Integration with Facebook via SaveMyLeads
Using the Messaggio platform, you can set up triggered notifications, chats with clients, advertising campaigns, etc. Service users are provided with functionality for creating interactive templates, tracking real-time statistics, and managing contacts. Personalized messages, multi-channel communication, analysis of results, testing of sending, setting up a “smooth” sending — all this can be implemented using the Messaggio platform.
Consider a situation where Facebook lead forms are used to attract new customers. The received data must be transferred to contact groups for dispatch via Messaggio. This can be done manually if you receive a small number of leads through the social network daily. But if there are dozens or hundreds of requests via Facebook, then transferring contacts to the messaging service becomes a routine task that takes a lot of time. This problem is solved by integrating Messaggio and Facebook. If you link these two systems, you can set up automatic transfer of new leads from the Facebook advertising account to the contact groups for dispatch.
How to set up Facebook and Messaggio integration
We need to link the Facebook advertising account and the Messaggio service to automatically transfer leads from one system to another. This task can be entrusted to programmers, but there is a simpler and more cost-effective solution to the problem. With the help of the SaveMyLeads service, the necessary integration is configured in just a few minutes. At the same time, programming knowledge and special skills are not required.
SaveMyLeads is a no-code tool for setting up Facebook integrations and automating workflows. Communication is created through the web interface. The data source is the Facebook advertising account. The SML service constantly checks for new leads and downloads the necessary information. The receiving system can be CRM modules, chat bots, instant messengers, Google services, mailing platforms, etc. In our case, the receiver will be Messaggio. Let's take a closer look at how to set up automatic uploading of Facebook leads as Messaggio contacts.
Connect Facebook Lead Ads account
Register on the site savemyleads.com, go to your personal account and create a new connection.

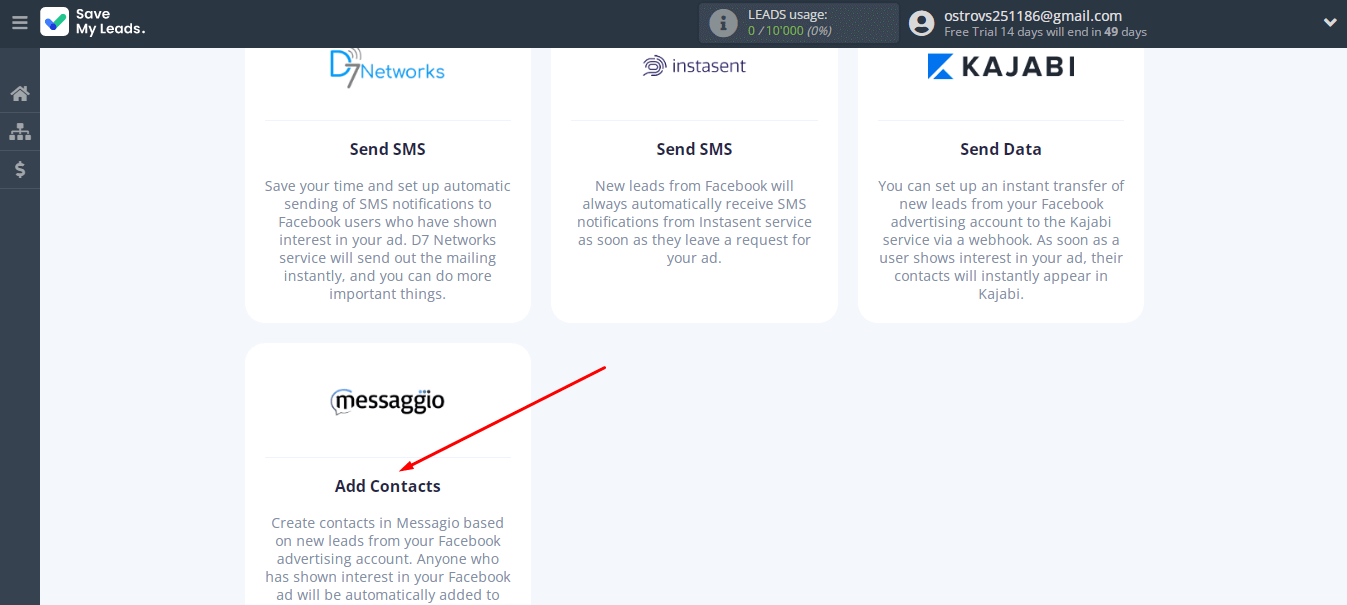
Among the ready-made templates for setting up integrations, choose the appropriate option for our task — Messaggio (Add contacts).
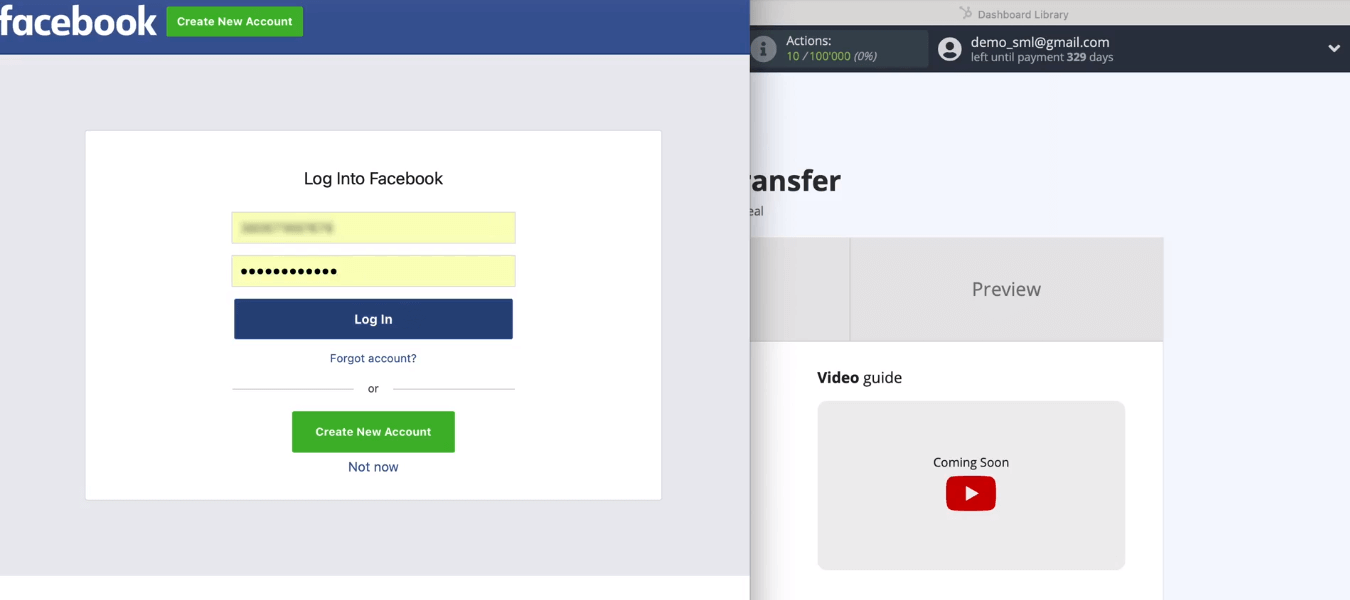
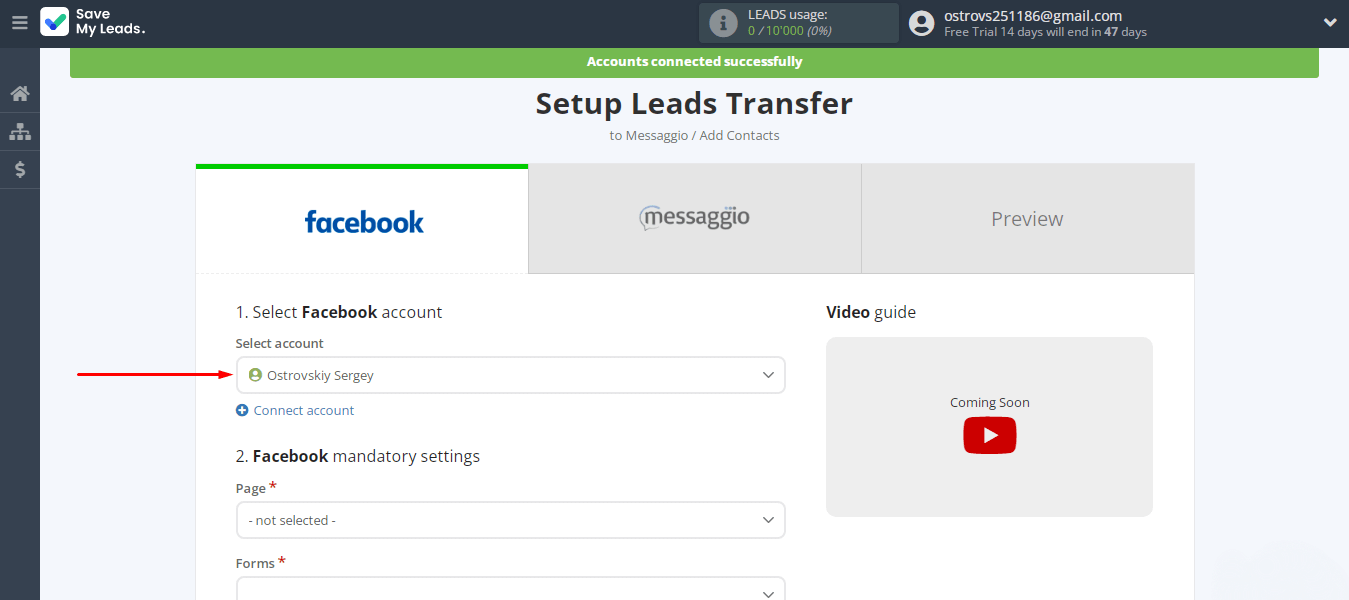
Connect a Facebook account to the SML system.
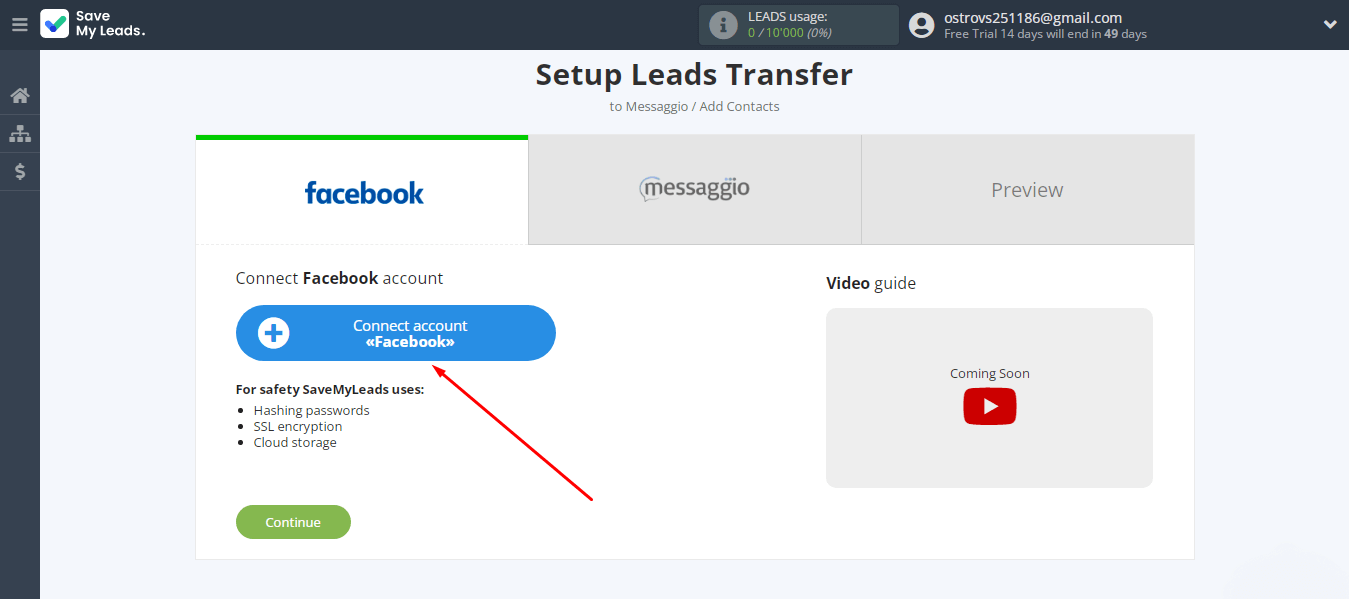
Login.
Go to the settings.
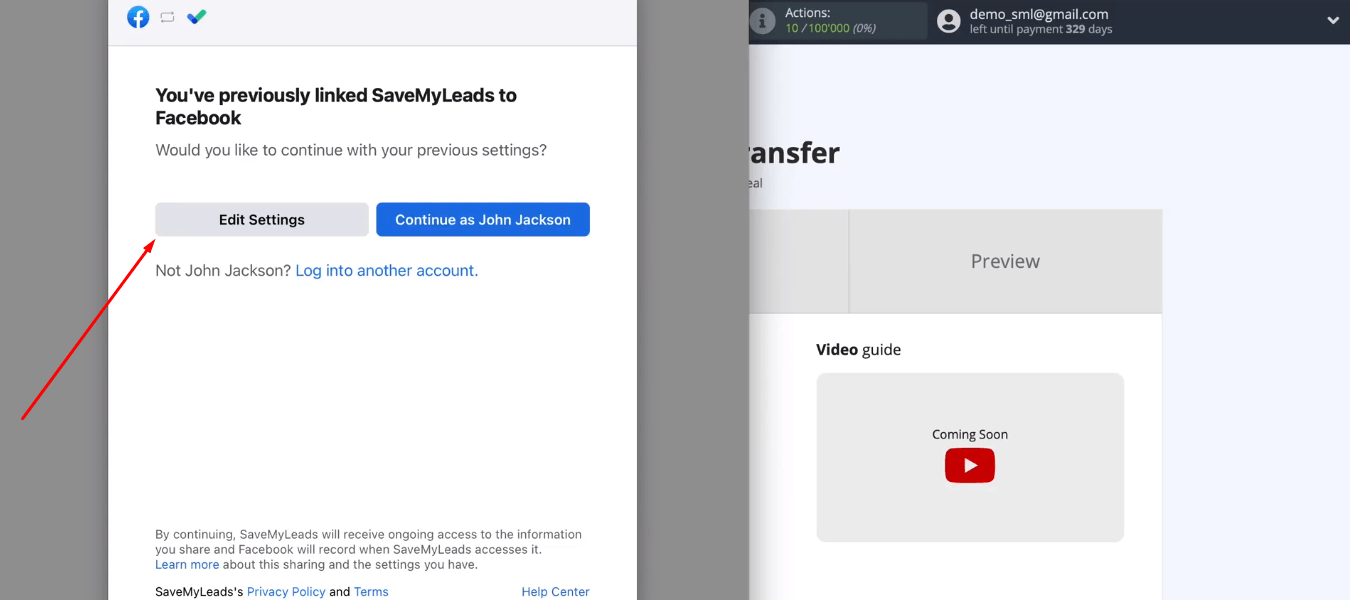
Select advertising pages with which we can work in the SaveMyLeads system. Later, new pages may appear for which you will need to configure the upload of leads. In this case, you should repeat the procedure for adding an FB account to the SML system with new connection parameters (in incognito browser mode).
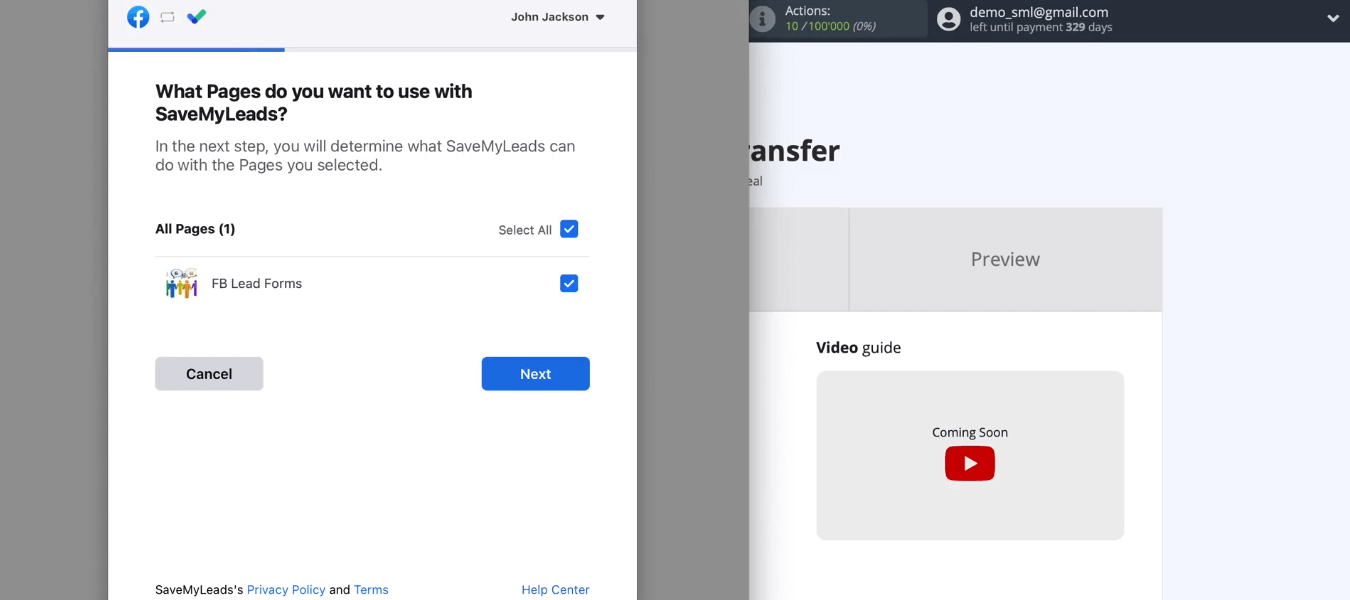
Provide the necessary access.
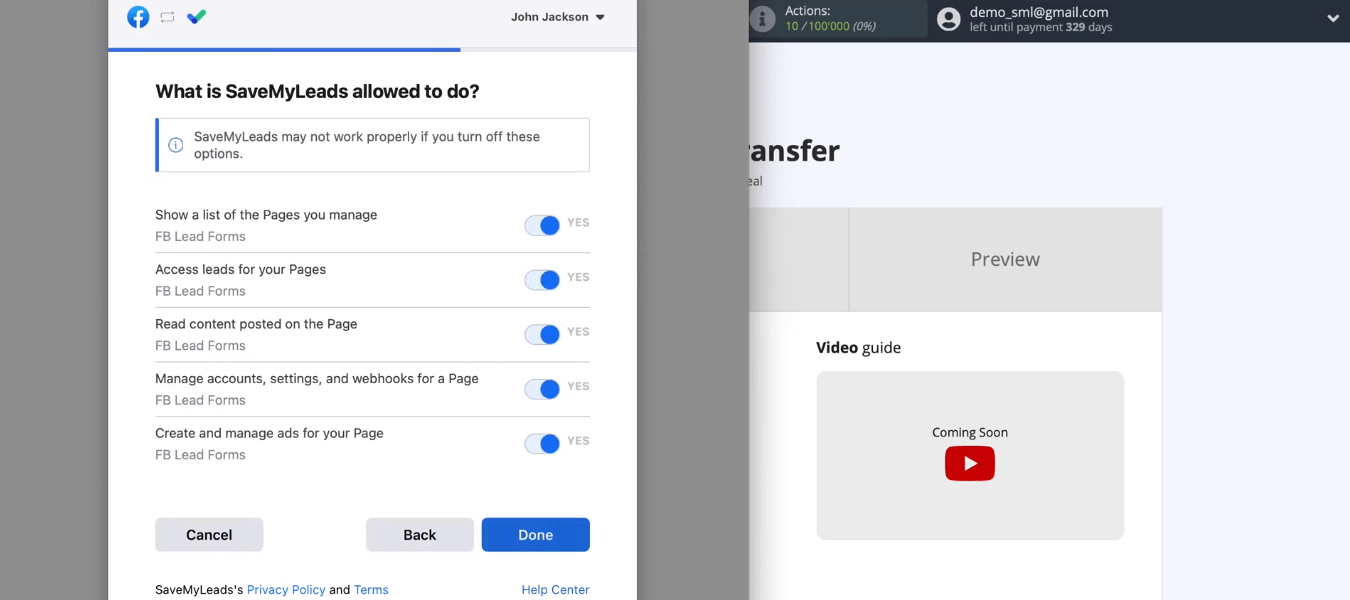
The FB account is connected to the SML service — click "OK".

Select an account from the list and proceed.
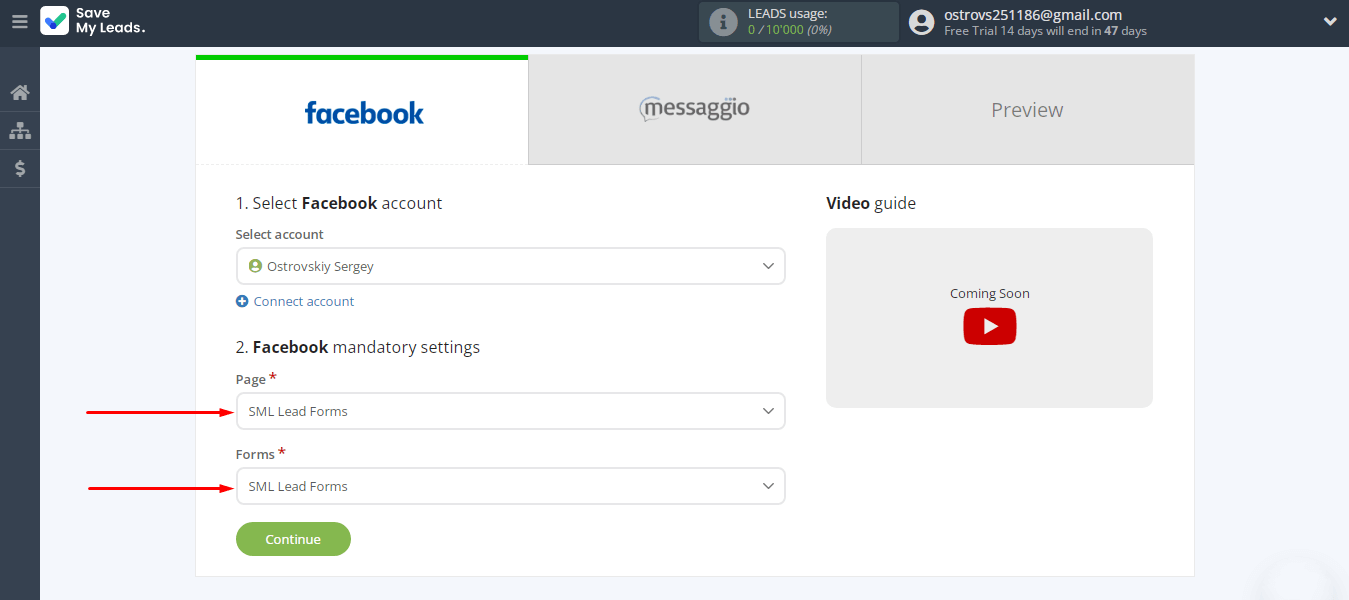
Define two required parameters — an advertising page and a lead form. If contacts in Messaggio should be added based on the results of several lead forms, then a separate connection must be configured for each of them. When the required data source criteria are defined, click “Continue”.
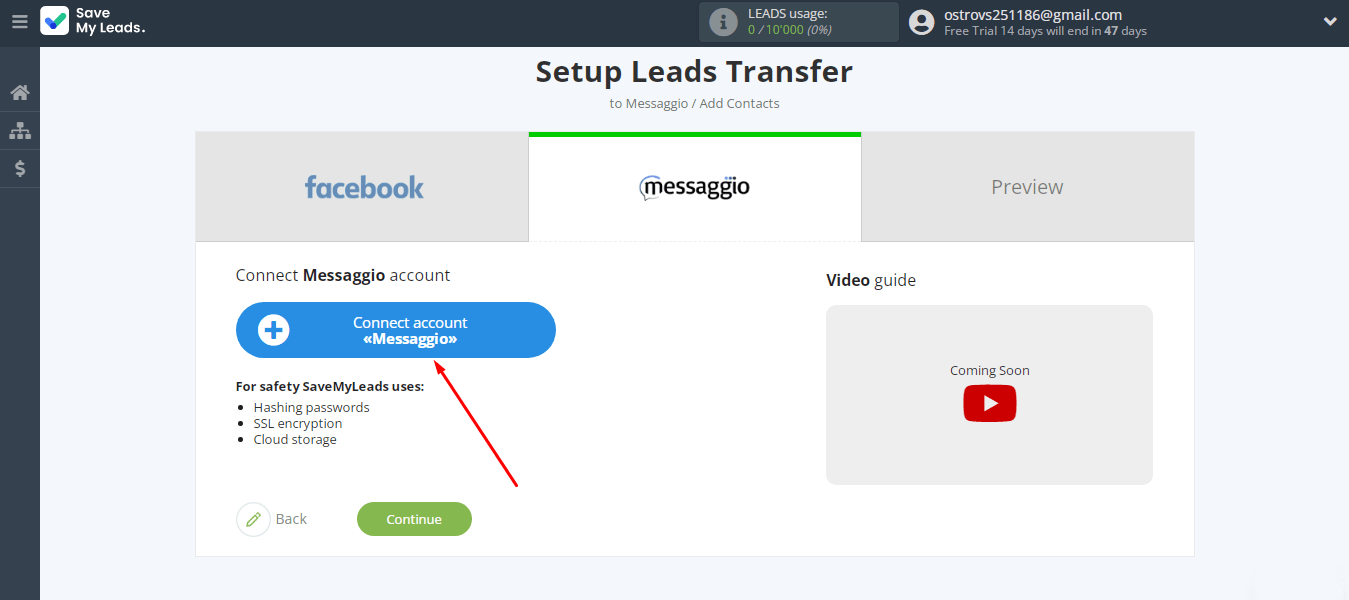
Connect Messaggio account
Connect the Messaggio account.
To add a Messaggio account to the SaveMyLeads system, you must specify login/password and click “Save”.

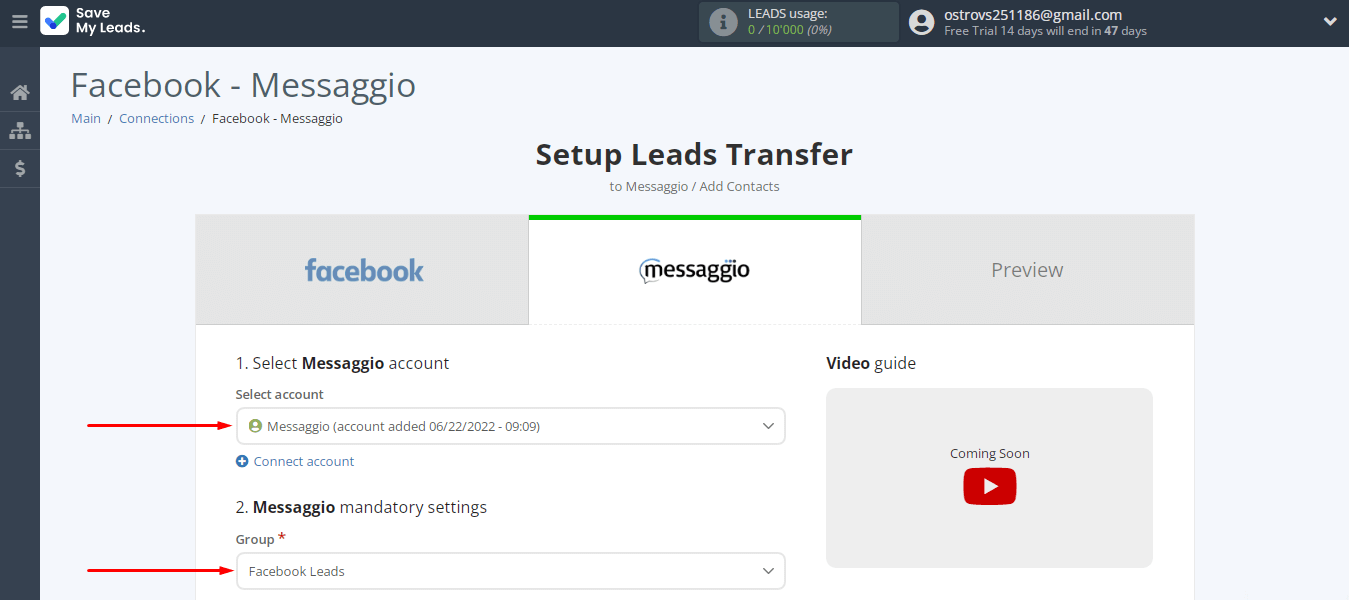
Select the connected account and contact group to which new records will be added.
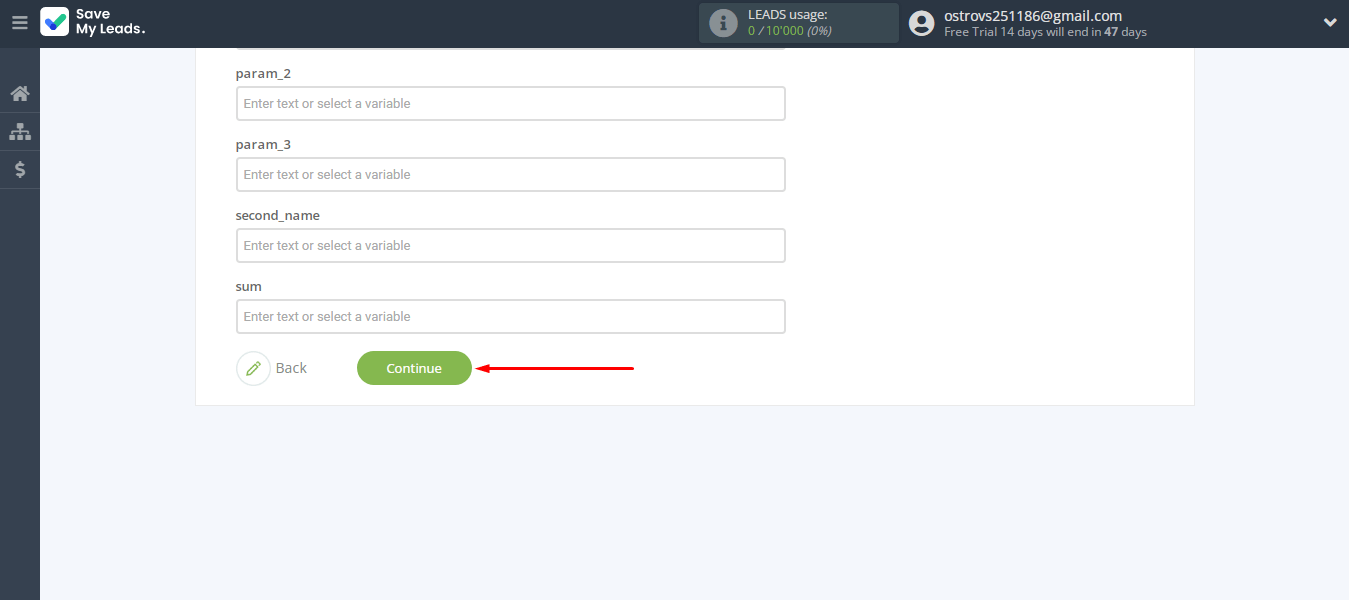
Define the content of the Messaggio fields that will be used to create new contacts in the messaging service. We have at our disposal variables received from Facebook, as well as system variables. You can enter your own text.

When the contents of the Messaggio fields are defined, click “Continue”.
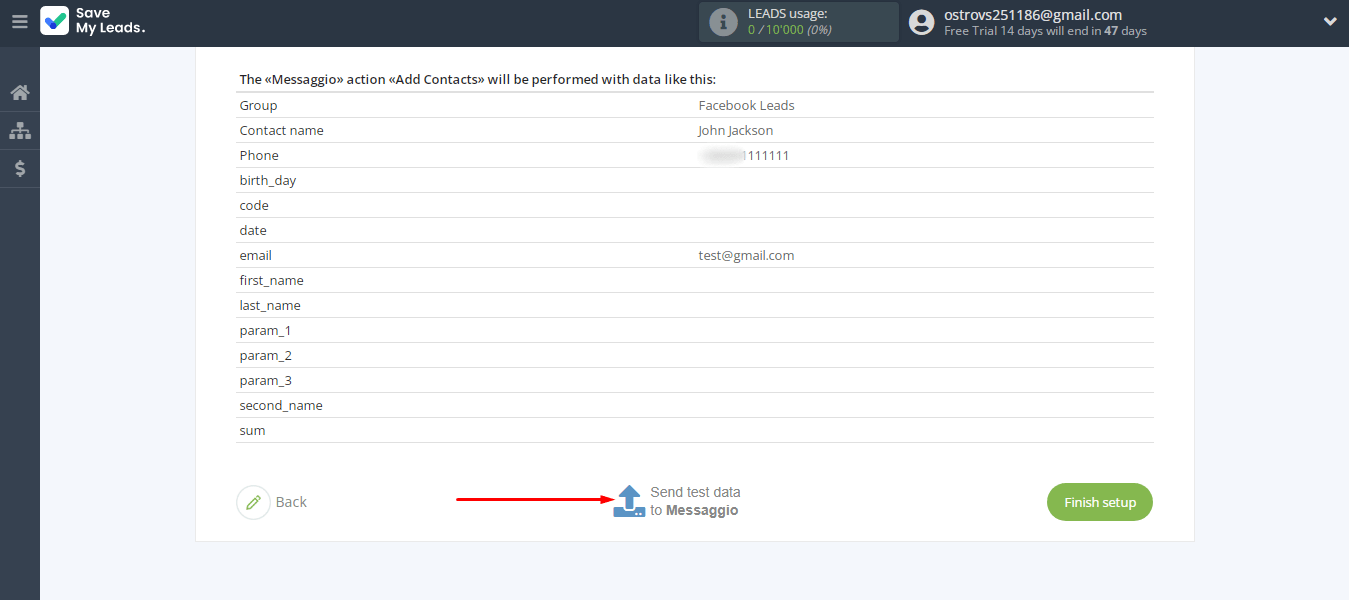
The SML system offers an example of the data that will be sent to the Messaggio service. We need to check the connection — click "Send test data to Messaggio".
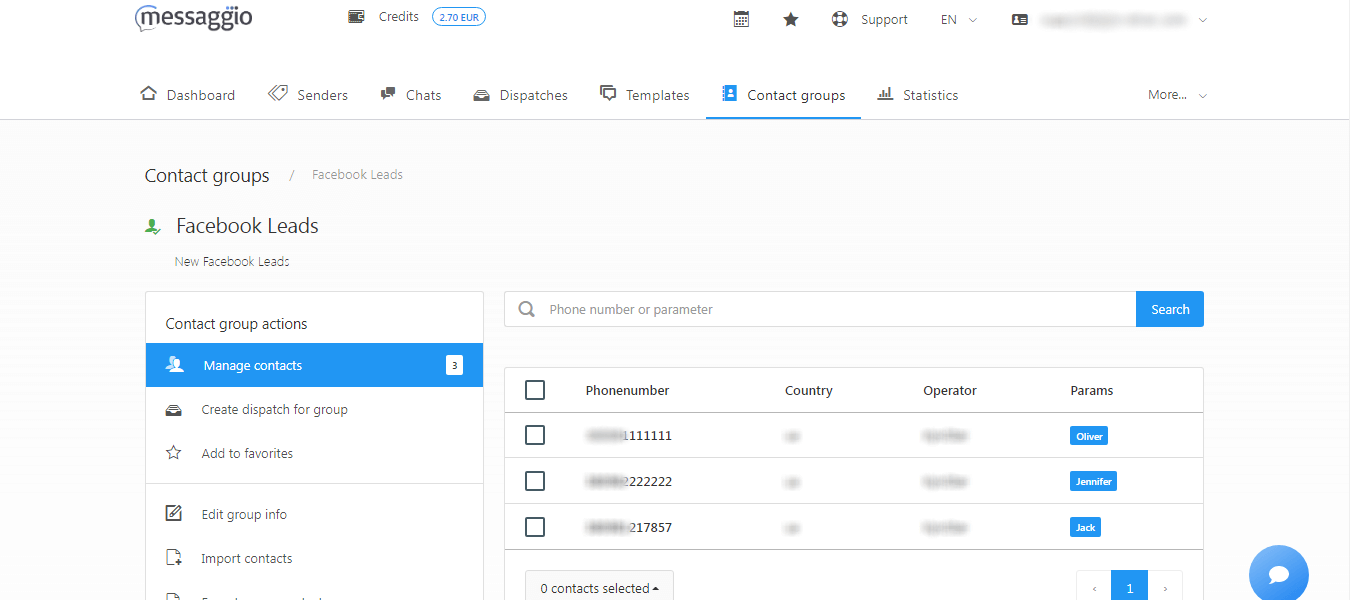
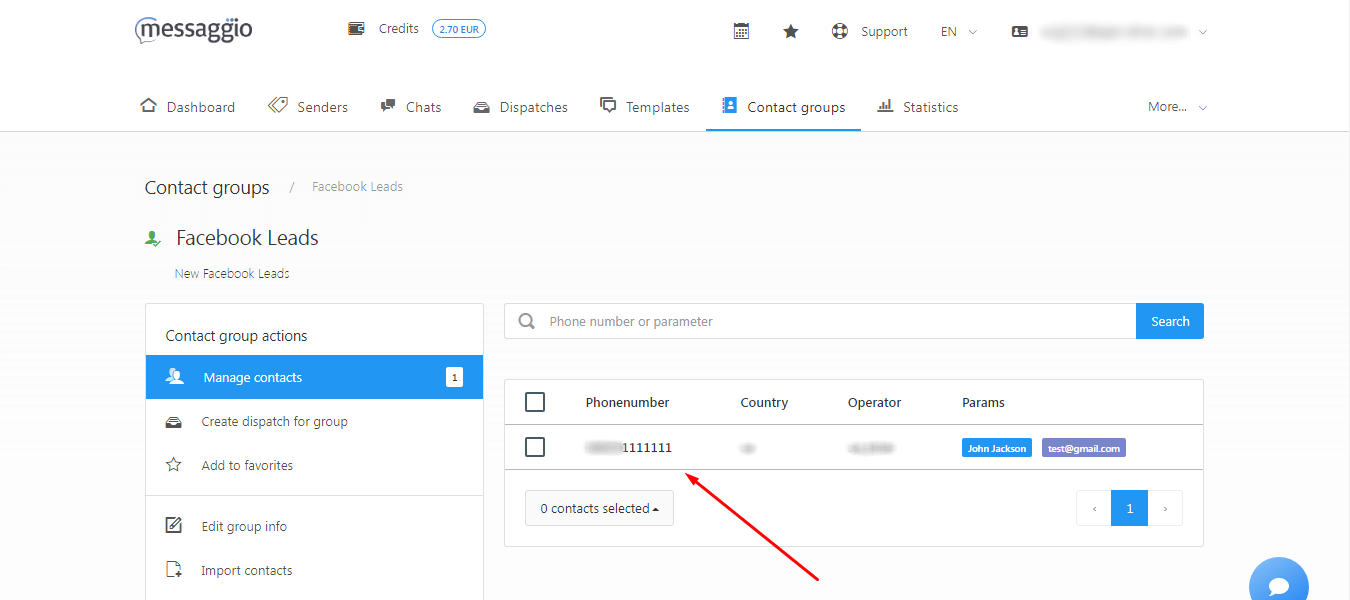
Go to the Messaggio account and check for a new entry in the desired contact group.
Enable automatic data transfer
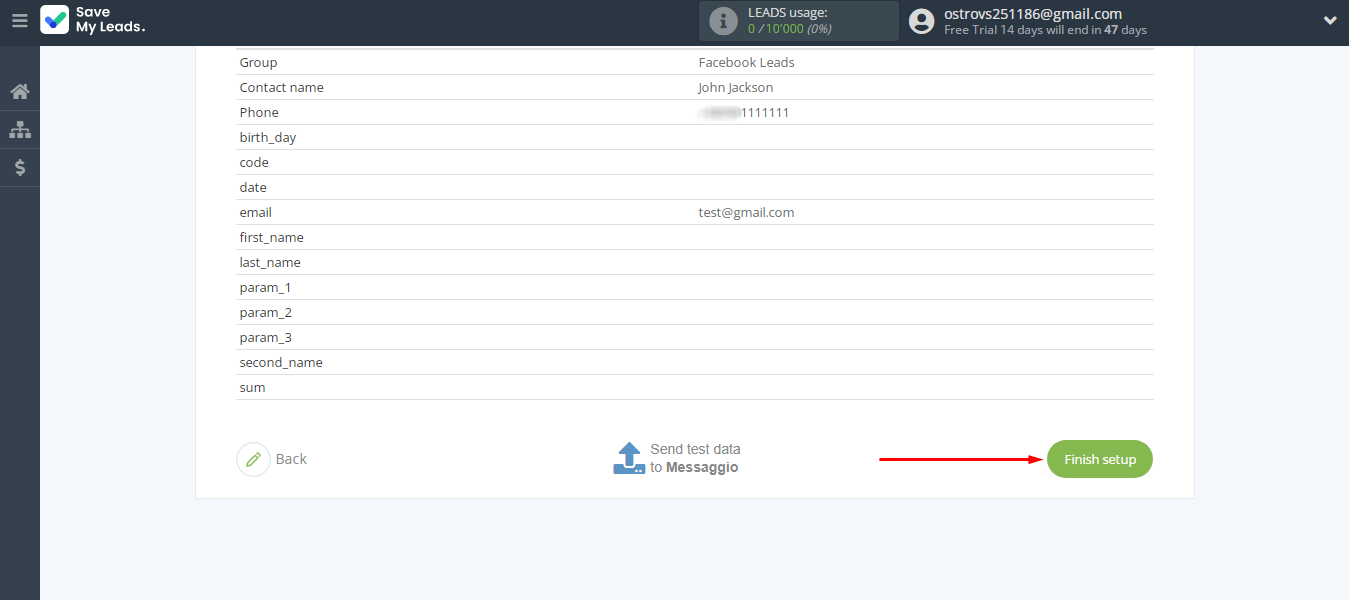
We checked the correctness of the integration. Now we need to activate it — enable automatic data updating. Return to the SaveMyLeads workspace and click “Finish setup”.
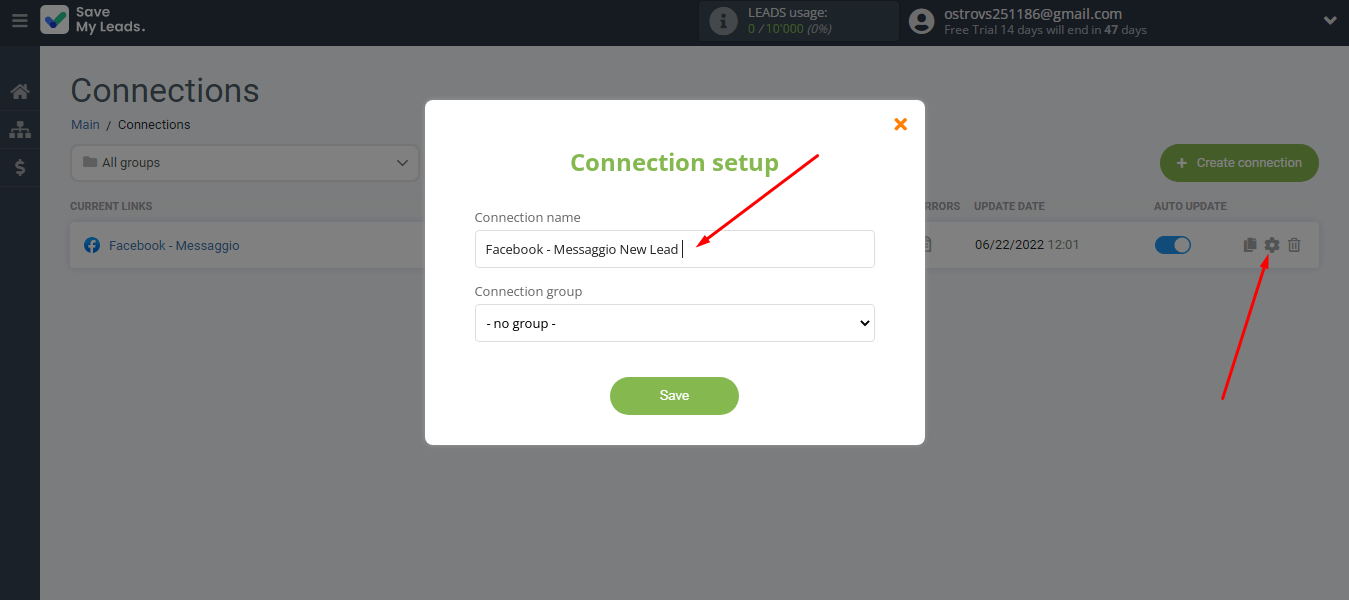
You may want to change the name of the integration. This is done through the "Connection setup". Specify a new name and save the changes.