How to set up a Flash Call verification
This guide is dedicated to the fastest, safest and cheapest method of two-factor authentication for users: Flash Call. 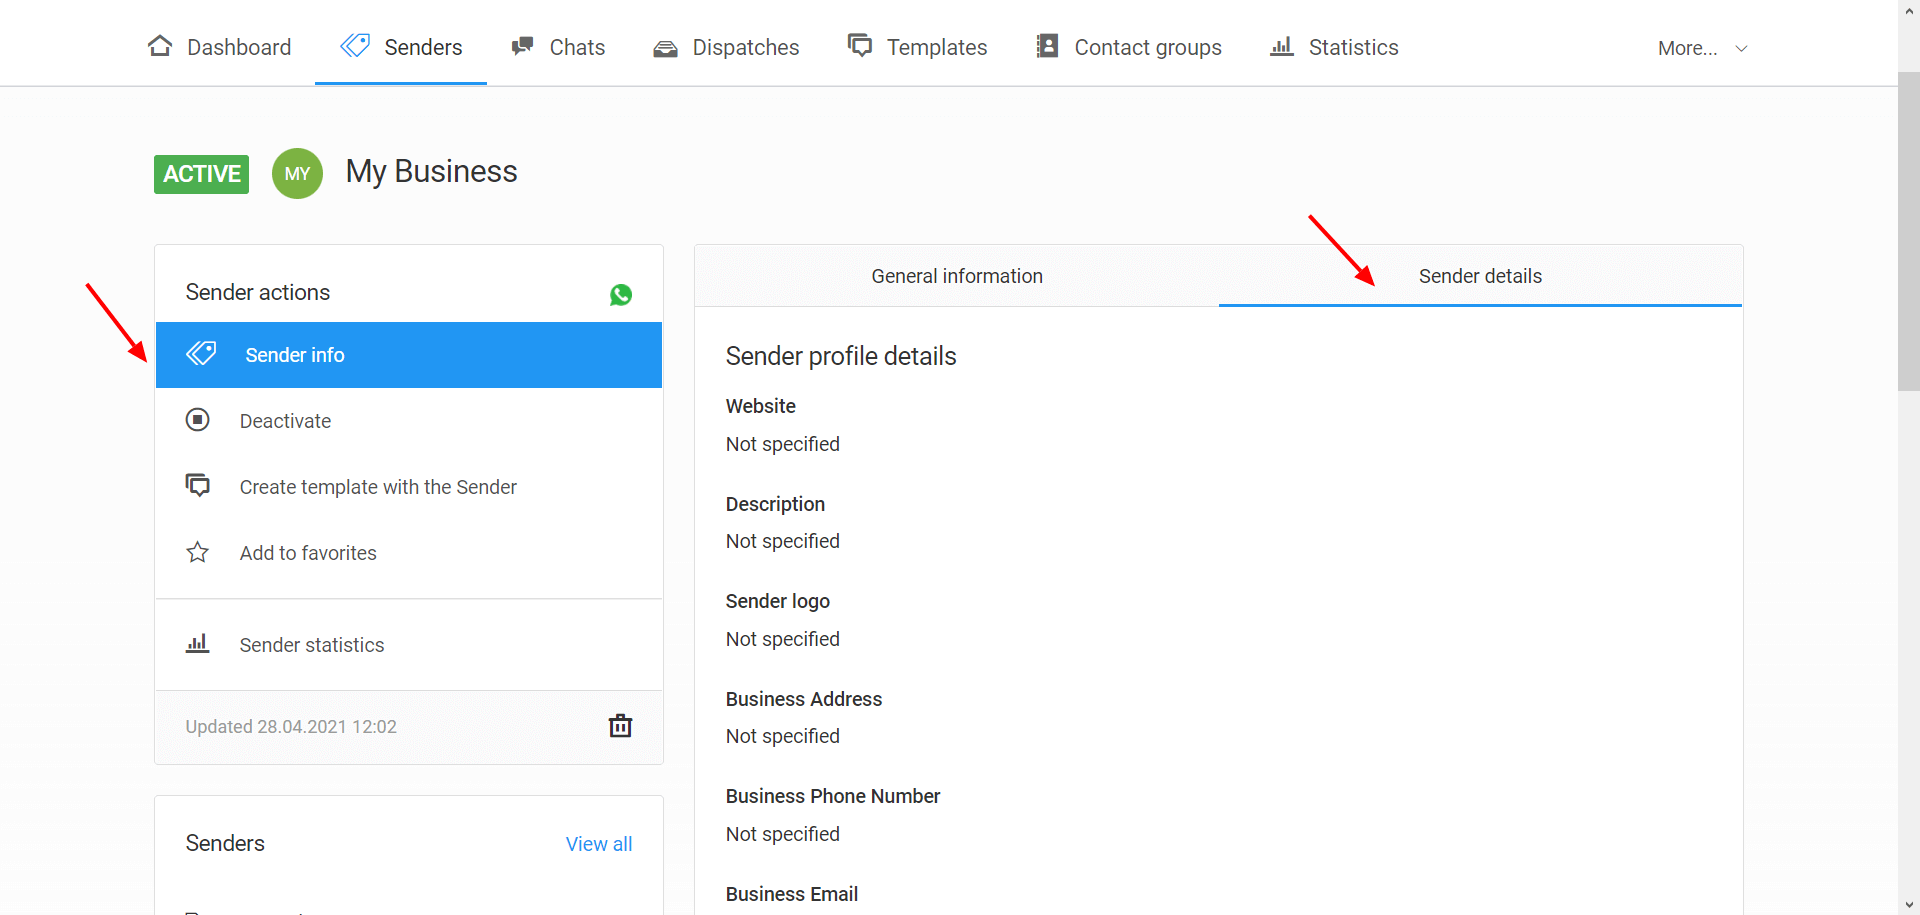
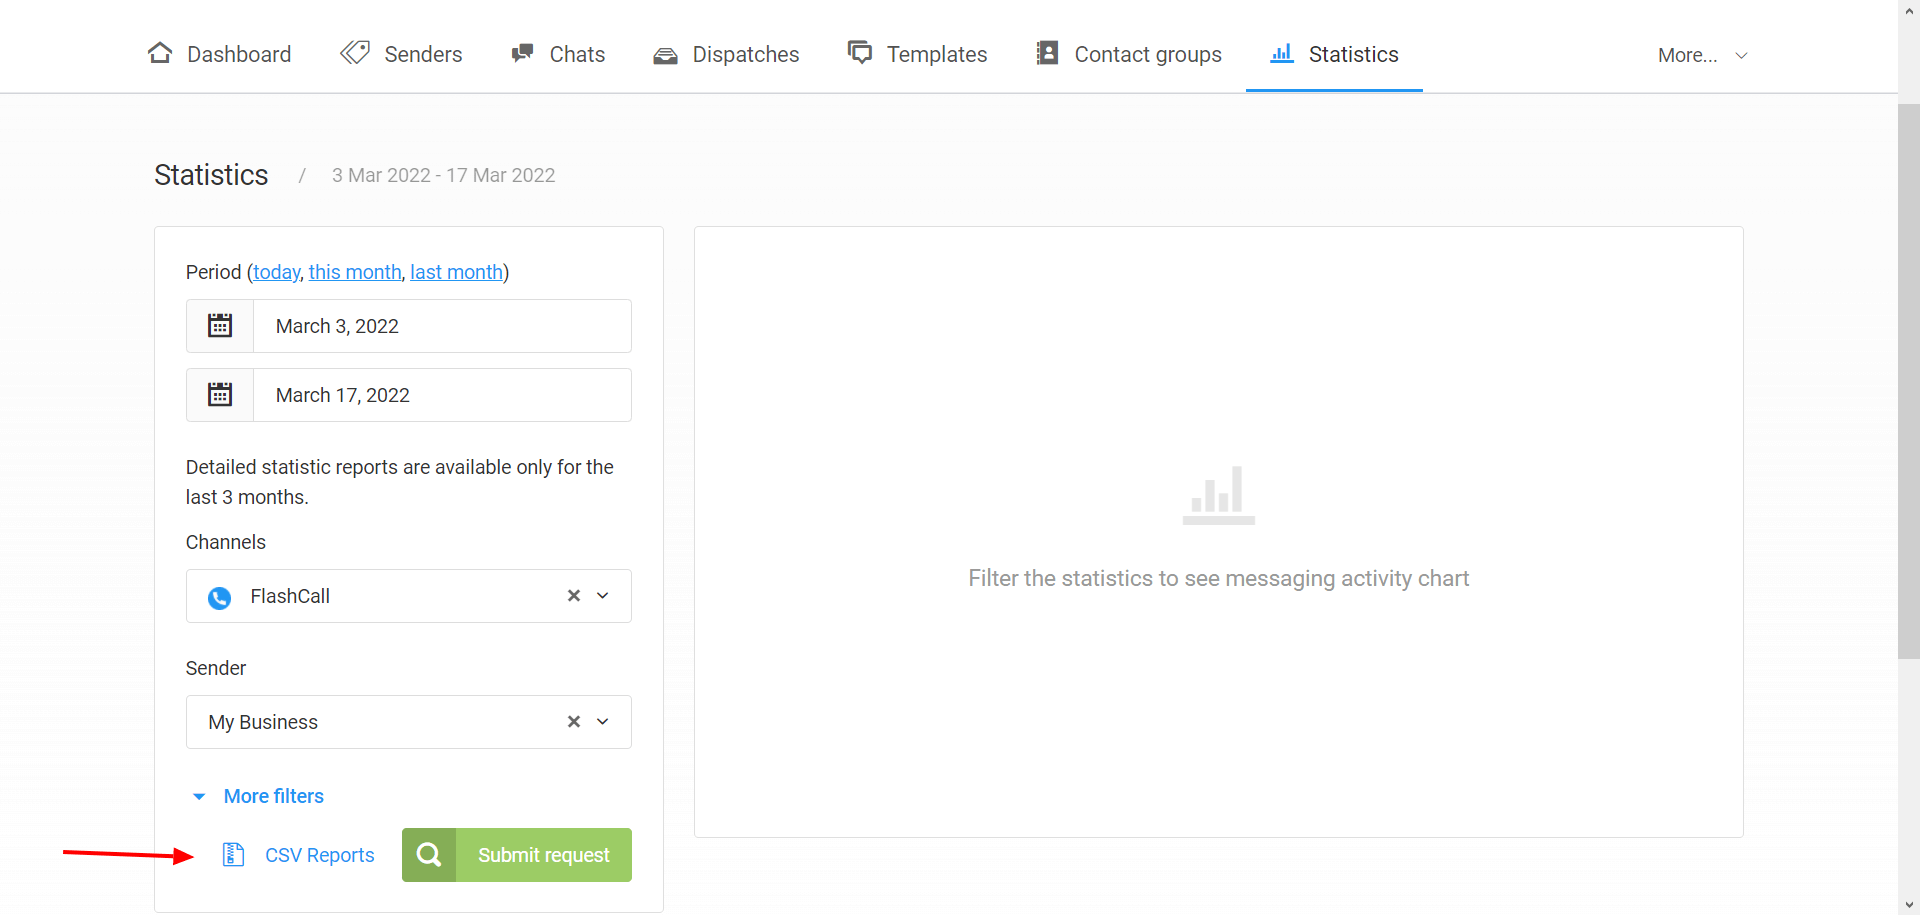
You can export a Flash Call request report for a chosen timeframe as CSV.
We will explain how to set up a Flash Call feature using the Messaggio dashboard.
Follow this algorithm to set up automated verification phone calls that will be received by the user's gadget during website log-ins, WiFi connections, online payments, or other actions:
- Create a Messaggio account. Go through the four registration steps, following the interface tips. During the last step ("Communication channels") choose Flash Call as the Sender and click "Send for Moderation". As soon as the Sender passes moderation (usually in a maximum of two days), the ACTIVE status will appear next to it.
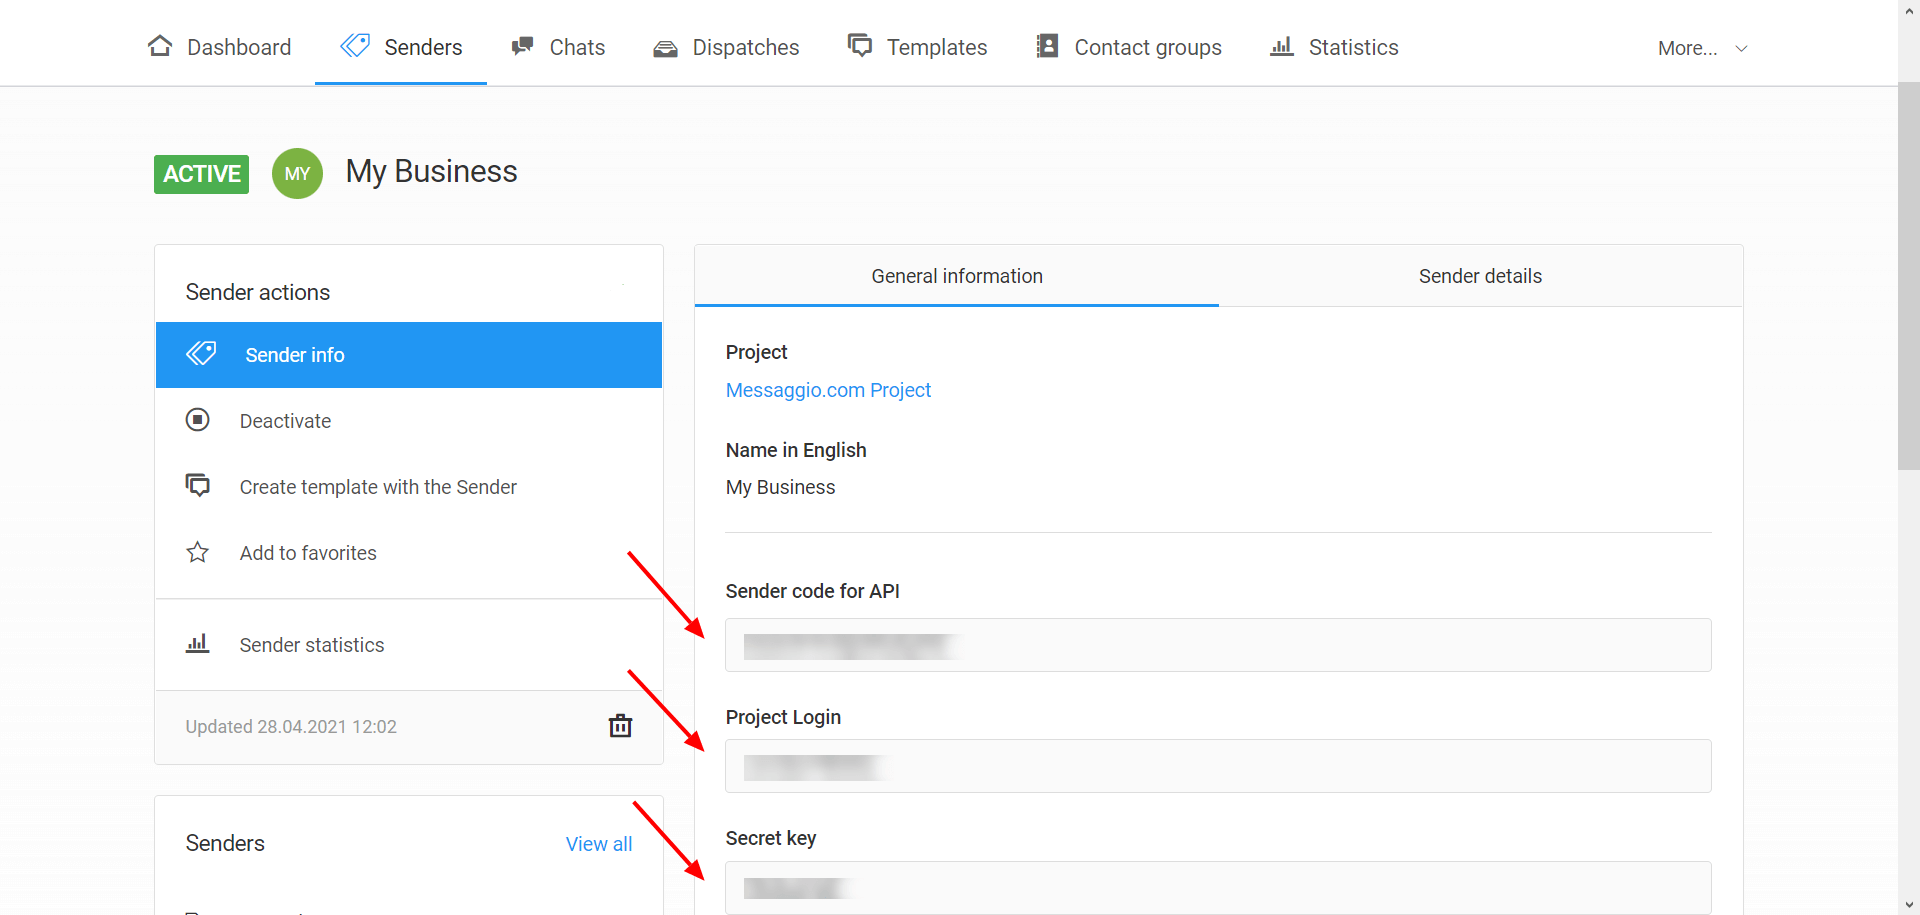
- Go to the Sender's ID "General information" section and submit the following:
- The Sender Code for API;
- The Project's login;
- The Project's secret key.
- Track your monthly Flash Call request statistics through the "Sender's detail" section. To set up the filters more precisely, go to the "Statistics" section.
Use this data for your system to send a Flash Call request.
For the verification step, use a Flash Call request to Messaggio, inputting a user phone number, the Sender Code for API, the Project's login, the Project's secret key, and 4 random digits.
A user will receive a phone call from Messaggio's pool of numbers, where the last 4 digits will be the ones you generated.
Ask the user to enter those digits into your website form.
You can export a Flash Call request report for a chosen timeframe as CSV.