How the URL shortener works: static and dynamic links
Learn more about why static and dynamic links are useful, how they work, and how to add them to messages, in this guide.
Difference between static and dynamic links
Static and dynamic links replace the destination URL for the recipient.
In Messaggio, you can use static links to hide long, unremarkable URLs or UTM tags from recipients by replacing them with the desired custom URL. Click statistics are assigned to a static link.
Dynamic links are URLs are generated for each subscriber. Pages with dynamic parameters do not actually exist on the site, but the URLs lead to the landing page. In Messaggio, a click on such a link is recorded and saved in statistics for a specific recipient.
In which templates can static and dynamic links be used
Static links are available in any text message layout.
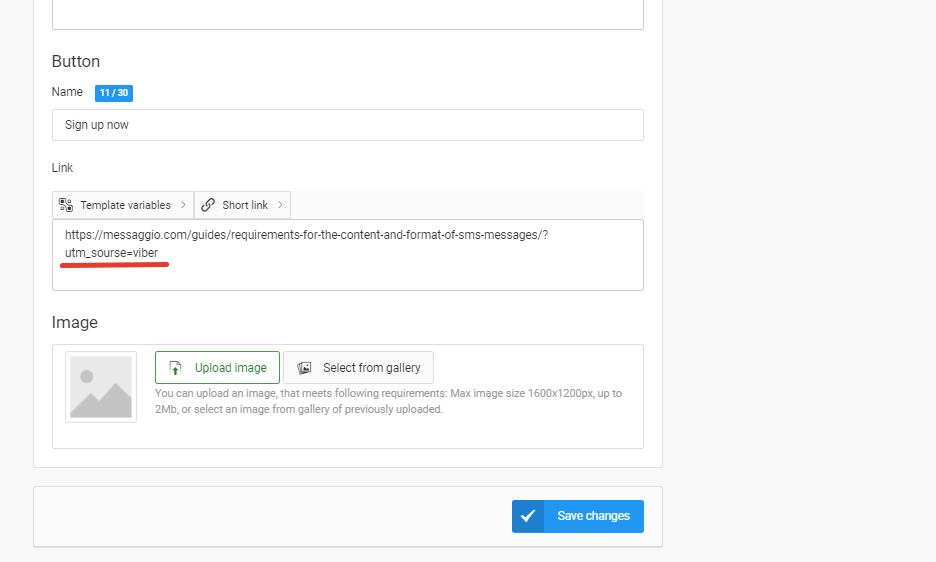
Dynamic links can be added to, for example, Viber and SMS text layouts by generating variables when creating a template. Also, dynamic links are automatically integrated into Viber buttons in «text + button» and «text + image + button» layouts.
How to add a static link to a message?
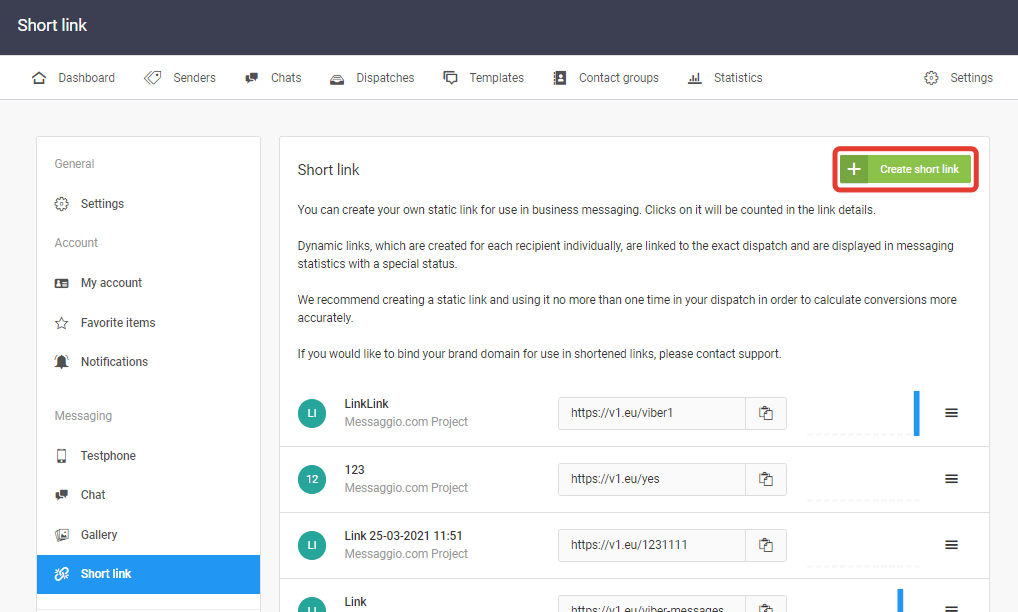
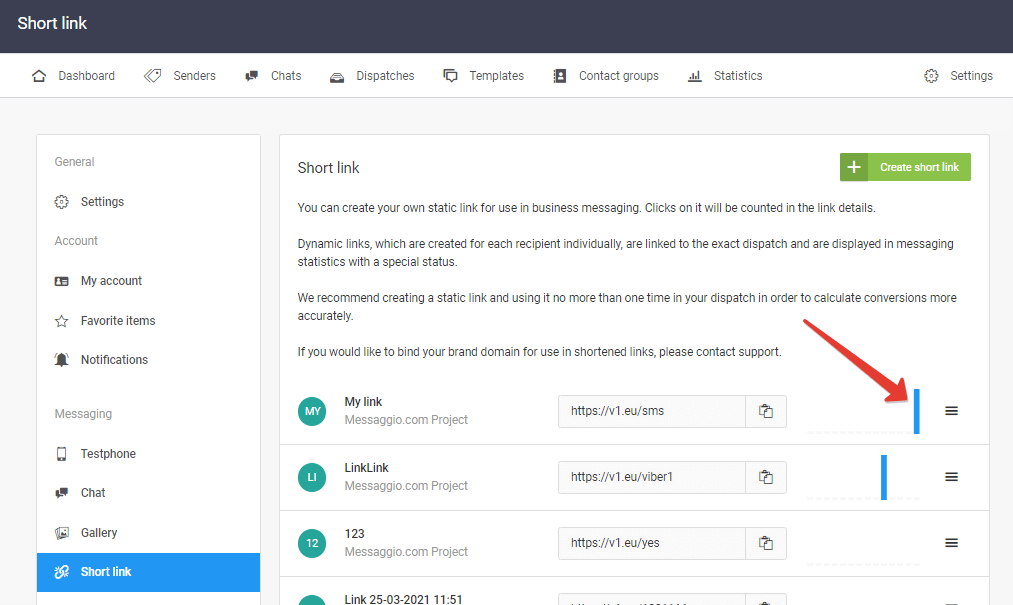
To set a static link that will be displayed to the recipient of the message, follow the «Settings — Short link» section and click «Create link».
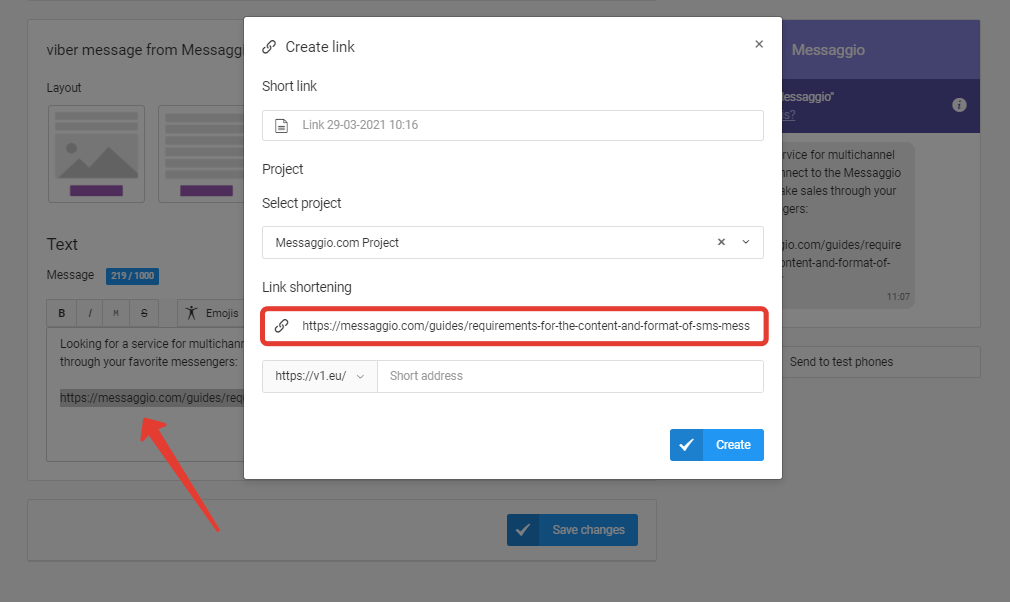
Specify the name of the link, select the project in which you will use the link. In the «Link shortening» field, specify the real URL, select the displayed domain from the drop-down list below, and set the displayed URL. Click «Save».

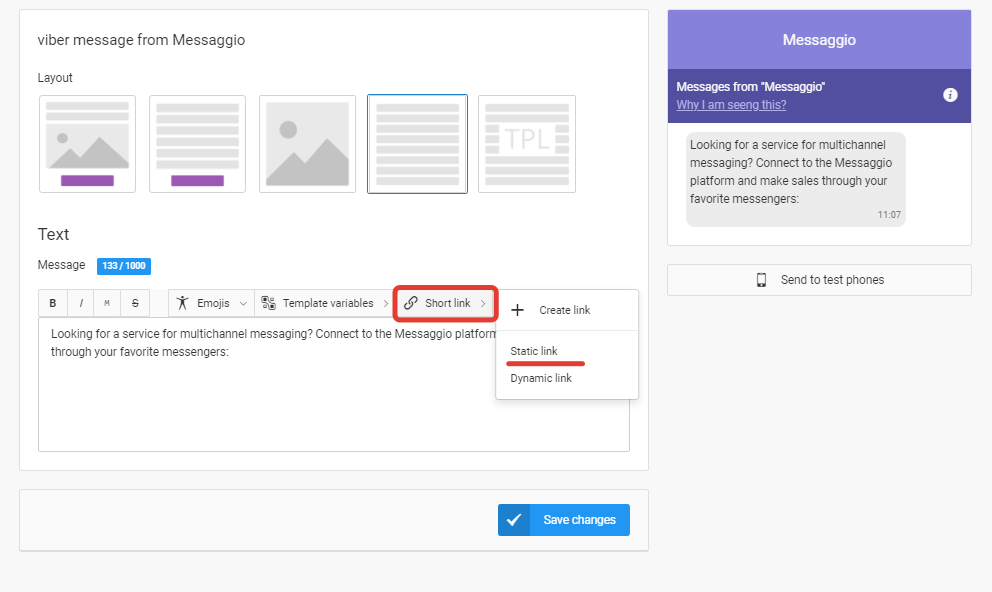
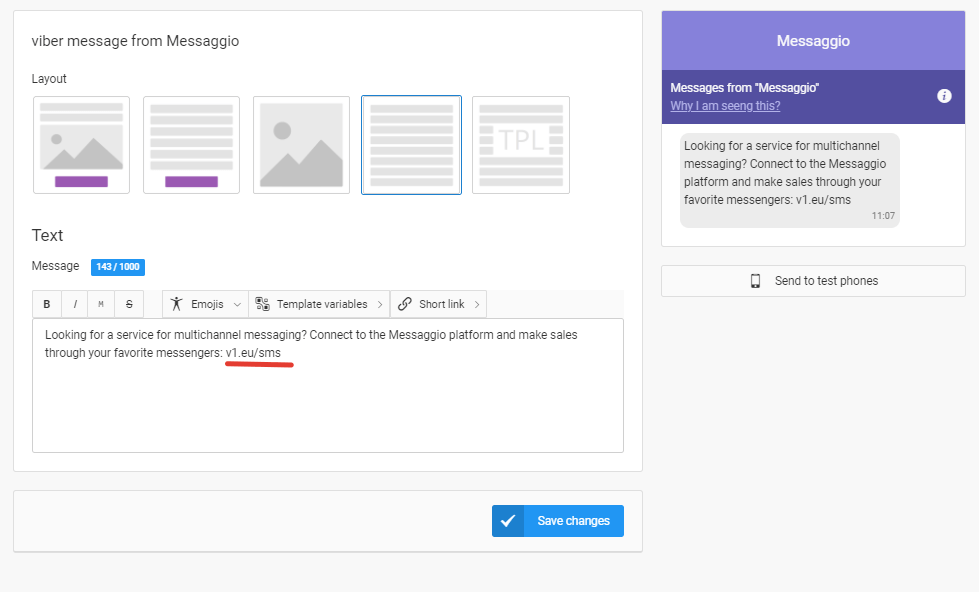
Start creating your message template. Read more about working with templates in the «How to create a message template» section. Specify the channel for sending messages: SMS or Viber and select a layout. Static links are available in any layout with text. In the text area, click «Short Link — Static Link» and select the display URL you created. Click «Select». This link will be seen by the recipients of the dispatch.
You can create a static link during template creation. To do this, click «Short link — Create link» above the text field and specify the parameters of the displayed link. Click «Create». Add the created link to the message template according to the instructions above.
If the template already contains a link that you want to replace for recipients, select the link and click «Short link — Create link». The original link will be inserted into the appropriate field automatically. It remains only to set the display URL.
The click-through rate of the URL will be displayed in the «Settings — Short Link» section: hover your cursor over the blue indicator to see the number of clicks on the link. Clicks on one link, which was used in several dispatches, are summarized. Therefore, we recommend creating a new static link for each dispatch to count conversions more accurately.
How to add a dynamic link to a message?
Dynamic links in a Viber button
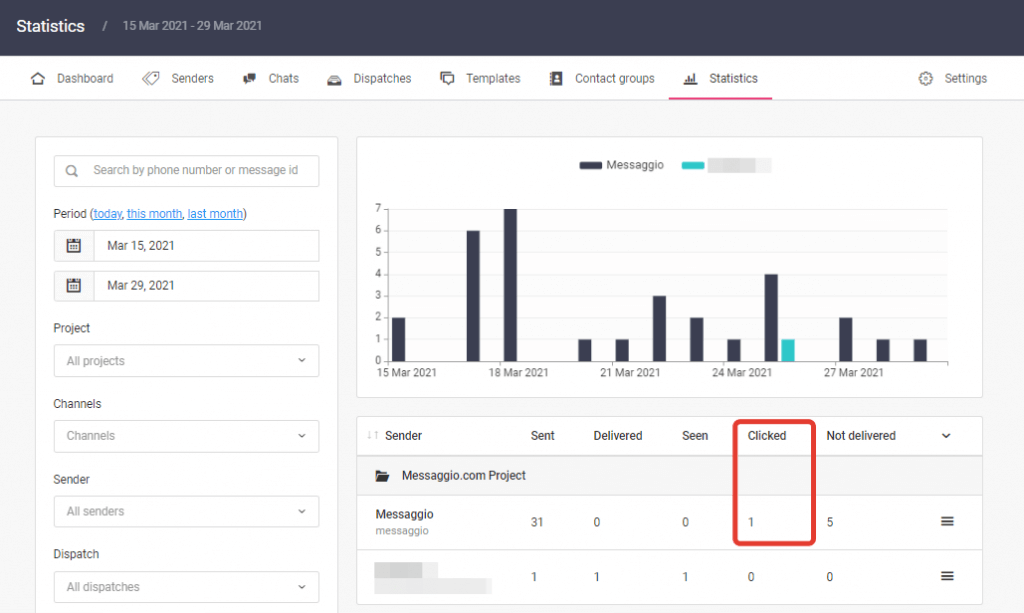
Dynamic URLs are automatically integrated into the Viber button. Short links are generated for each recipient to register the conversion. Clicks related to the exact dispatch and are counted in the statistics in the «Clicked» column. Only unique clicks on the button are counted. This allows you to measure the conversion of your dispatch.
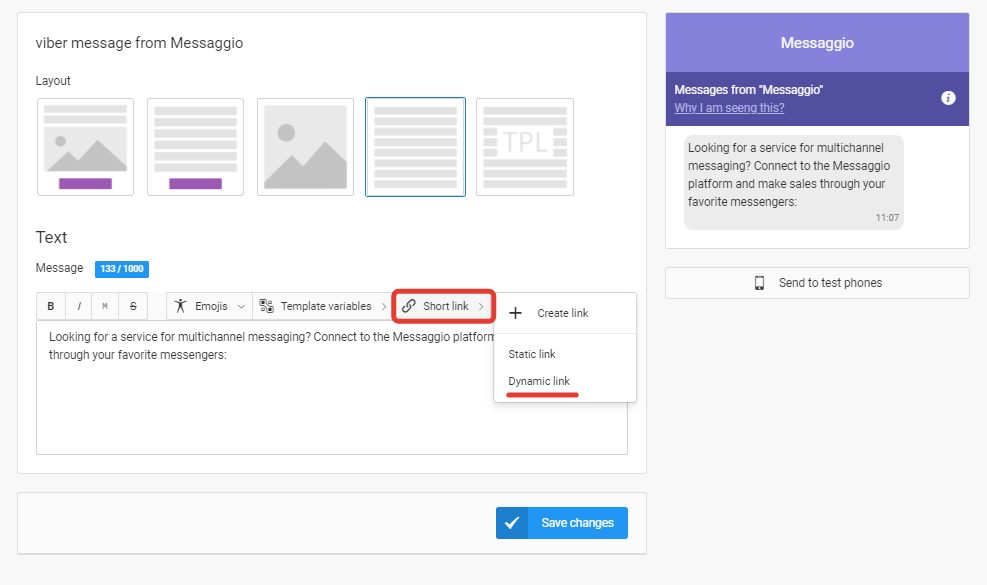
Dynamic links in a text message
To record a click on a link in a message without a button, generate the LINK variable: in the text layout of Viber or SMS, click «Short link — Dynamic link». A variable will be added to the text. A dynamic URL will be inserted into this variable to track clicks.
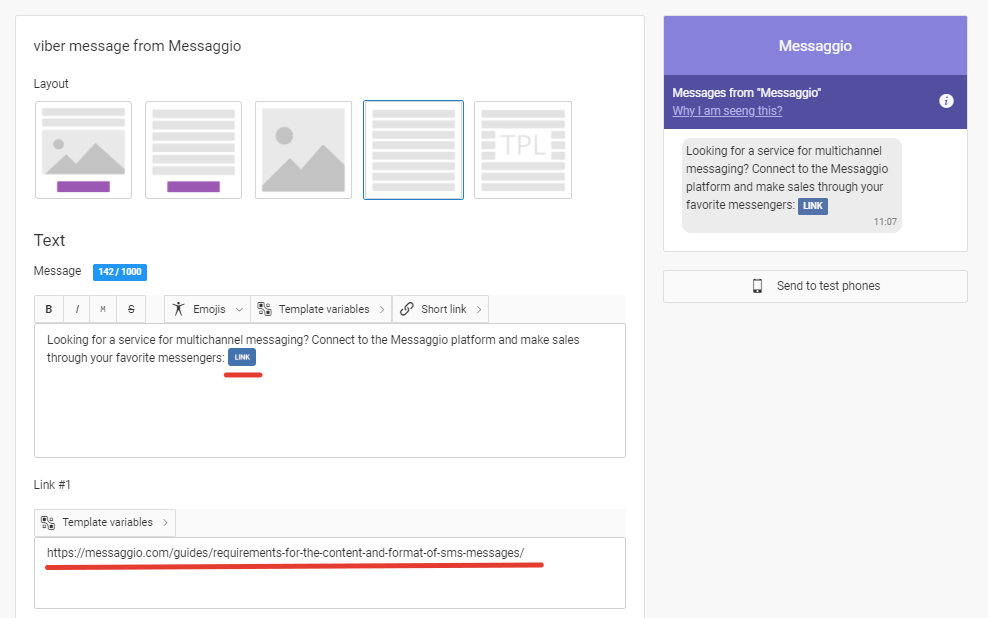
After saving the template, dynamic URLs will be linked to the dispatch. This means that data on conversion per click will be collected by dispatch and displayed in the «Statistics» section along with the «Sent», «Delivered» and «Seen» message statuses.
You can create a link using one of Messaggio's domains or use your own, which should be bound to your account. To bind your branded domain, please contact support.