Integration with Bitrix24
This guide will show you how to integrate Messaggio application for SMS sending in your Bitrix24 system.
Messaggio and Bitrix24 integration
You need to link your Messaggio account and Bitrix24 to set up sending notifications.
Messaggio application installation
Install the Messaggio application in your Bitrix24. To do this, go to "Applications" - "Market" - "SMS" in Bitrix24 and type "Messaggio" in the search box. Click "View" - "Install" near the Messaggio application icon. Messaggio will appear in the list of services displayed in the Bitrix24 sidebar.
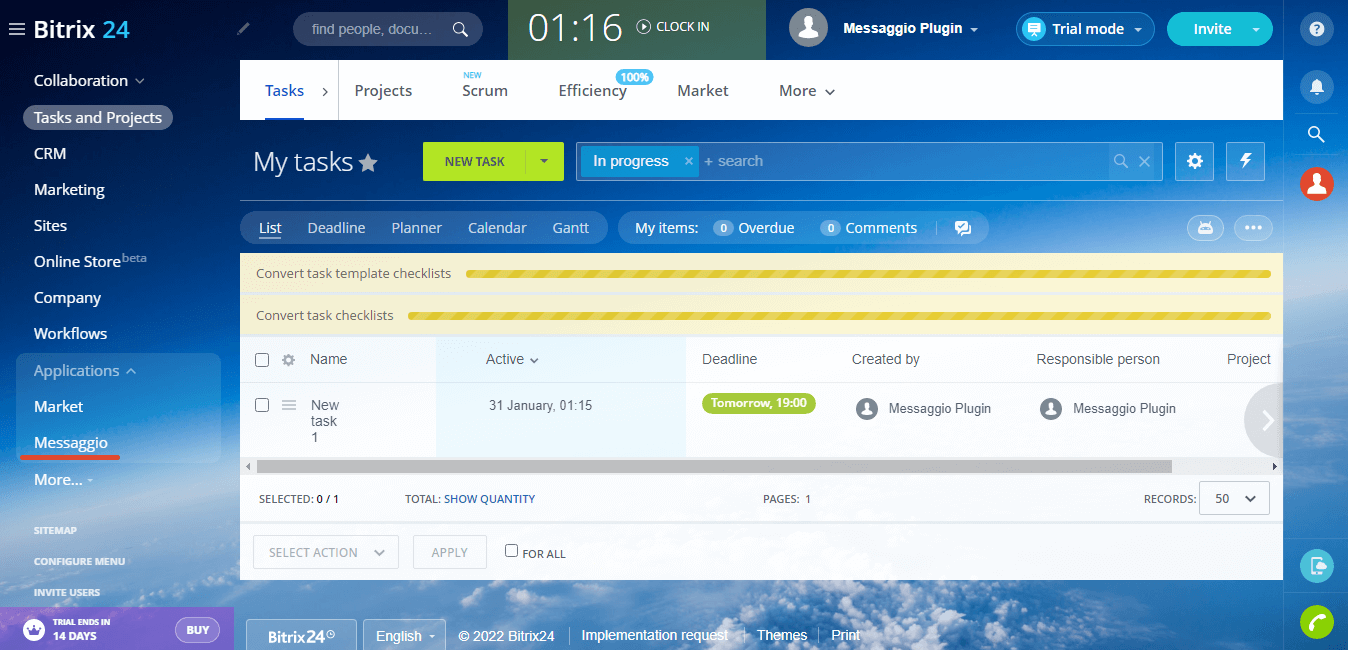
According to your Bitrix24 tariff plan, you can use from 2 to 10 free integration applications from the Bitrix24.Market catalogue. If your application limit is exceeded, you can delete some of the free applications you are no longer using and install new ones instead or subscribe to Bitrix24.Market Plus.
Messaggio settings
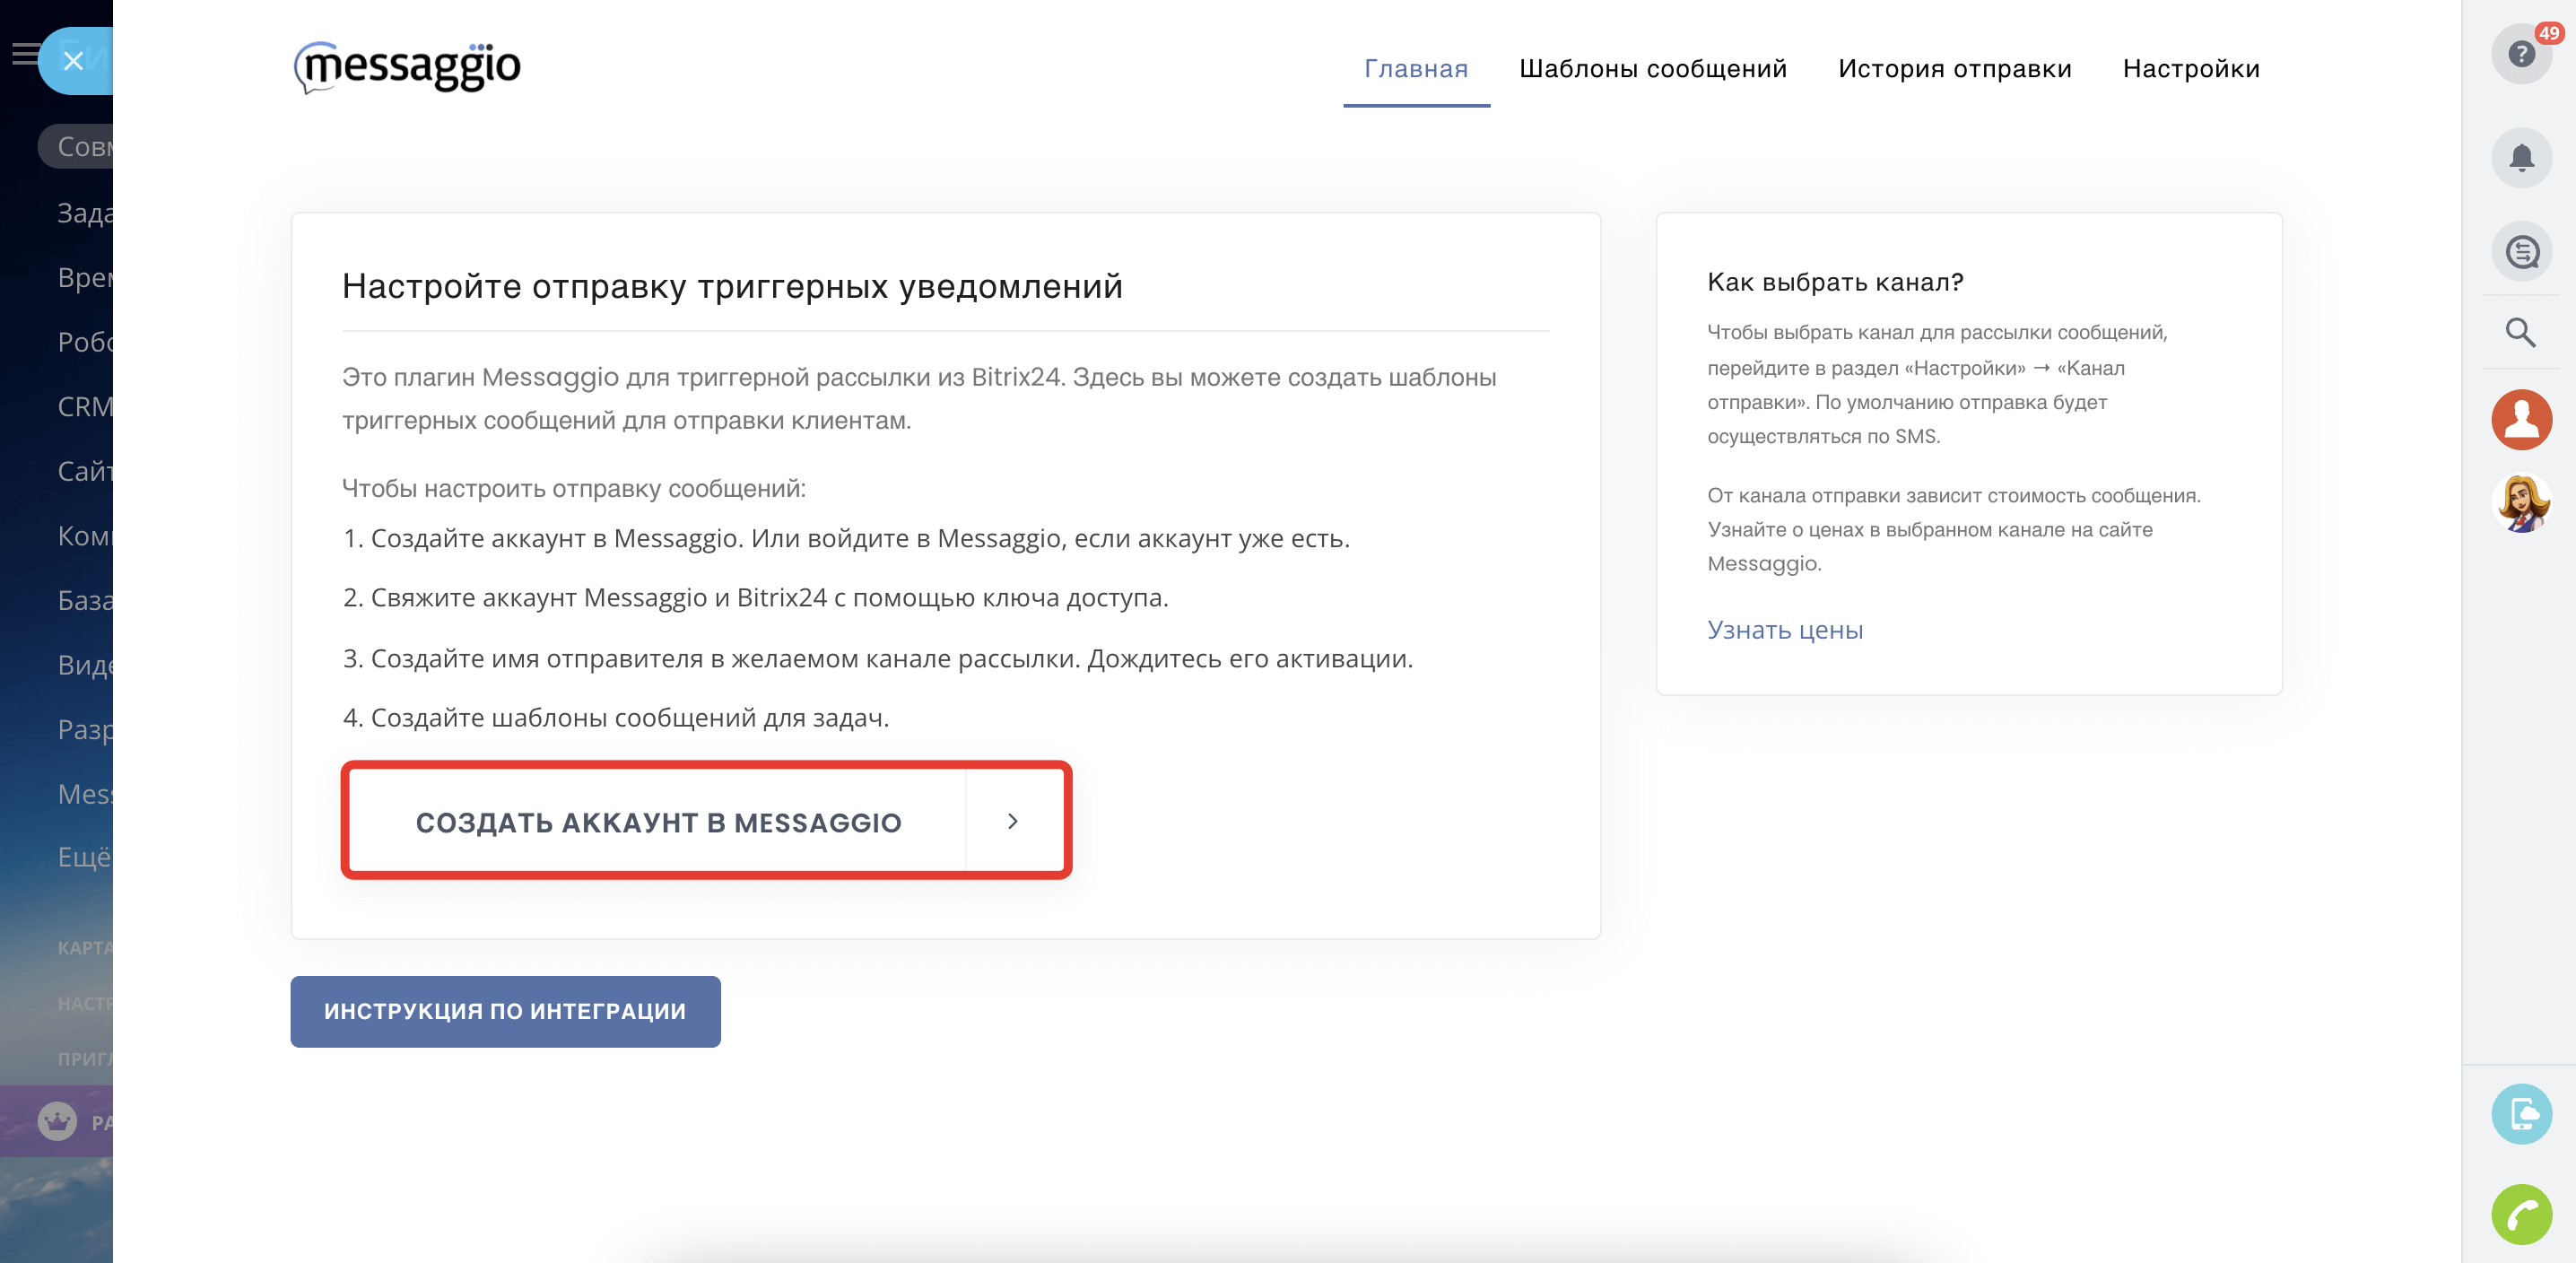
- Create an account in Messaggio. You can do this by launching the Messaggio application for Bitrix24 and clicking on "Create Messaggio account" in the "General" tab. Complete your details and click "Register". You have an account in your Messaggio personal account now.
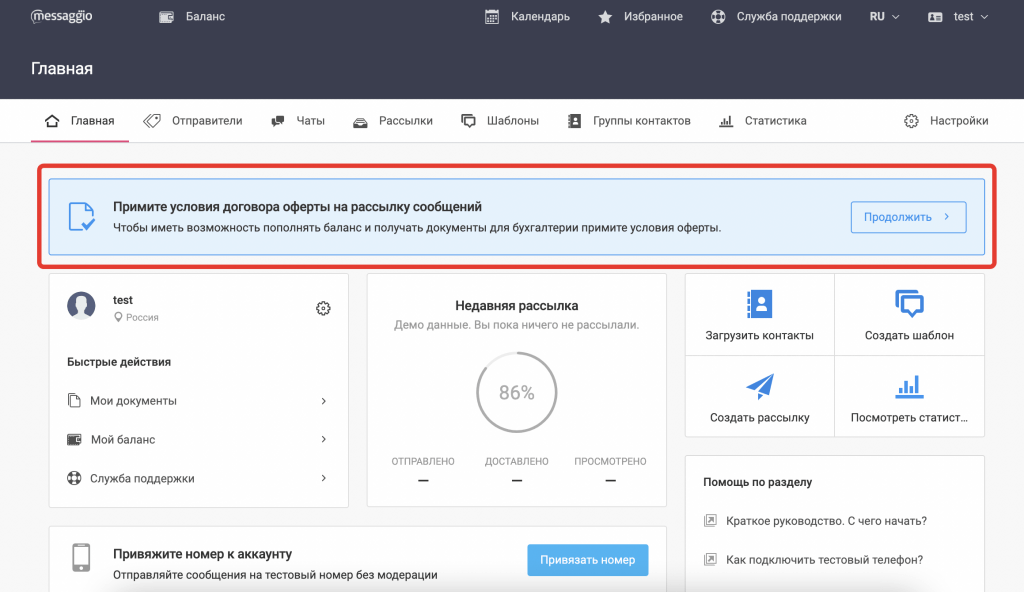
- Accept the public offer on behalf of your company. Click "Continue" on the notification under the menu and follow the prompts in your personal Messaggio account. Once your application has been reviewed, you can proceed to register the sender name.
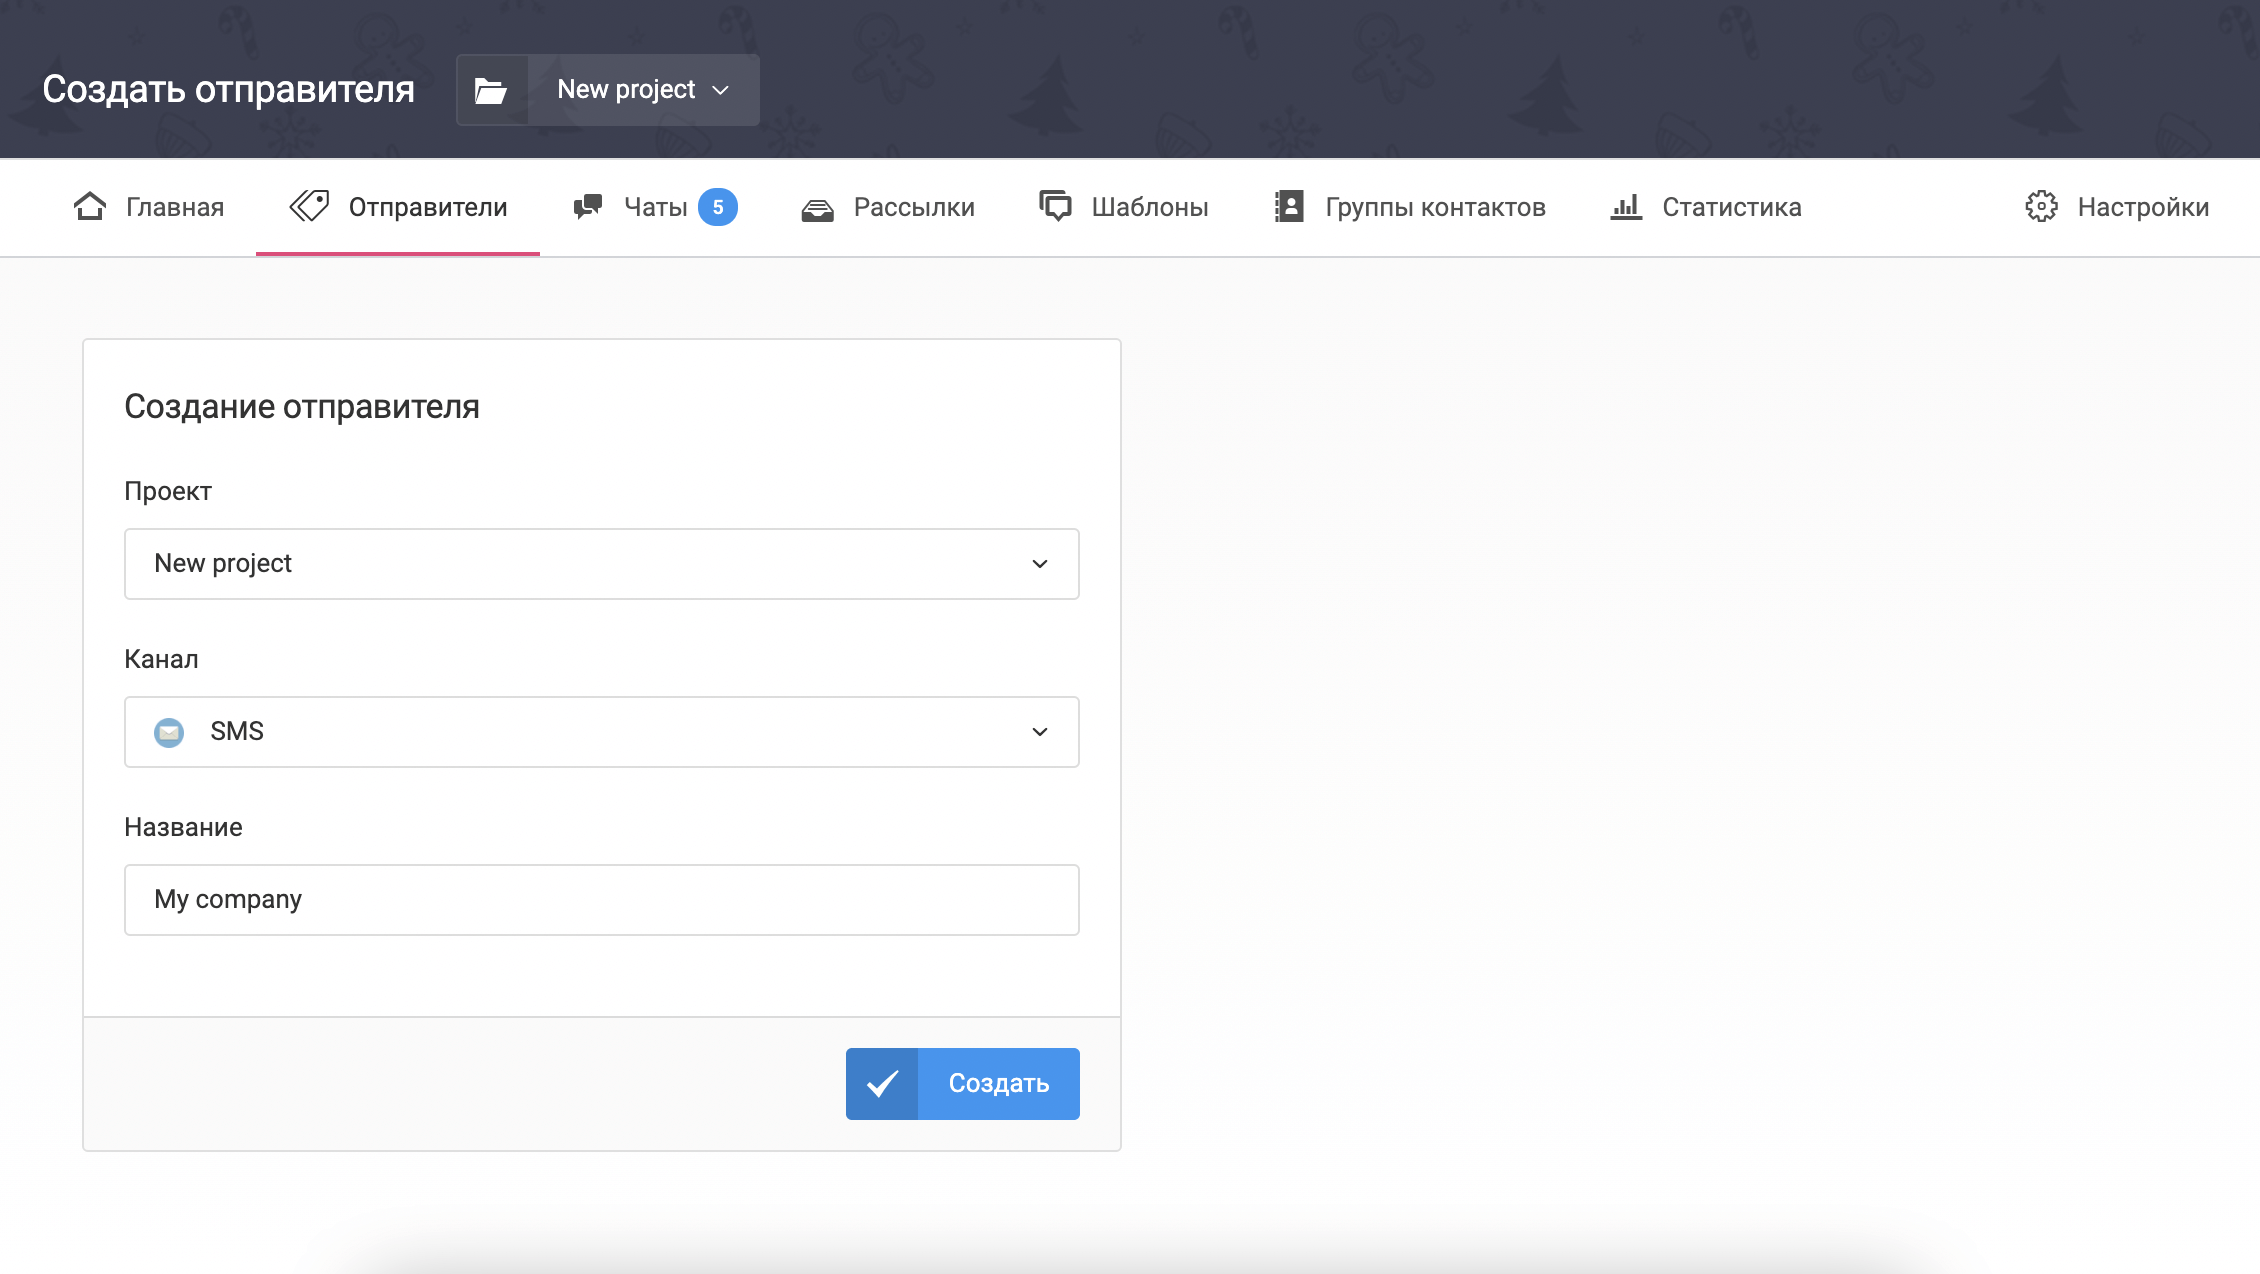
- Register the sender name by specifying the preferred channel for sending messages.
- SMS - 3-15 days, depending on mobile operator
- Viber - 1-5 days
- WhatsApp - up to 10 days
- VK - 1-3 days
It usually takes 1 working day or less to verify an offer to join.

Bitrix24 settings
- In Bitrix24, in the Messaggio application interface, go to "Settings". Select the channel for sending notifications according to the sender name created in the Messaggio personal account.
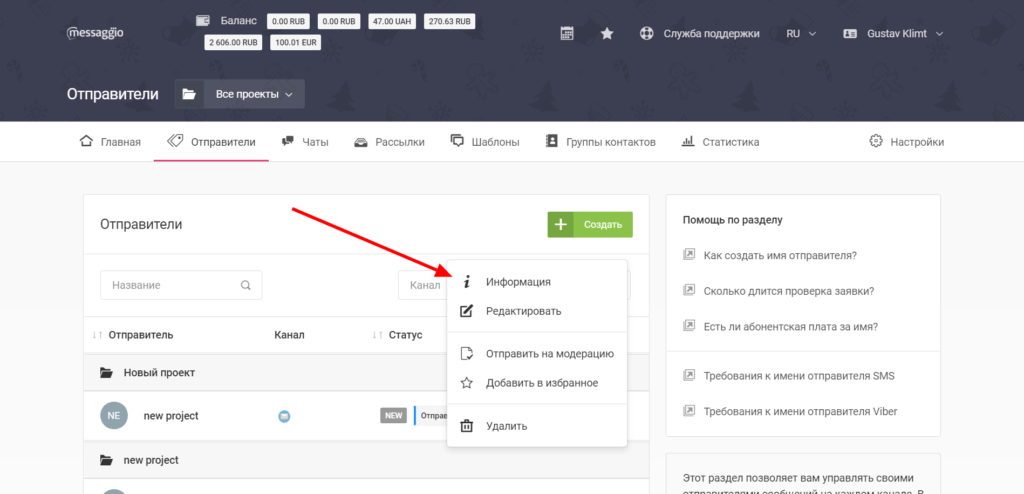
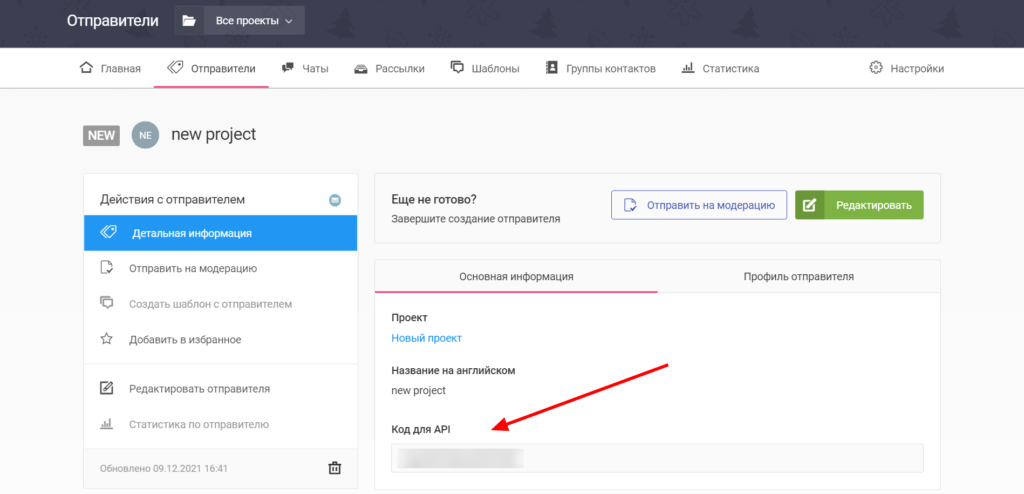
- Enter the Sender Name code for the API. Click on the Sender Name menu in your Messaggio Personal account and then click on "Info". Copy the code and paste it into the relevant field of the application for Bitrix24.
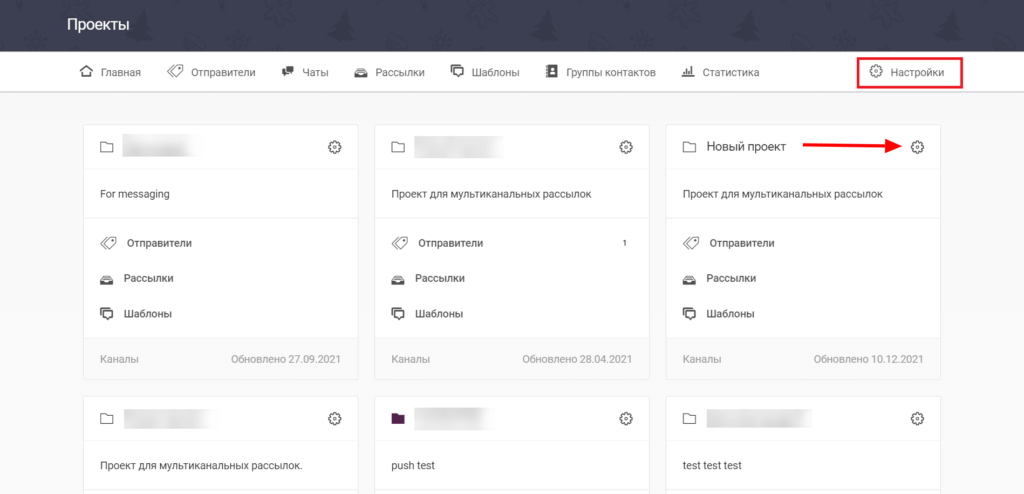
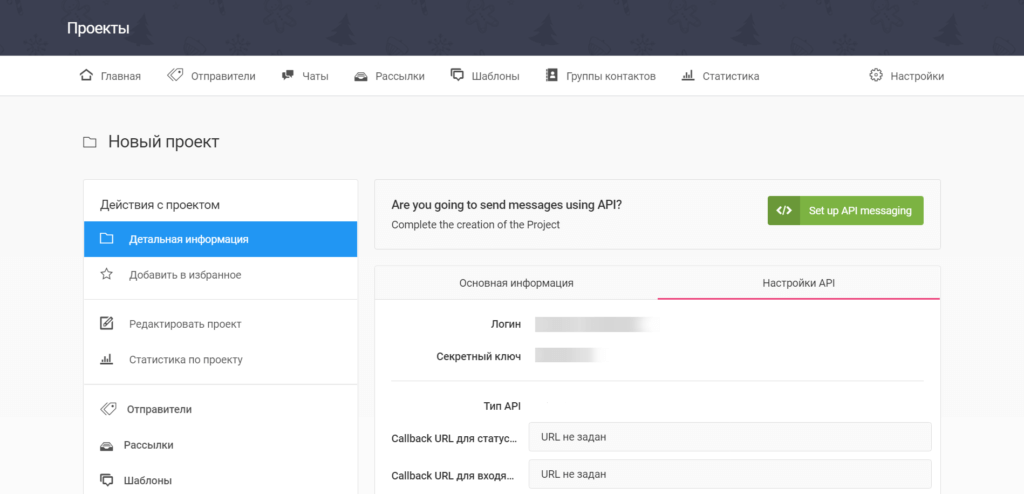
- Enter the Messaggio project login. You can find it in your Messaggio personal account under "Settings" - "Project" - "Detailed information" - "API settings".

Congratulations, the Messaggio and Bitrix24 integration is complete!
Sending messages from a deal
You can remind the client about yourself, invite them to a meeting, send documents or a link to payment directly from the deal interface.
- Open a deal with the customer you want to send a message. Press "SMS/WhatsApp".
- Enter the message text, select the files you want to attach to the message (public links will be generated), add a link to pay for the item if necessary. Click on "Send".
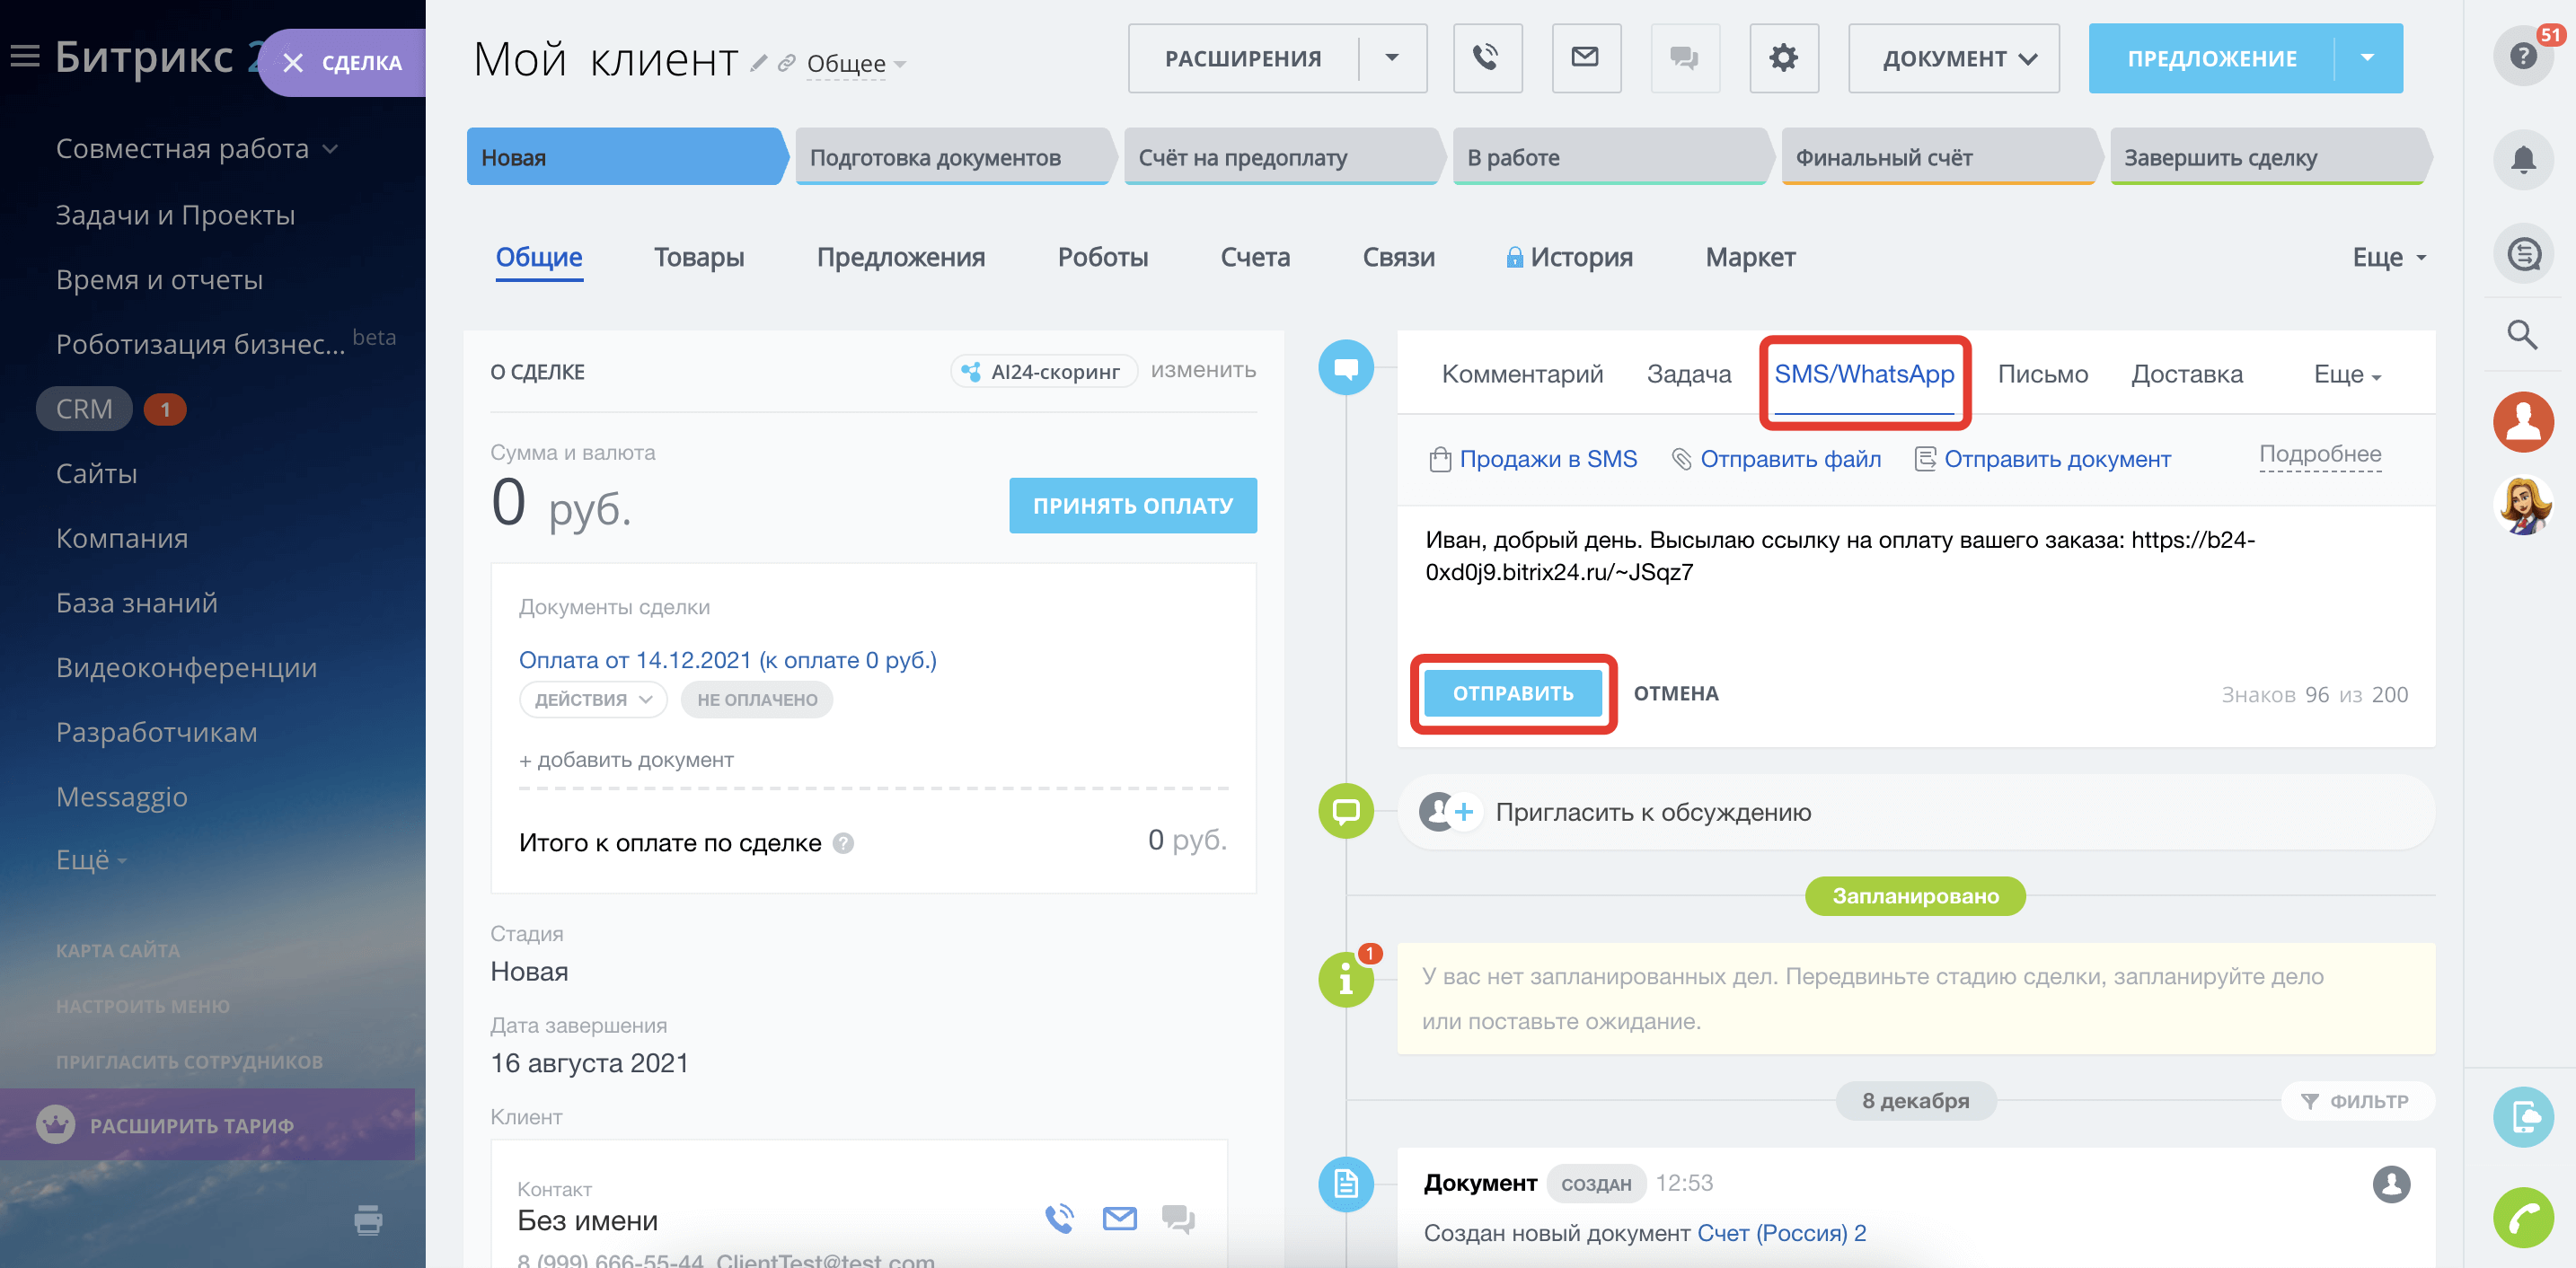
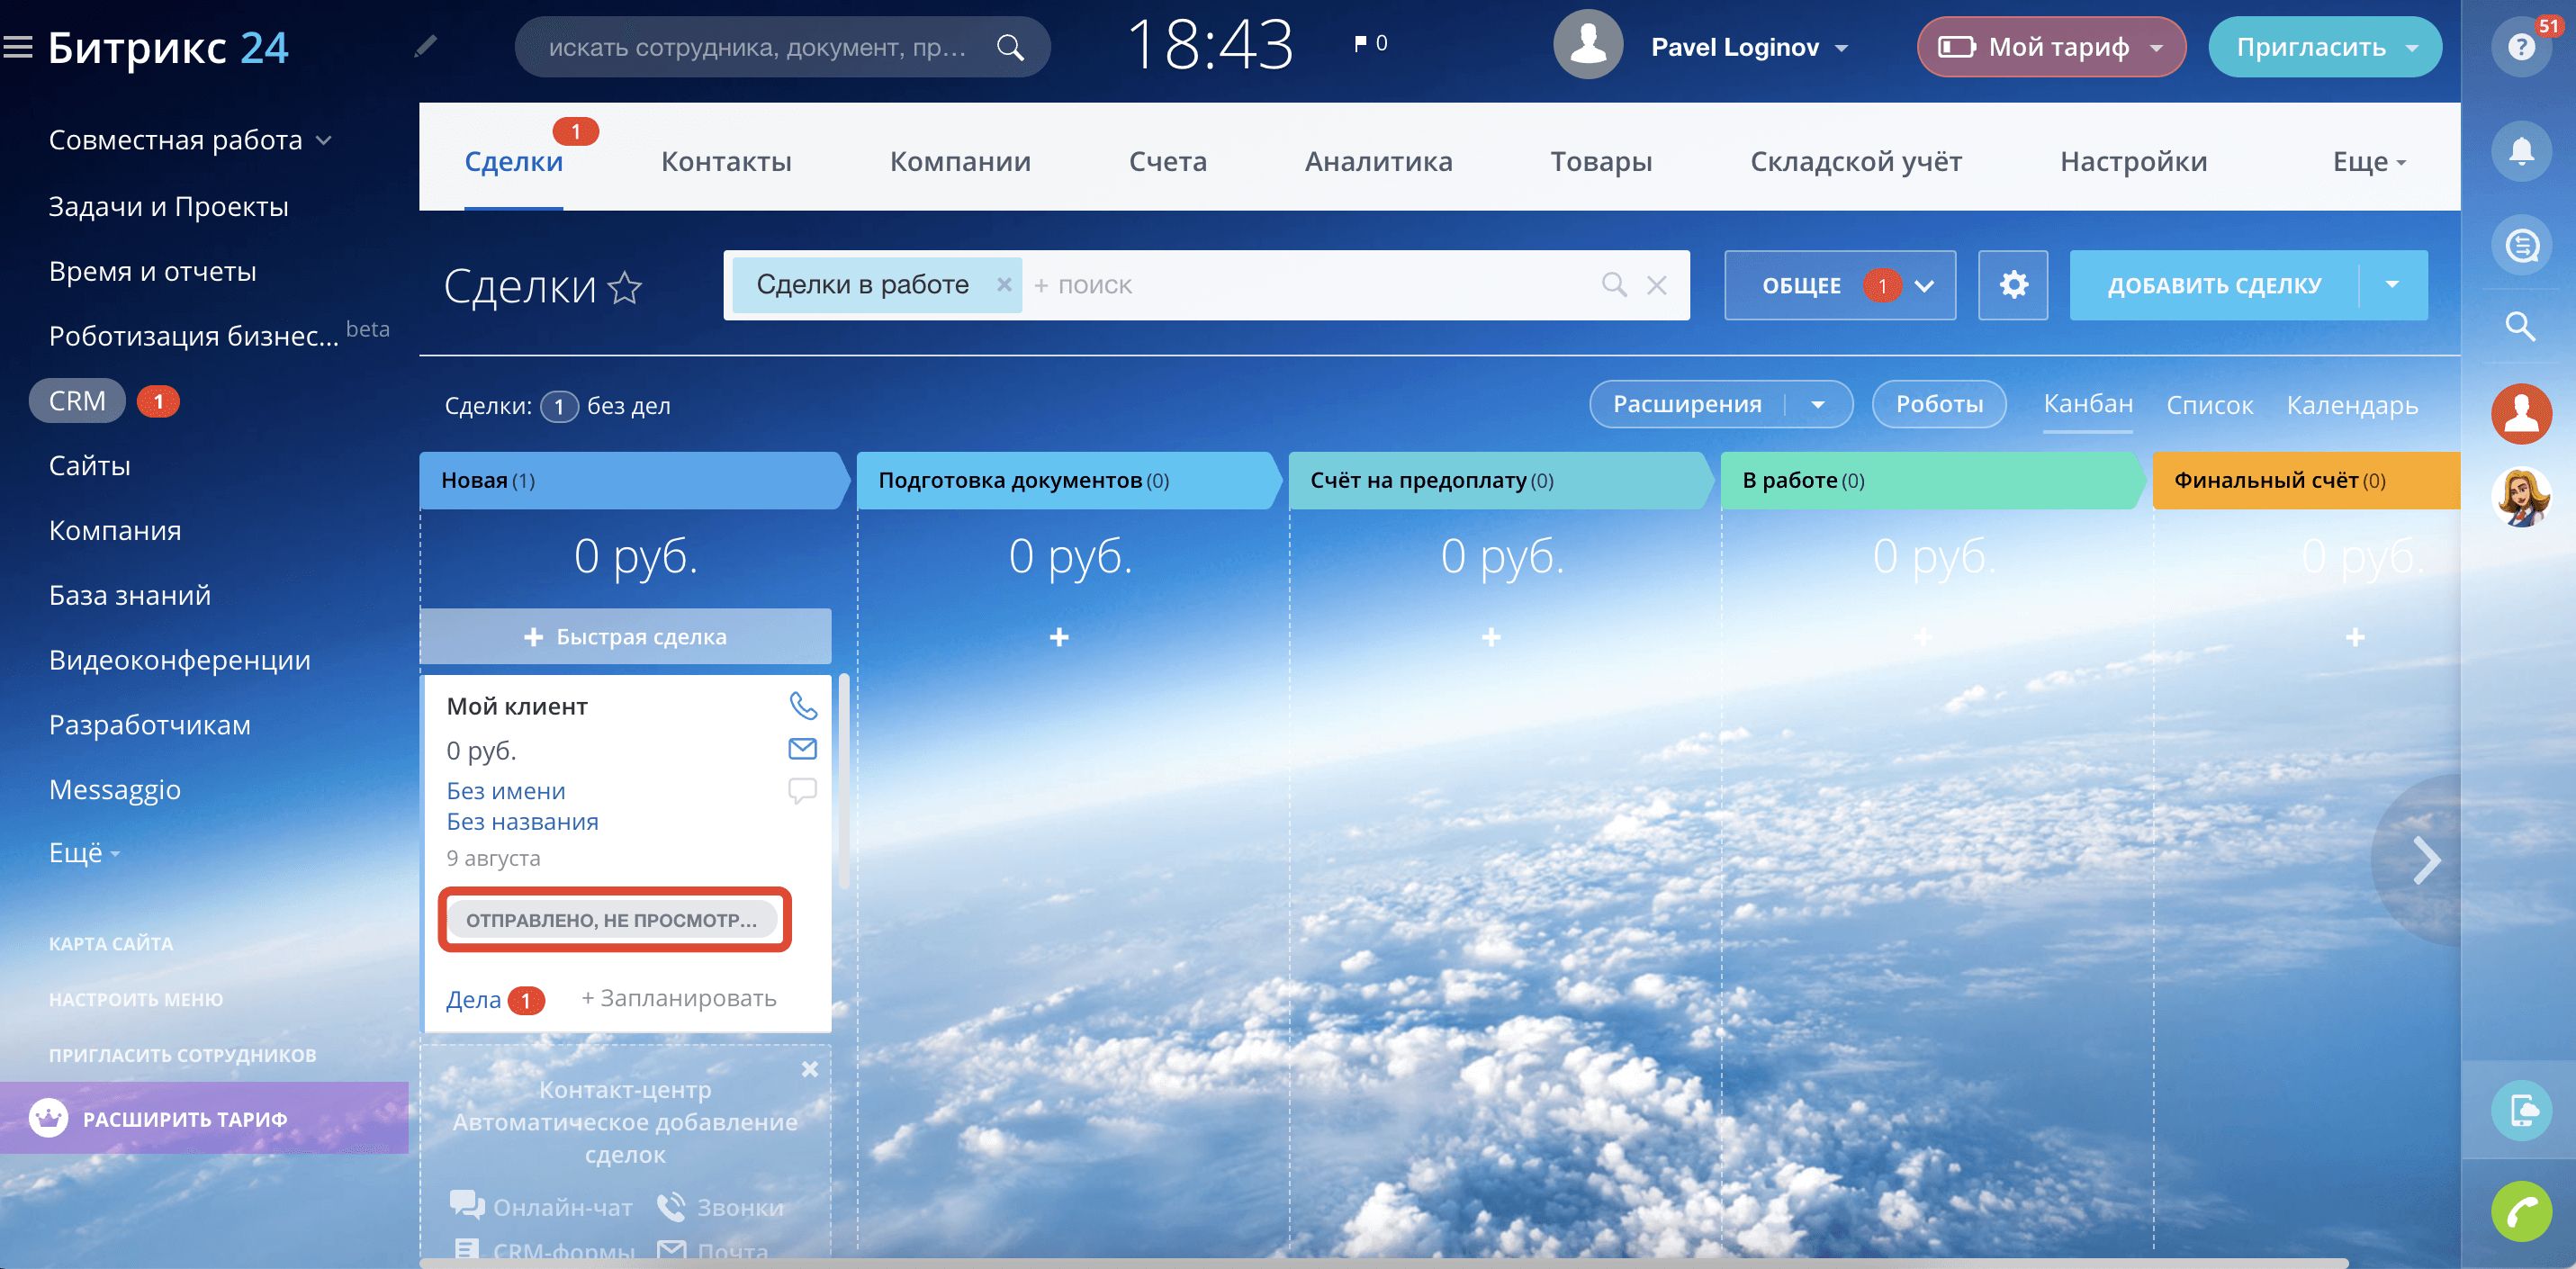
Your customer will see a message push notification on their mobile device. The message status will be displayed in the transaction preview.
Sending messages when creating/updating tasks
The function can be used to send messages to the account manager's, sales managers' and other employees' devices to get their attention to a task and trigger a customer-facing process.
To send trigger notifications when a task is created/updated, you need to prepare message templates.
Message template creation
A message template is the content you send to the recipient. To start creating message templates, go to "Message templates", press "Create template" and follow the prompts in the application interface.

- For each template, assign an event to which a message should be sent. The available events are Task Creation and Task Update.
- Specify the recipient's phone number and message text. To personalise your message, add parameters to the template. To do this, simply click on the necessary parameter. It is located under the text field of the template.
- Press "Save". The status ✓ means that the template is active and will be sent as soon as the event occurs.
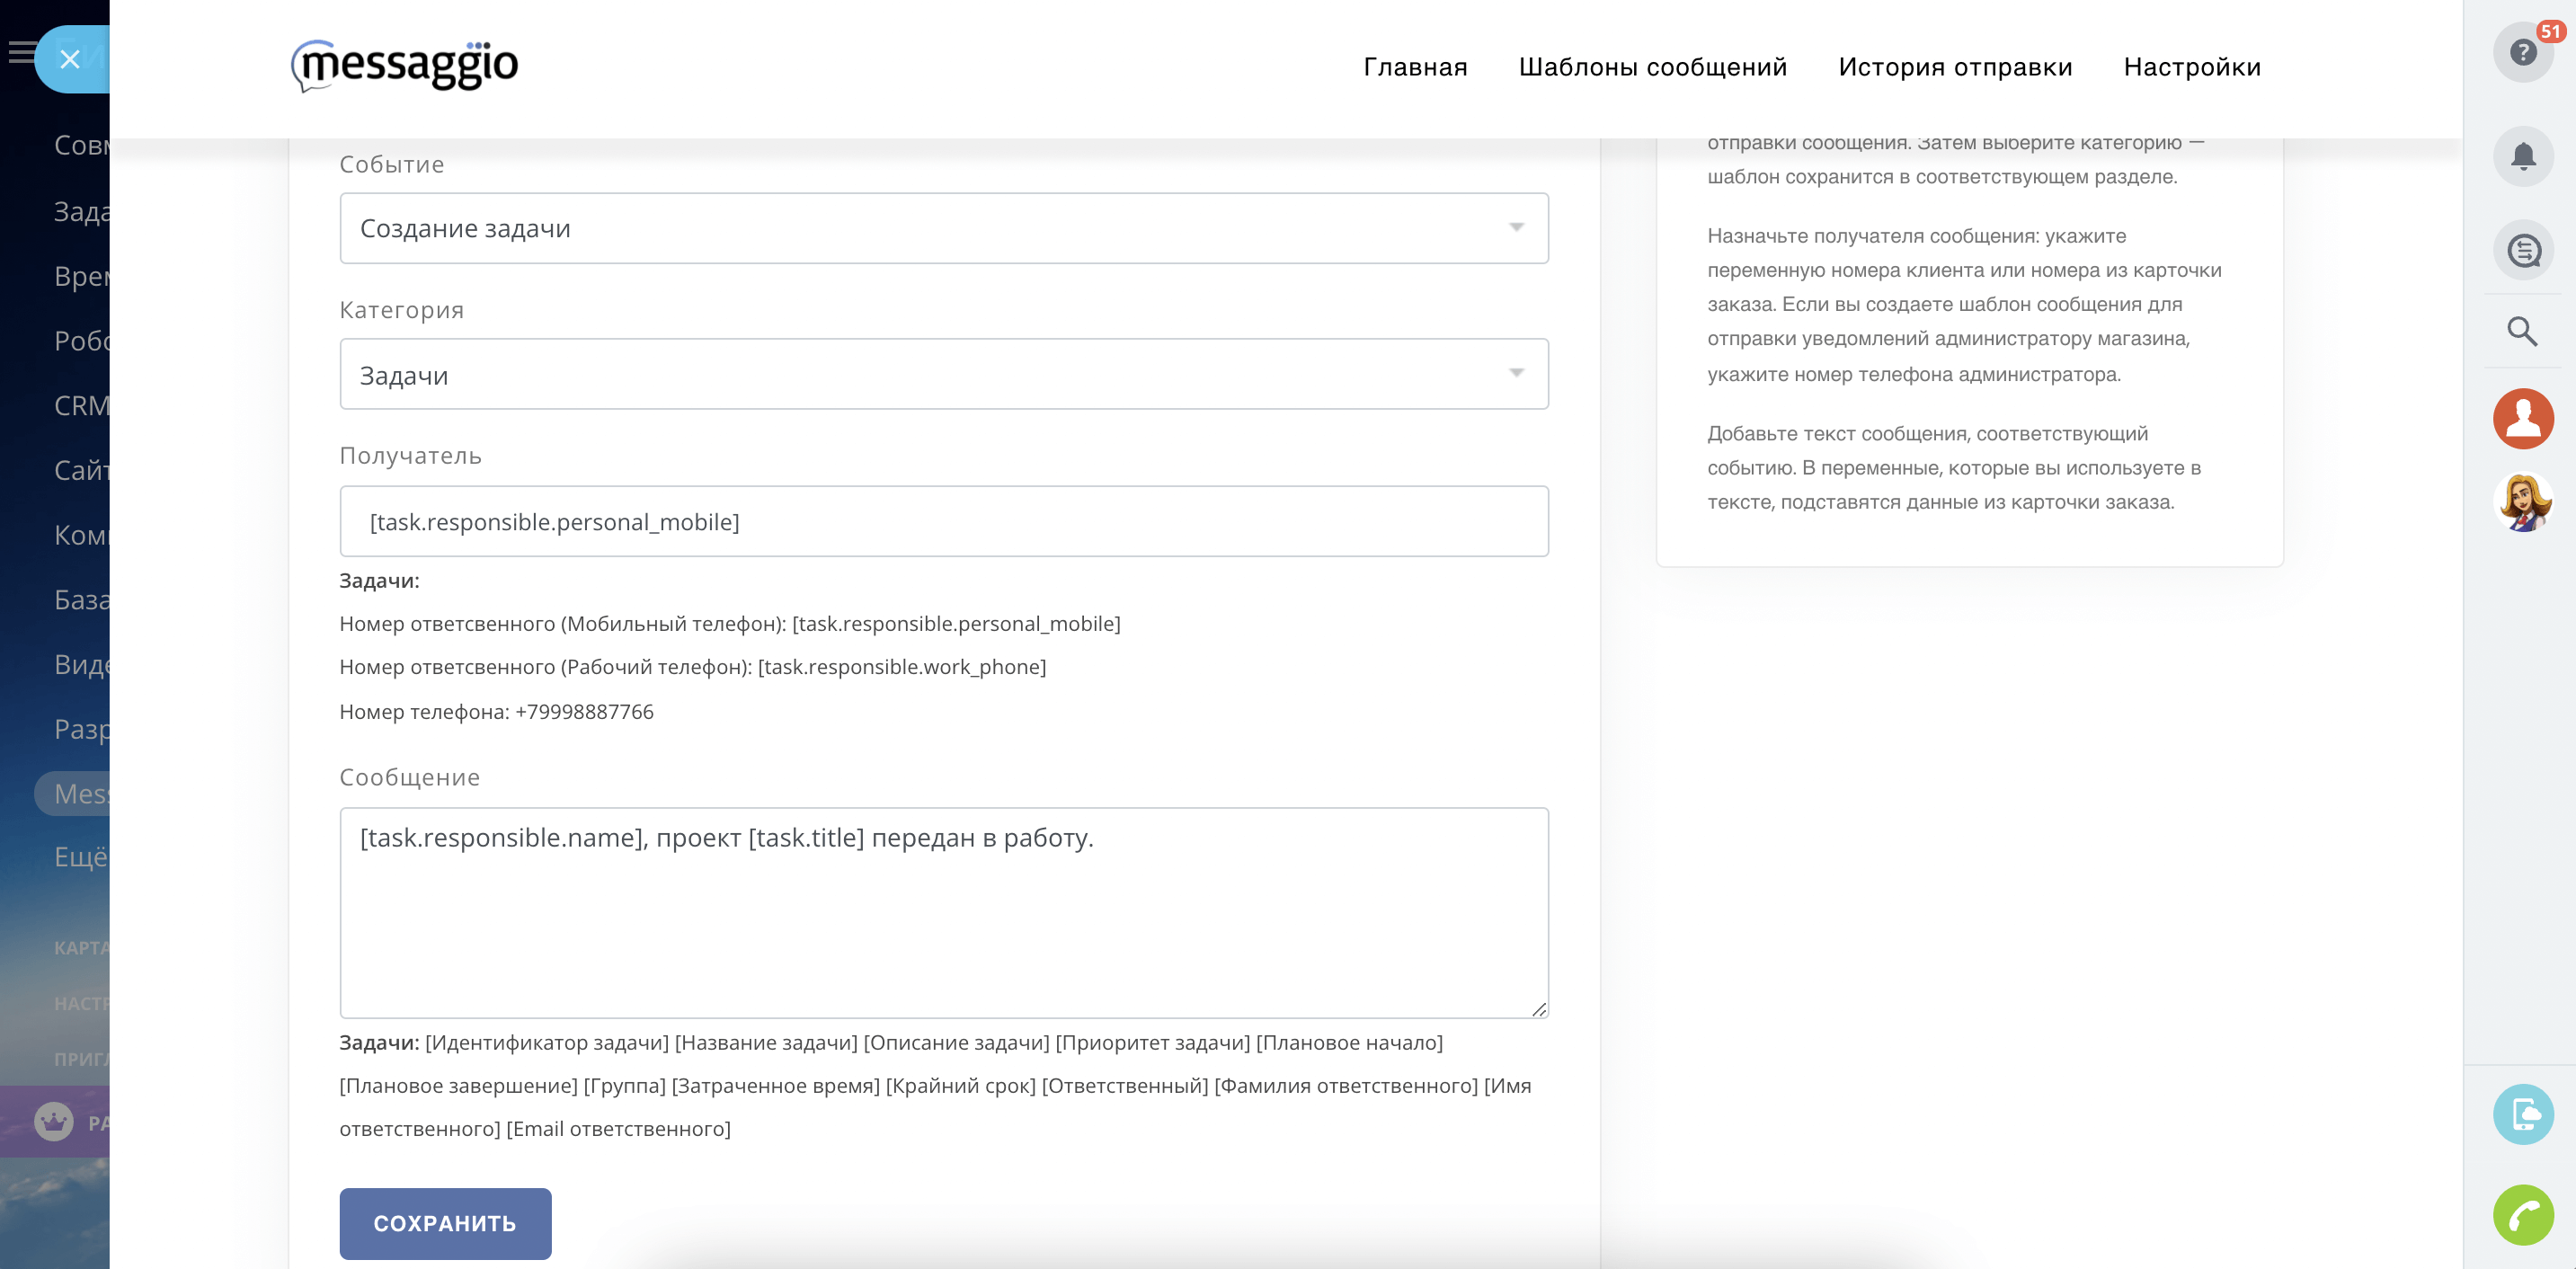
List of available parameters:
Task ID — [task.id]
Task name — [task.title]
Task description — [task.description]
Task priority — [task.priority]
Start date plan — [task.start_date_plan]
End date plan — [task.end_date_plan]
Group name — [task.group_name]
Time estimate — [task.time_estimate]
Deadline — [task.deadline]
Responsible — [task.responsible.name]
Responsible person's last name — [task.responsible.last_name]
Responsible person's first name — [task.responsible.first_name]
Responsible person's email — [task.responsible.email]
We have already prepared several message templates for your convenience. To use them, click on "Edit" near the selected template and customise it to your needs.
To send messages, make sure that the sender's name is activated. Click on the "Senders" tab in your Messaggio account. An ACTIVE status should appear near the name.
Dispatch history
You can see the messages log you have sent in the "Sending history" section. The information is displayed for the last 7 days. Statistics for a longer period can be viewed in your personal Messaggio account, in tab "Statistics"
