Integration with amoCRM
If you use AmoCRM in your working process and plan to send notifications to your clients or colleagues via SMS, Viber or other channels, you could use a ready-made module, which have been developed by the F5 company for amoCRM. A special widget "SMS gateway" allows you to connect Messaggio as the SMS messaging provider. First of all, you should find a widget in the AmoCRM marketplace and also set up an account in Messaggio platform. For more on this, please find our step-by-step instructions below. 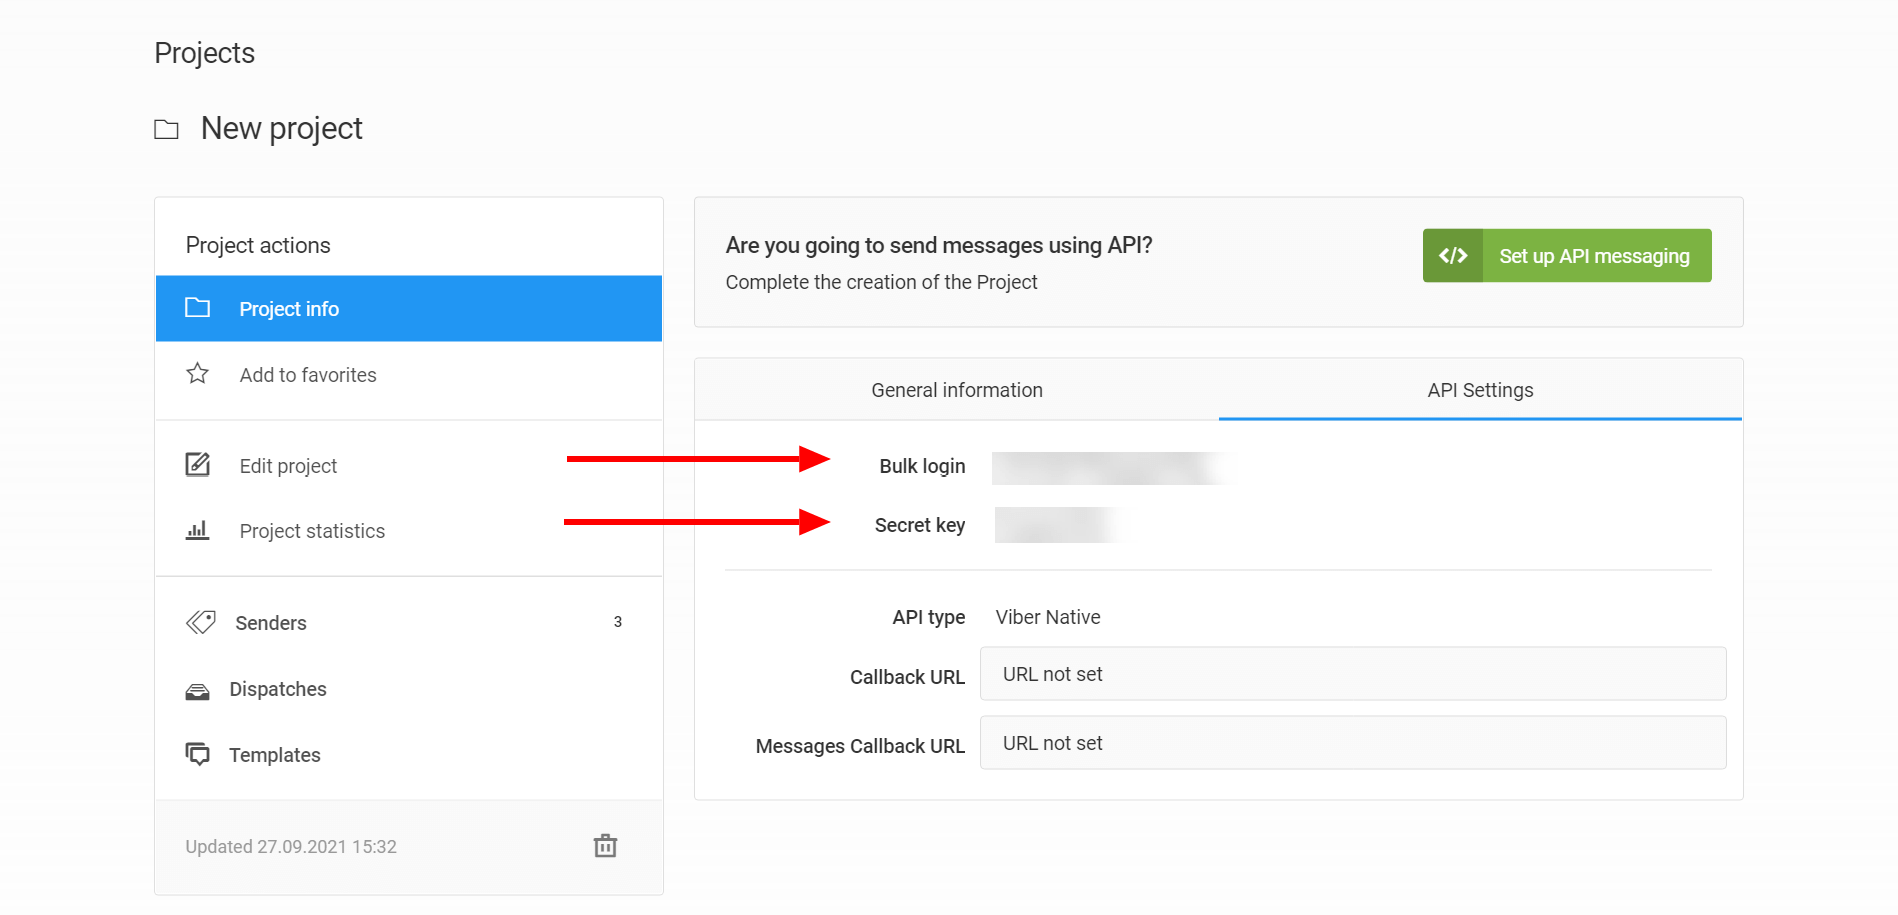
The account in Messaggio platform and the process of getting all the necessary settings
- First of all, you should create the user account in Messaggio dashboard. While using it, you will be able to get notifications about a low balance and top up your balance. All messaging activity, the delivery statistics and the active Sender IDs will be available for you in your account.
- To get started, you should accept all the terms of the offer agreement on behalf of your company. In order to do this, please click "Continue" in your dashboard on the pinned notification under the menu and follow the prompts. When your application is being reviewed, you will be able to start the registration process of your SMS Sender ID.
As a rule, the verification process of the request for accession to the offer agreement takes not more than 1 working day.
- Register the Sender ID, having pointed out the messaging channel - "SMS".
The SMS Sender ID moderation process takes from 3 till 15 days, depending on the mobile operator.
The moderation process also includes checking of the SMS messages for compliance with the conditions and requirements. For more information about registering of the SMS Sender ID, see the "Senders" section.
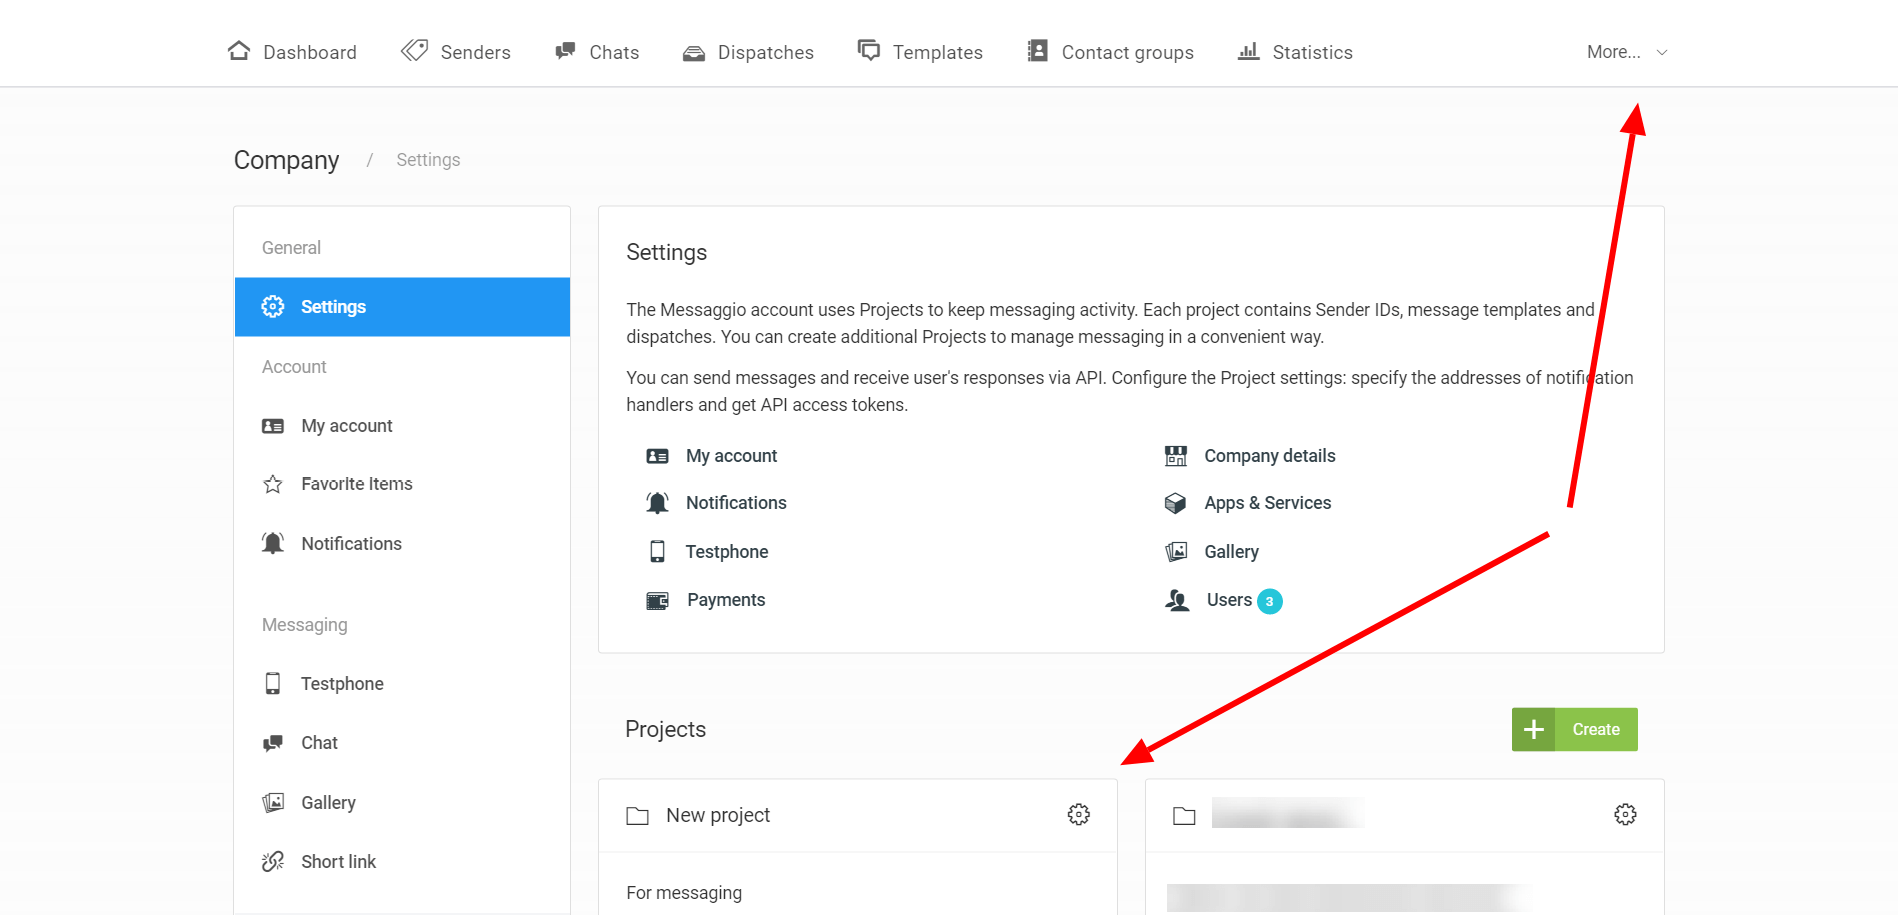
- To get the necessary settings for sending messages, there is very little left: Generate an API secret key in your Messaggio dashboard. To do this, go to the "Settings" section, then click the sign of the gear in the corner of the project.
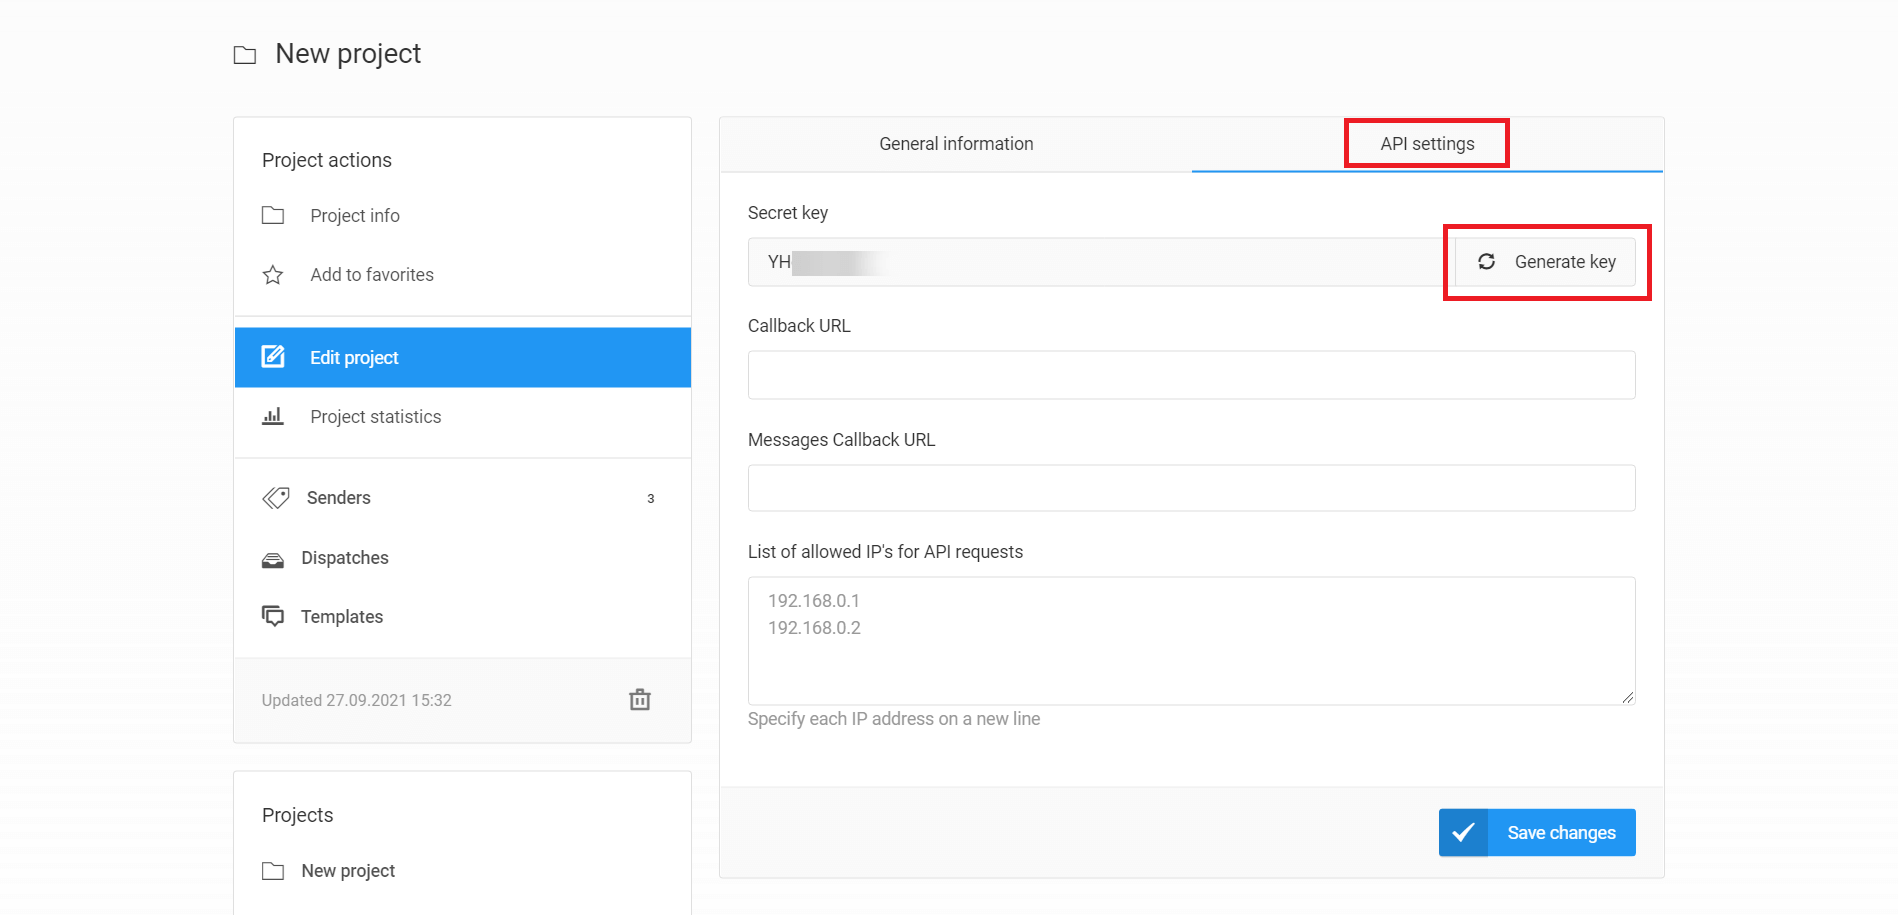
- In the "edit project" section, go to the "API Settings" tab, click "Generate key" and save the changes.
- Go to the «Detailed information» section, copy the key and login.
The widget connection and the settings in amoCRM
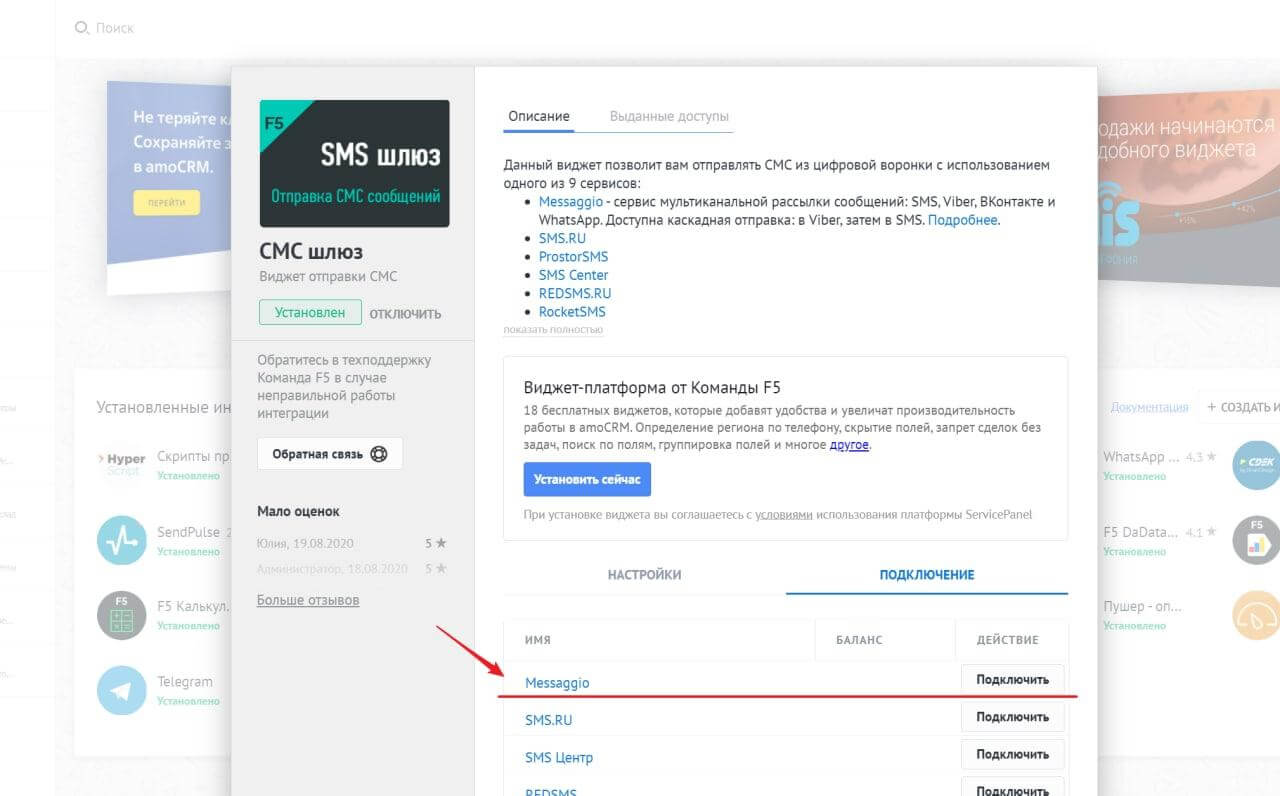
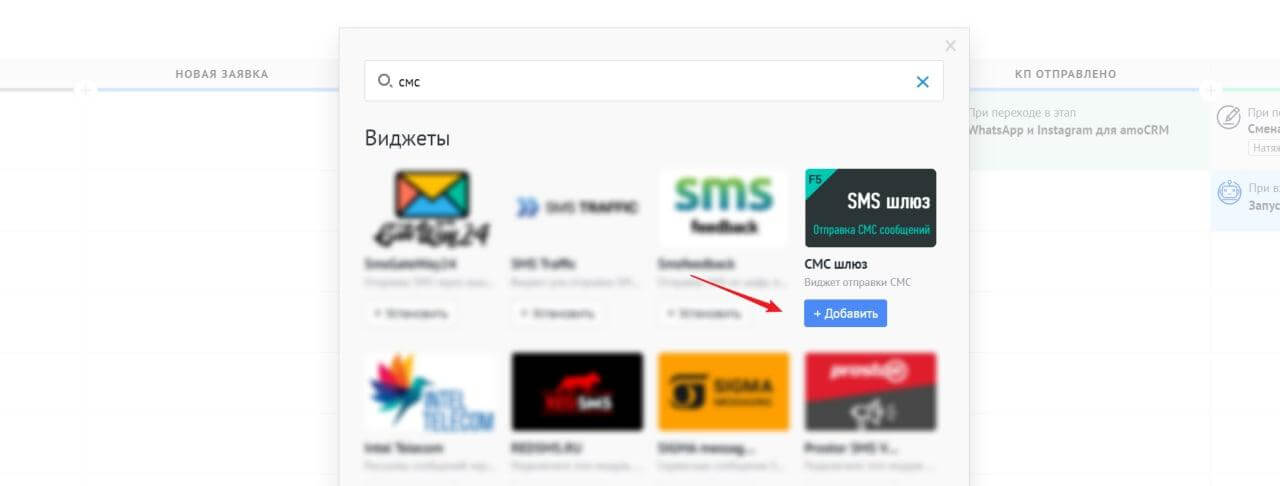
- Log in to AmoCRM and go to the "Settings" section. Enter “SMS Gateway” in the widget marketplace search and then click “Install”.
- In the "Connection" tab, click "Connect" in the Messaggio line.
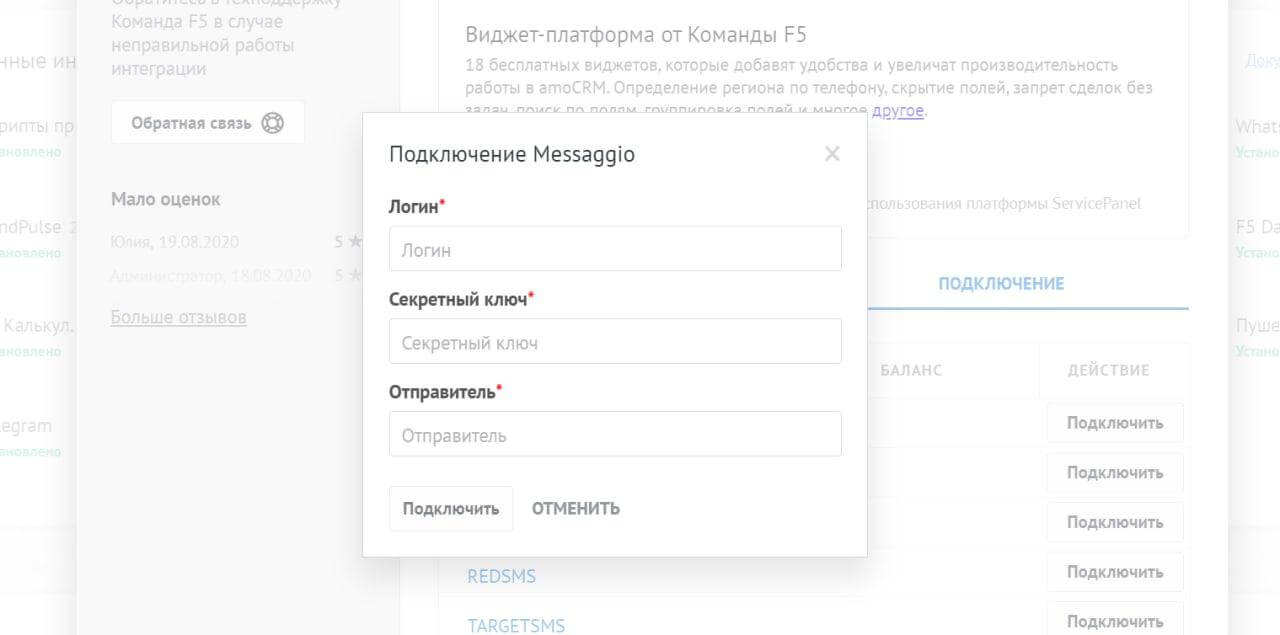
- Set your Messaggio account login, the approved Sender ID and the API secret key of the activated Sender ID (you can find this key, having clicked on the Sender ID in your Messaggio dashboard).
- Go to the section «Deals» ---> «Funnel» ---> «Funnel settings». Click on the empty field, where it is required to create an action. Find the widget "SMS Gateway" in the search, which has been added earlier. Click «Add».
- Set the necessary settings and input the text of the message to be sent.
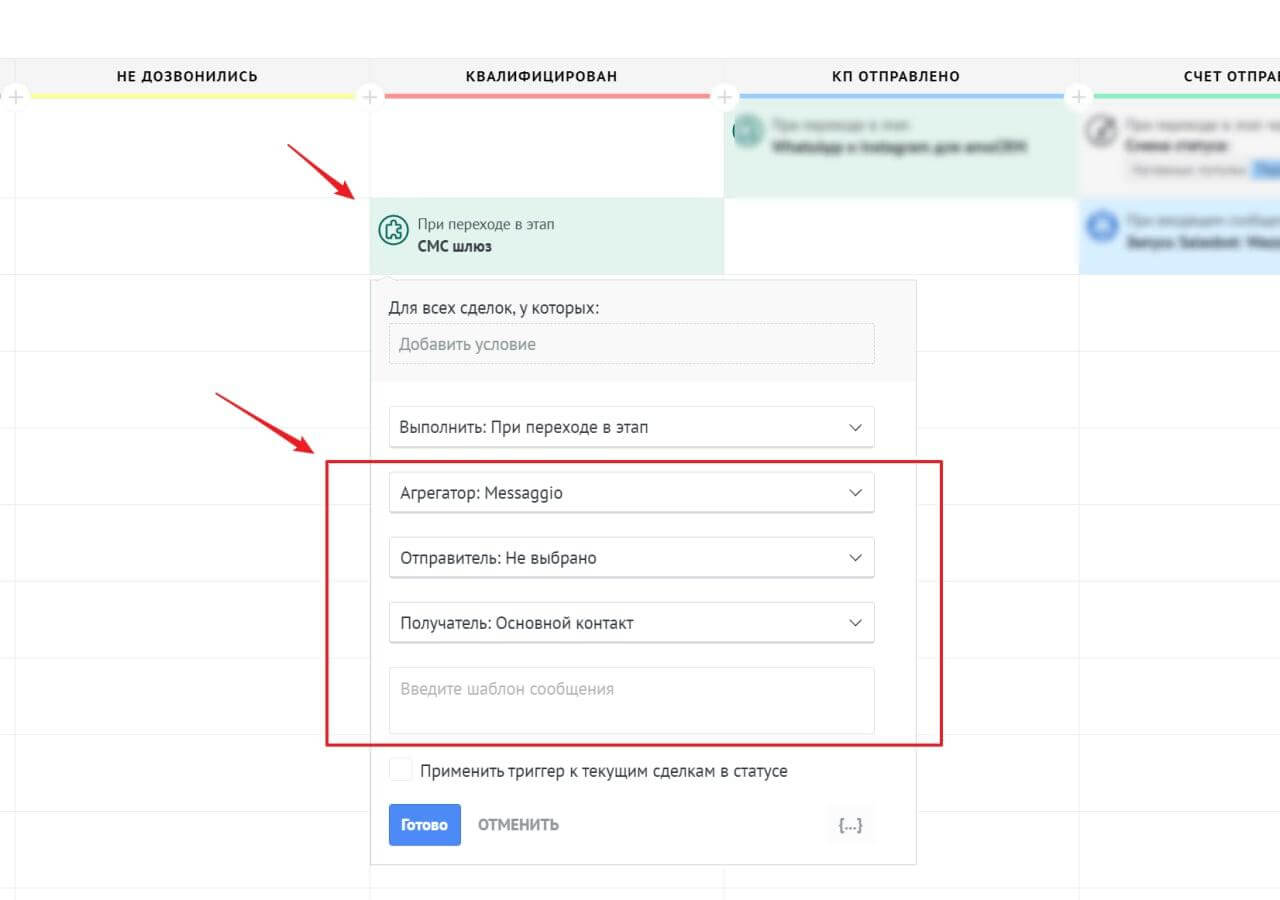
Now this message will be sent to the contact from the deal, which fell into the funnel stage with the assigned action. If, while creating the action, you click the tick “Apply the trigger to the current deals in status”, the message will be sent to all the contacts at the stage you have chosen.