How to integrate Firmao and Messaggio

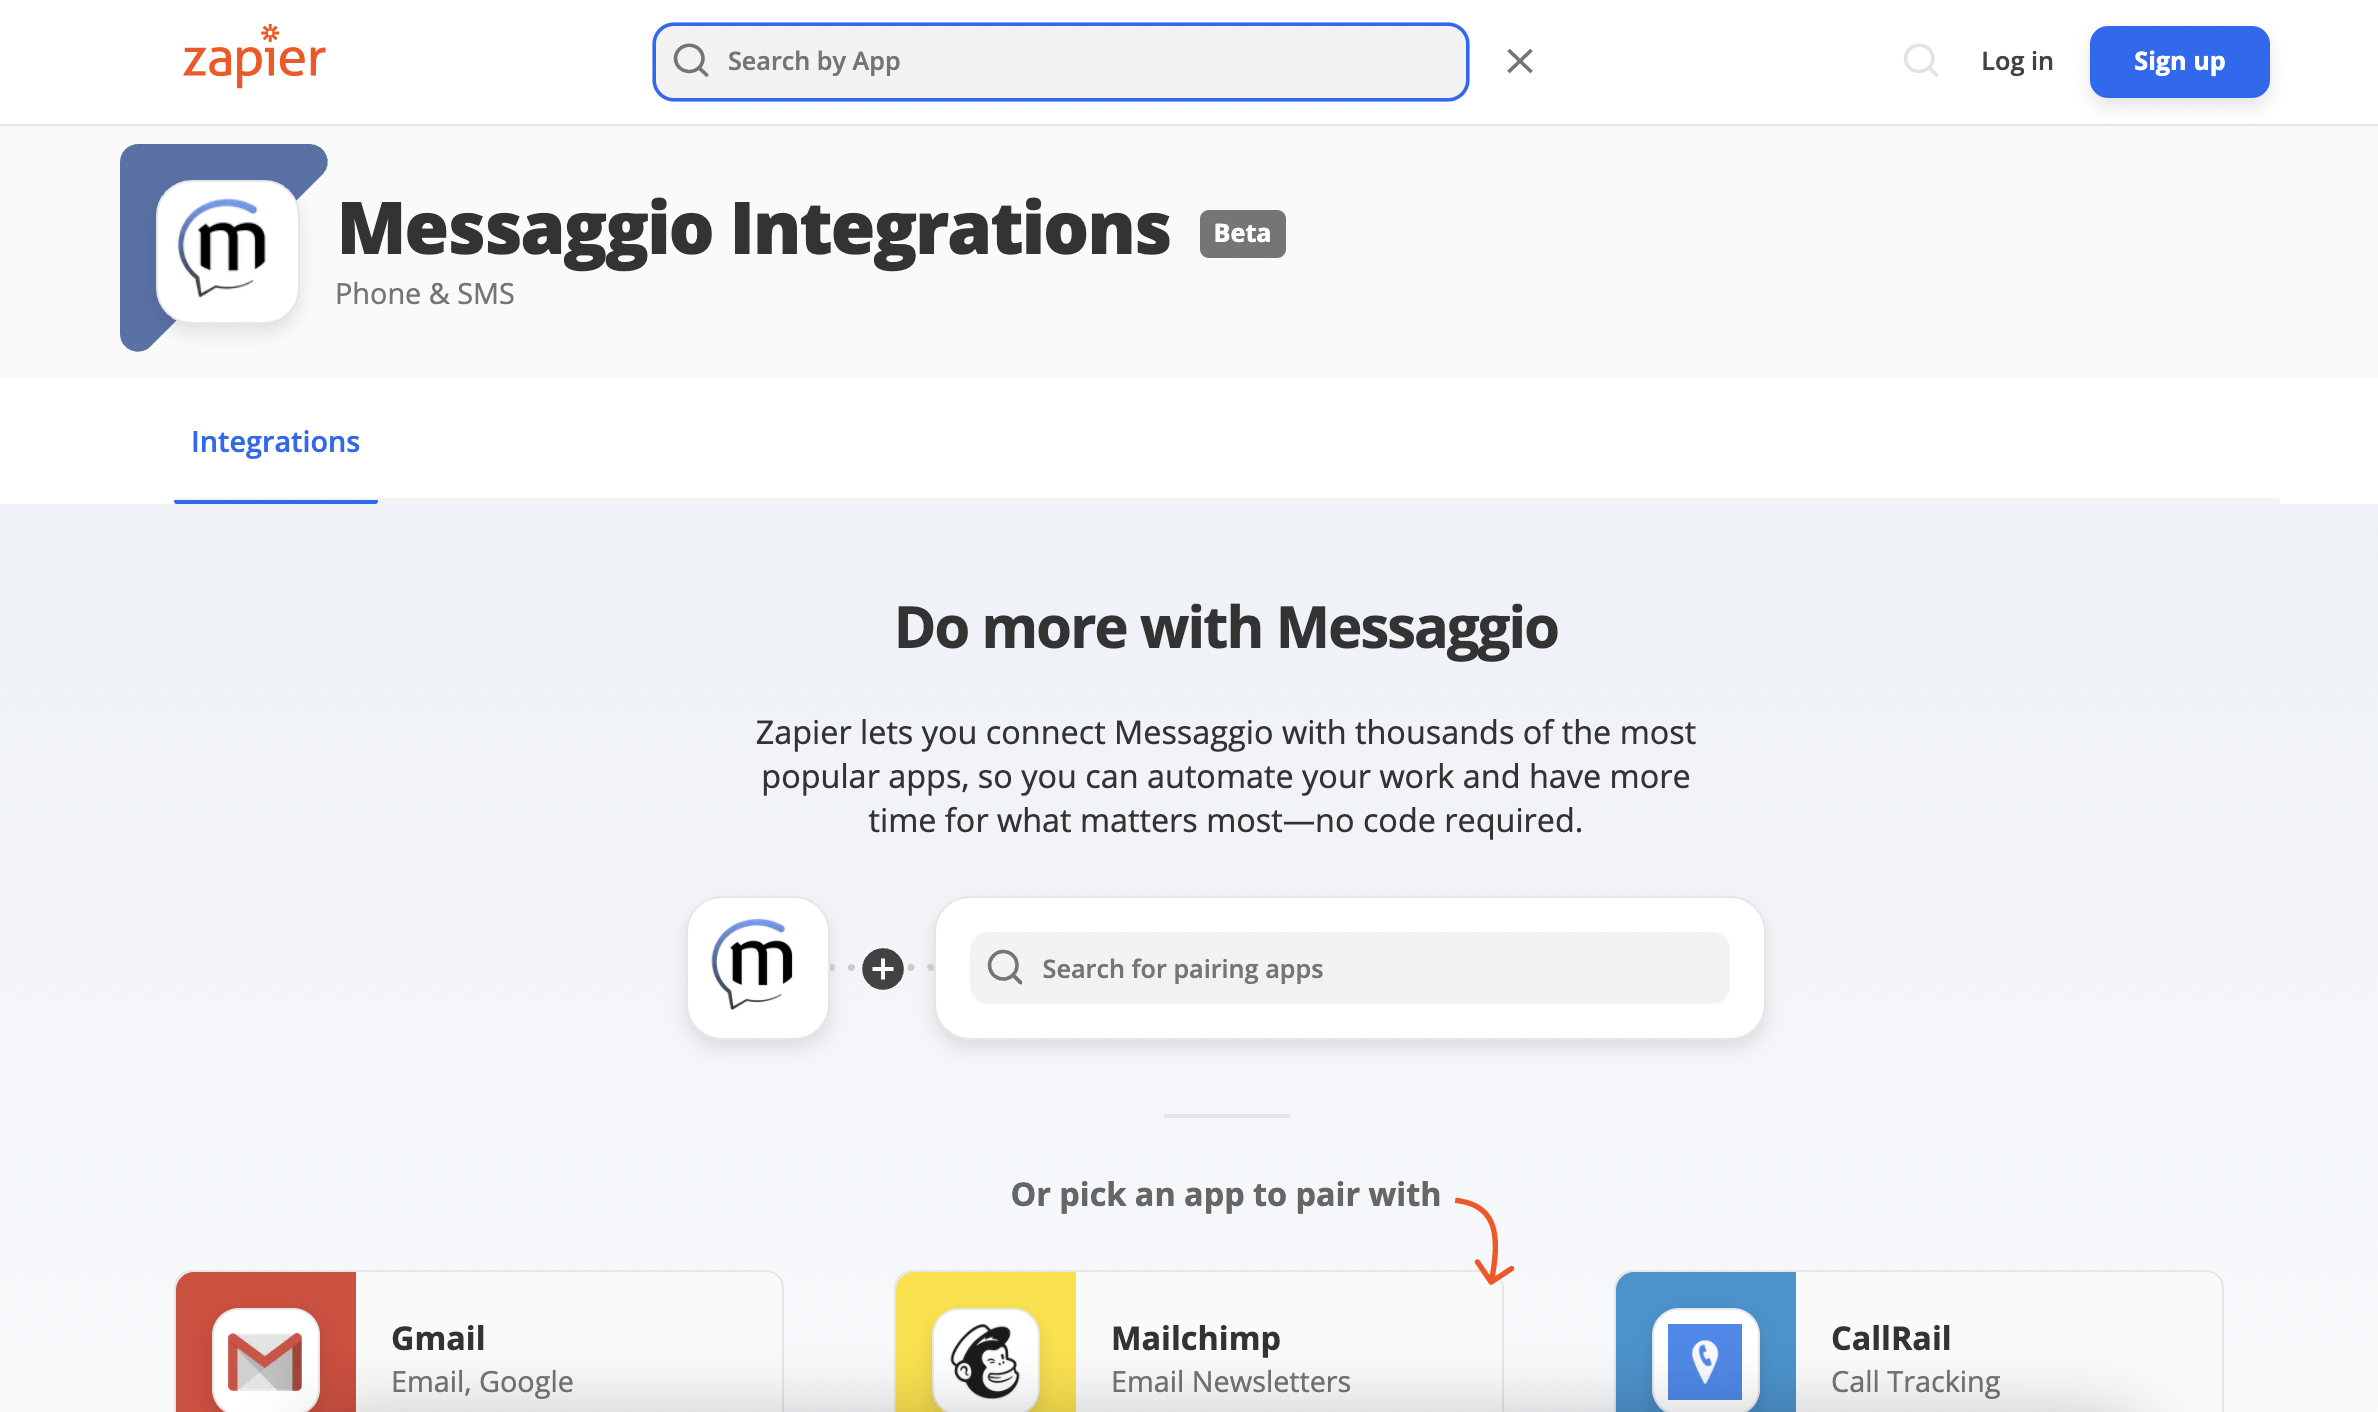
Messaggio and Firmao integration is implemented through Zapier.

Zapier — Triggers and Actions

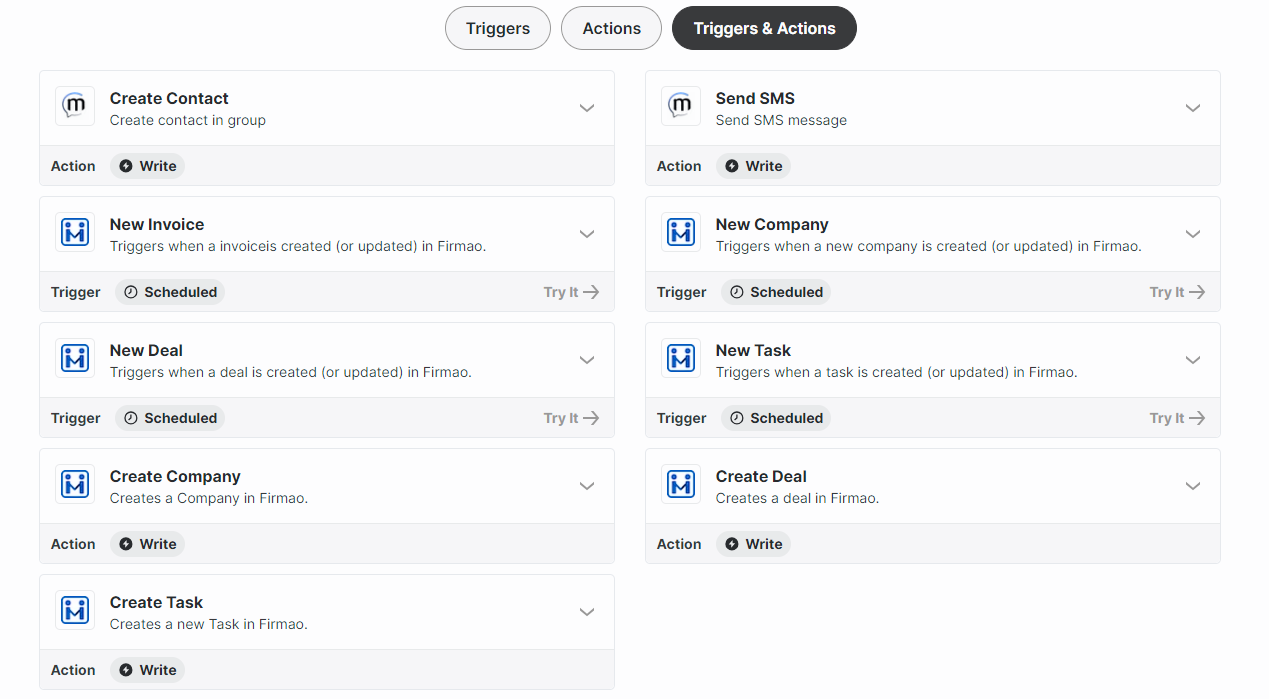
The integration between Zapier, Firmao and Messaggio offers various Triggers and Actions to automate the flow of data between these platforms.

Triggers: are the events that trigger automatic actions in the integration. For example, the trigger can be a new Company in Firmao.

Actions: are the specific actions that are taken as a result of triggers. For example, when a new Invoice is generated an SMS message can be sent via Messaggio.
Zapier. Triggers and Actions

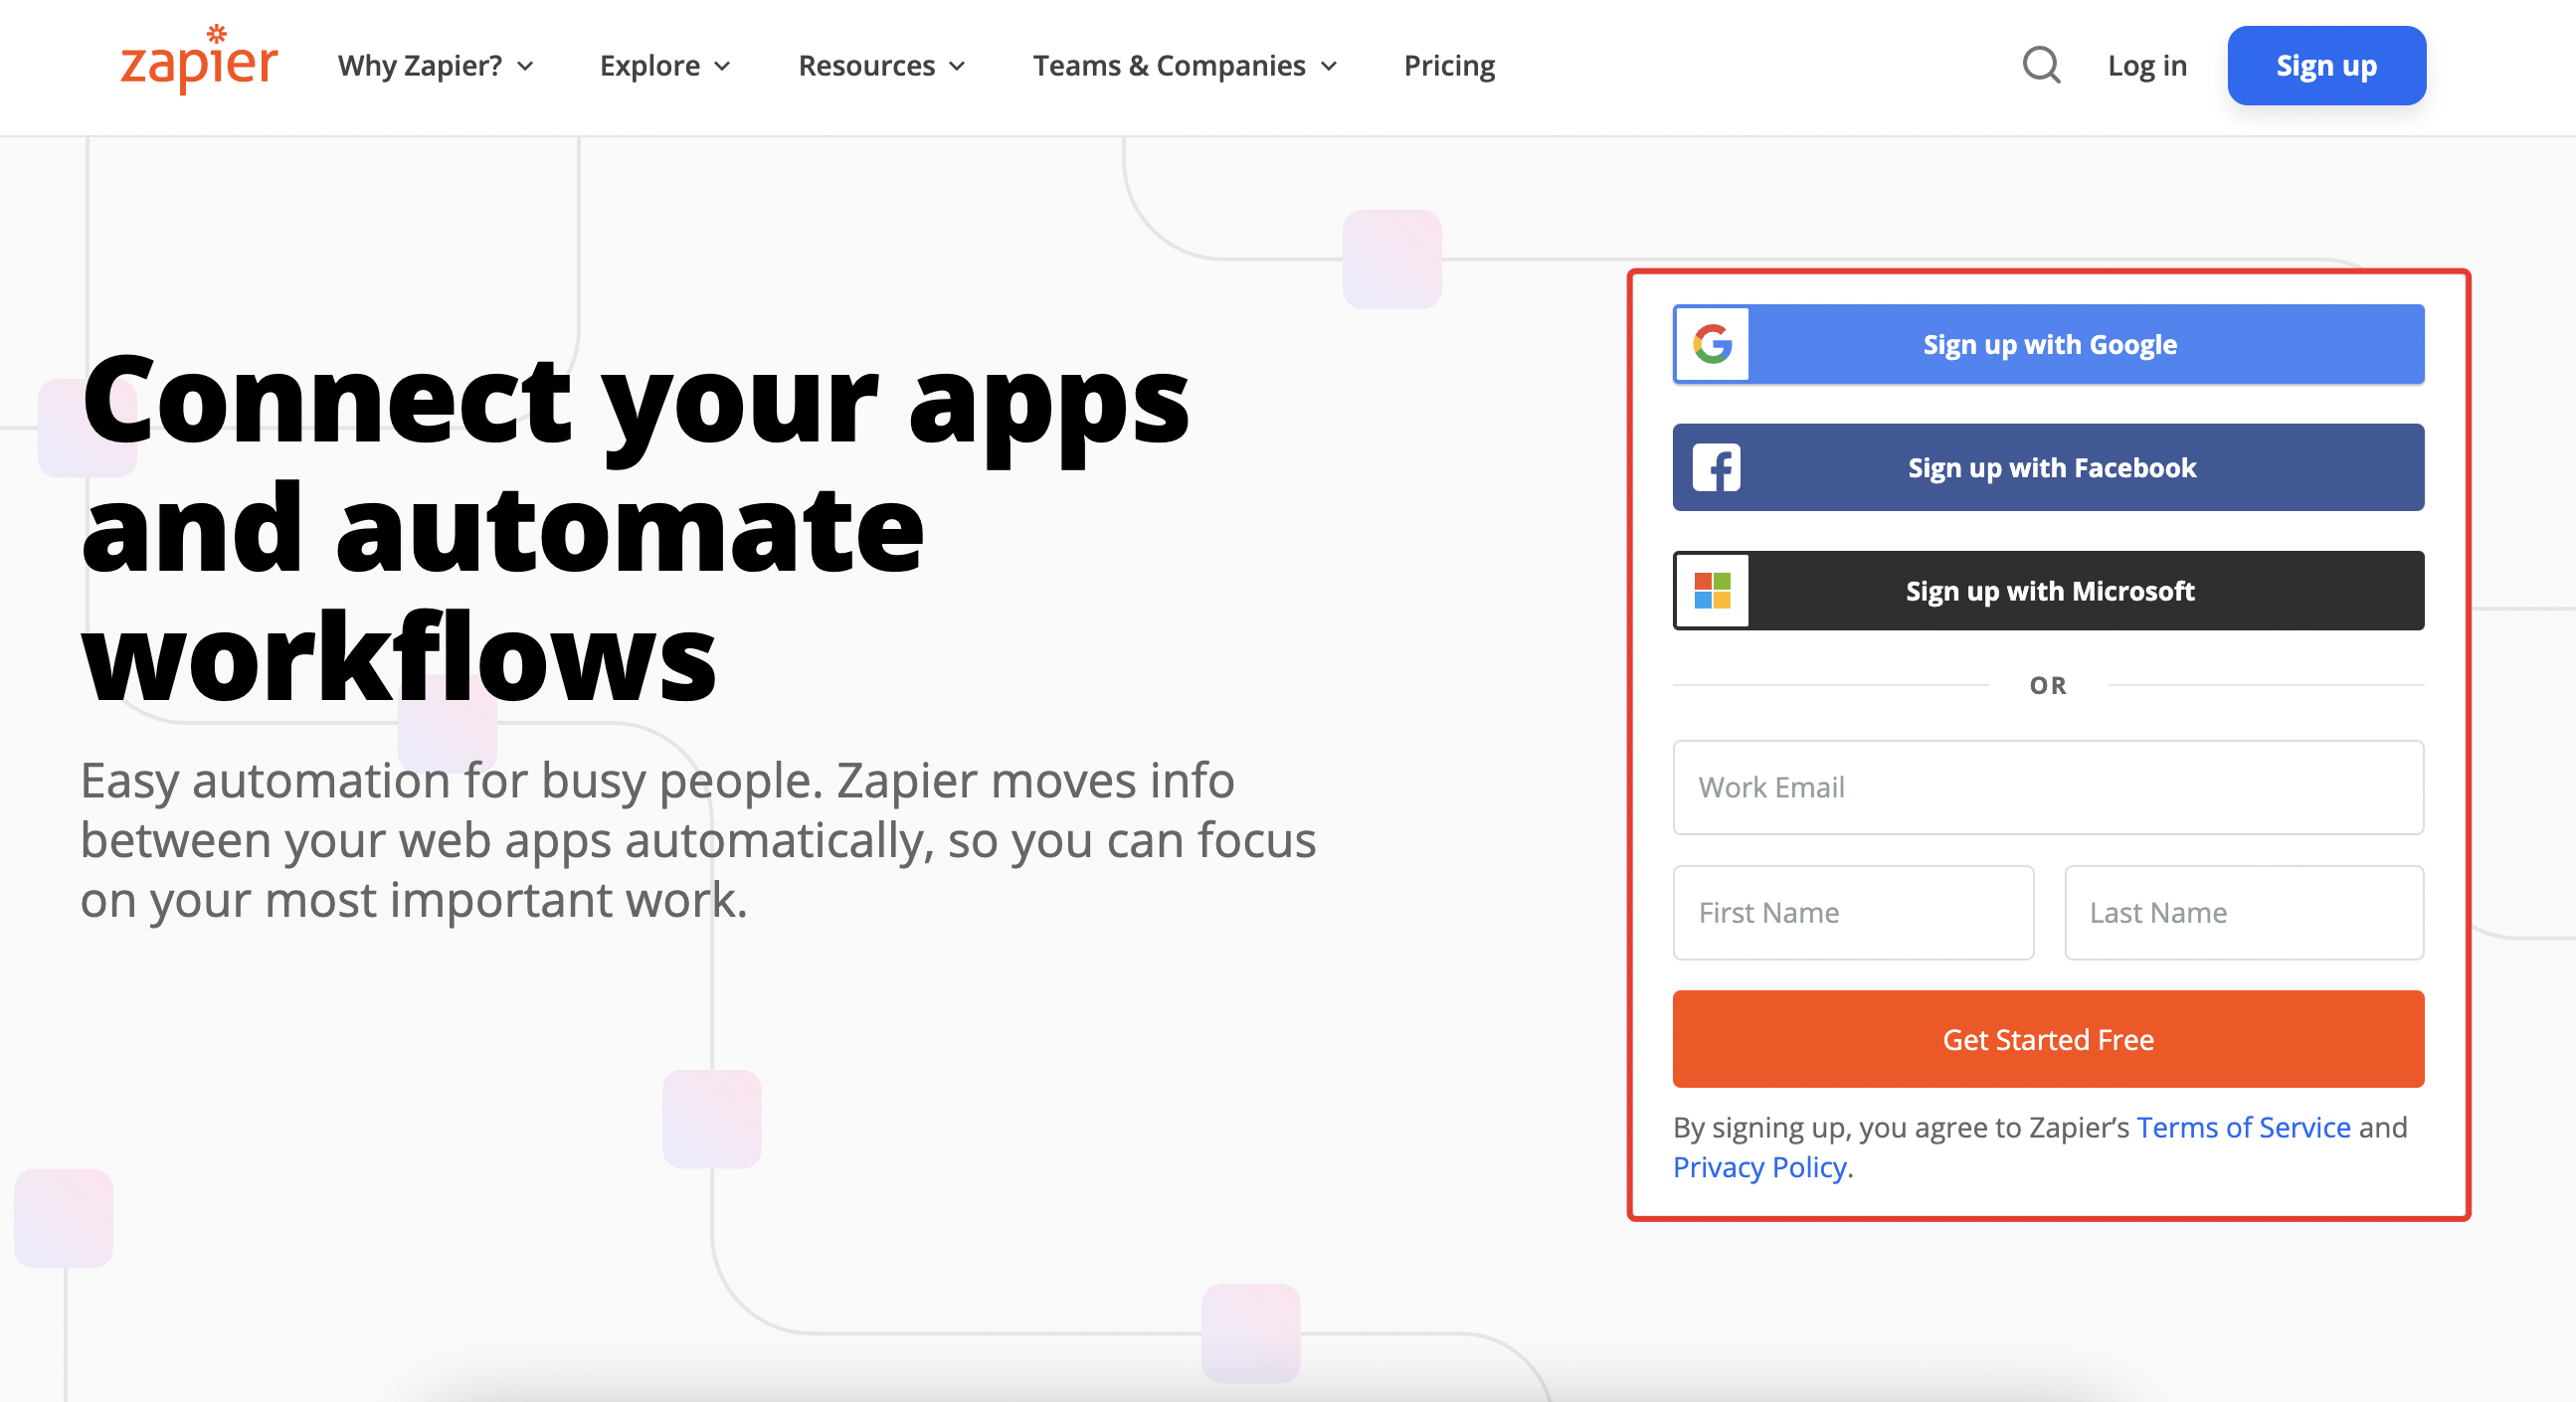
What needs to be done to connect applications in Zapier?

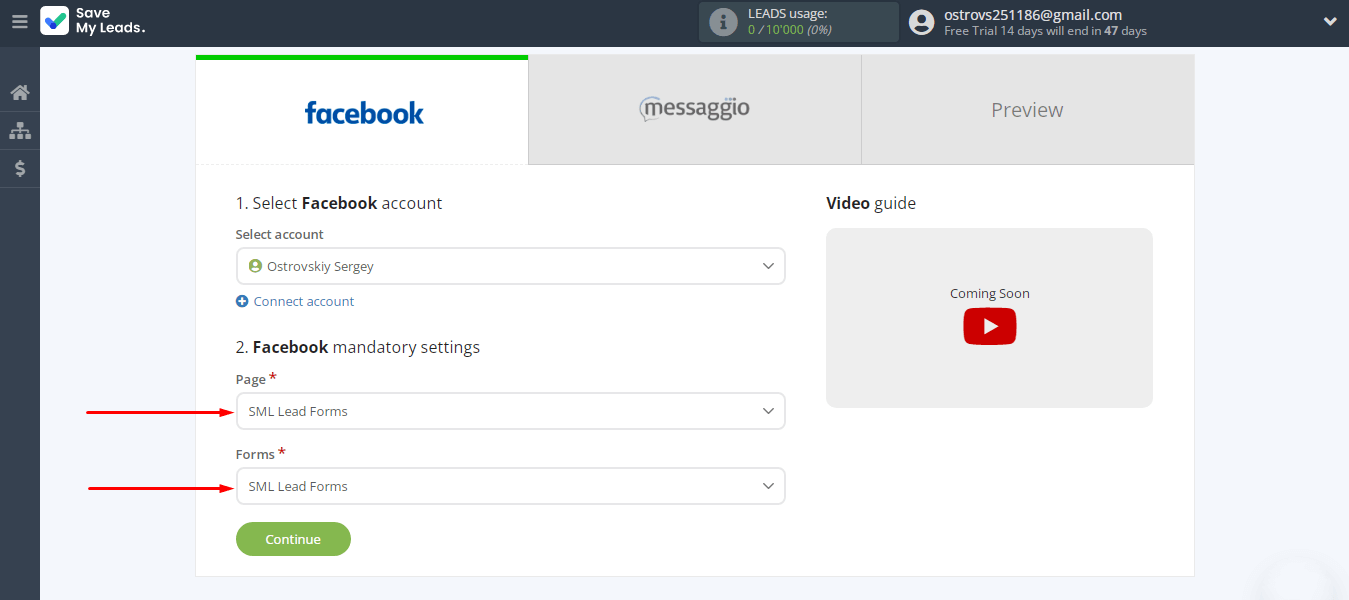
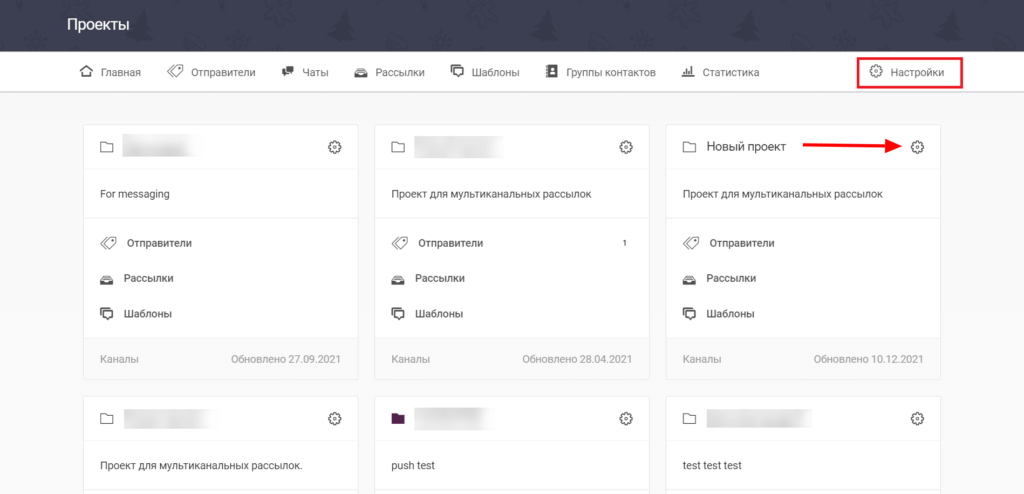
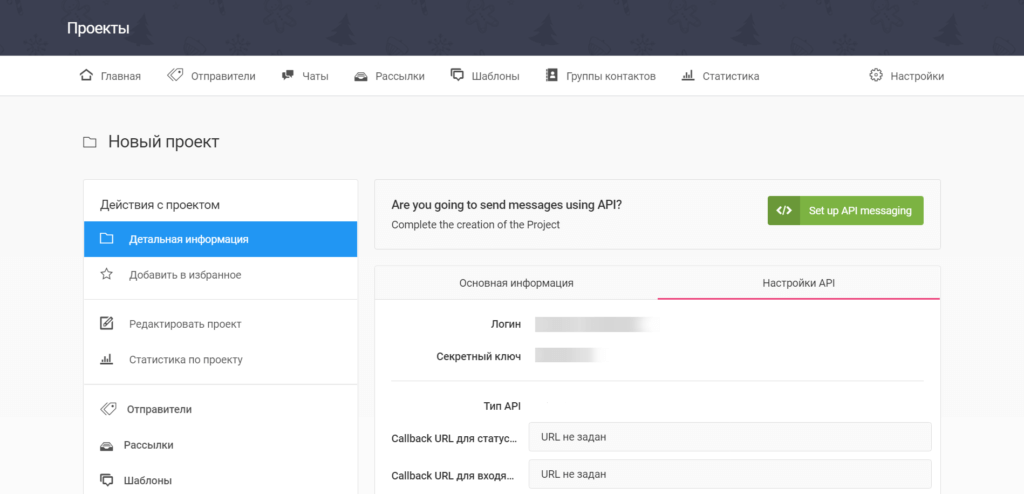
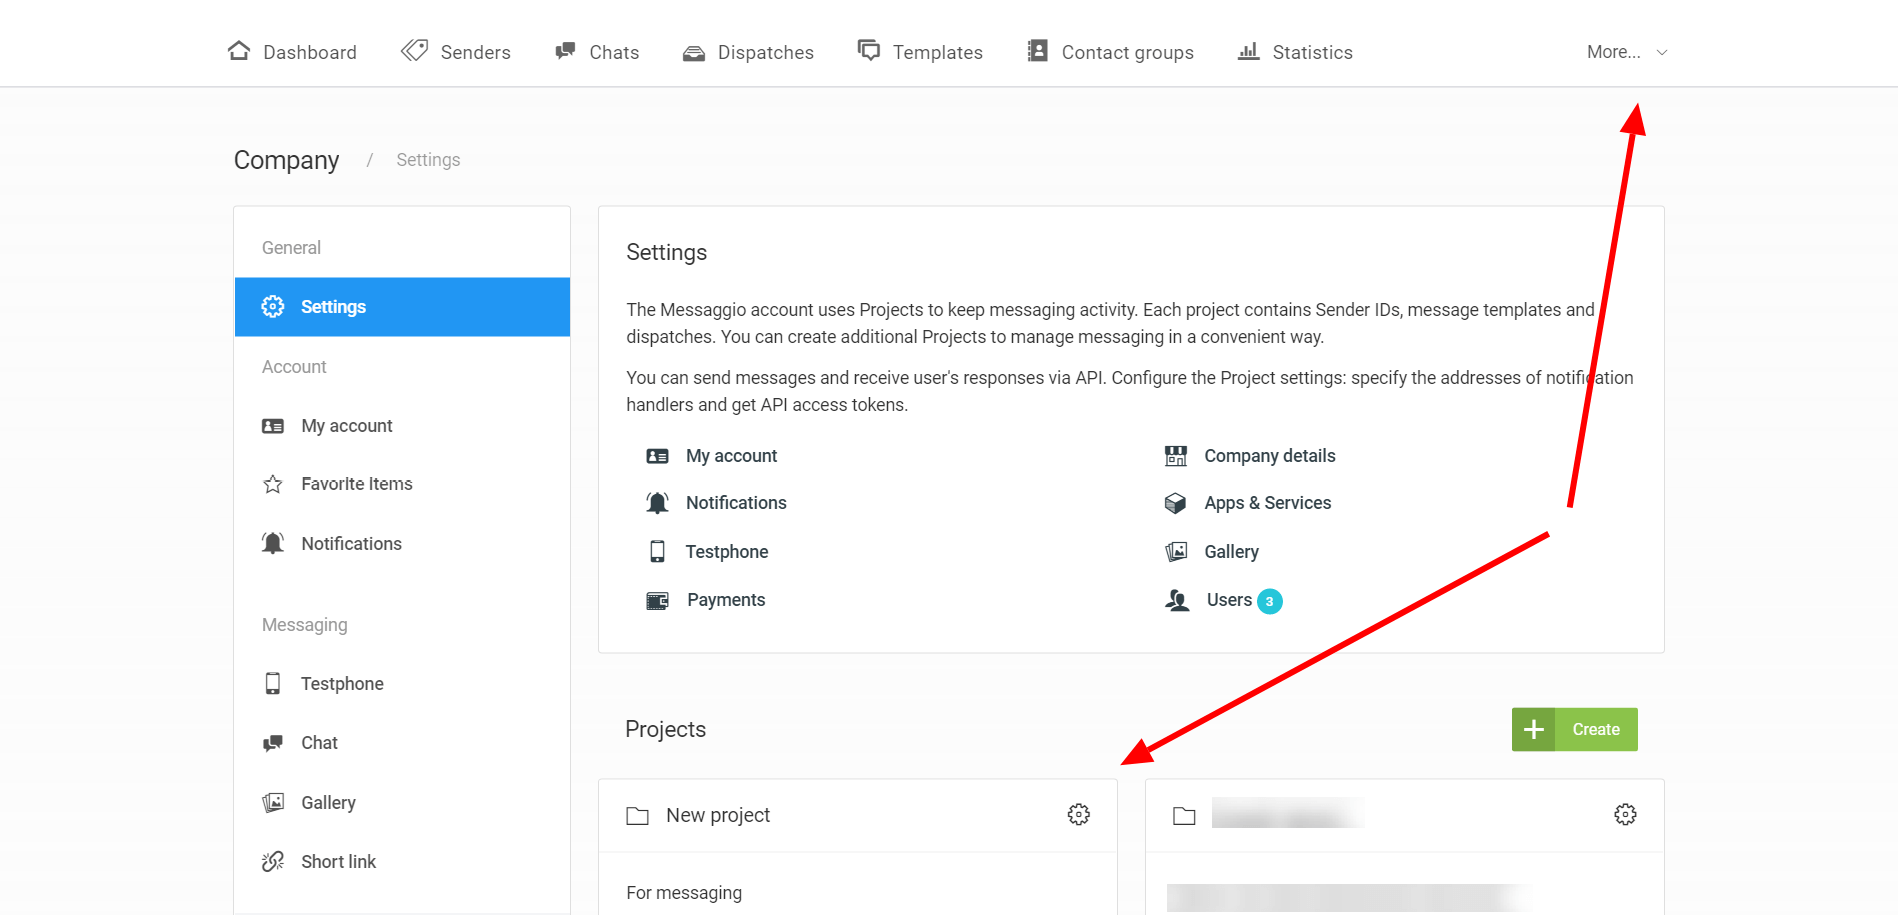
Firmao: Log into your account, click in to the button on the right corner (with letter A — admin), click “company settings”. On the left you’ll have different categories — click on Integrations. On the top click on “API”, then click “Enable API”. Here you’ll have API login and Password — that’s the credentials needed for you to sign in Zapier. You can set the rest simply via Zapier.

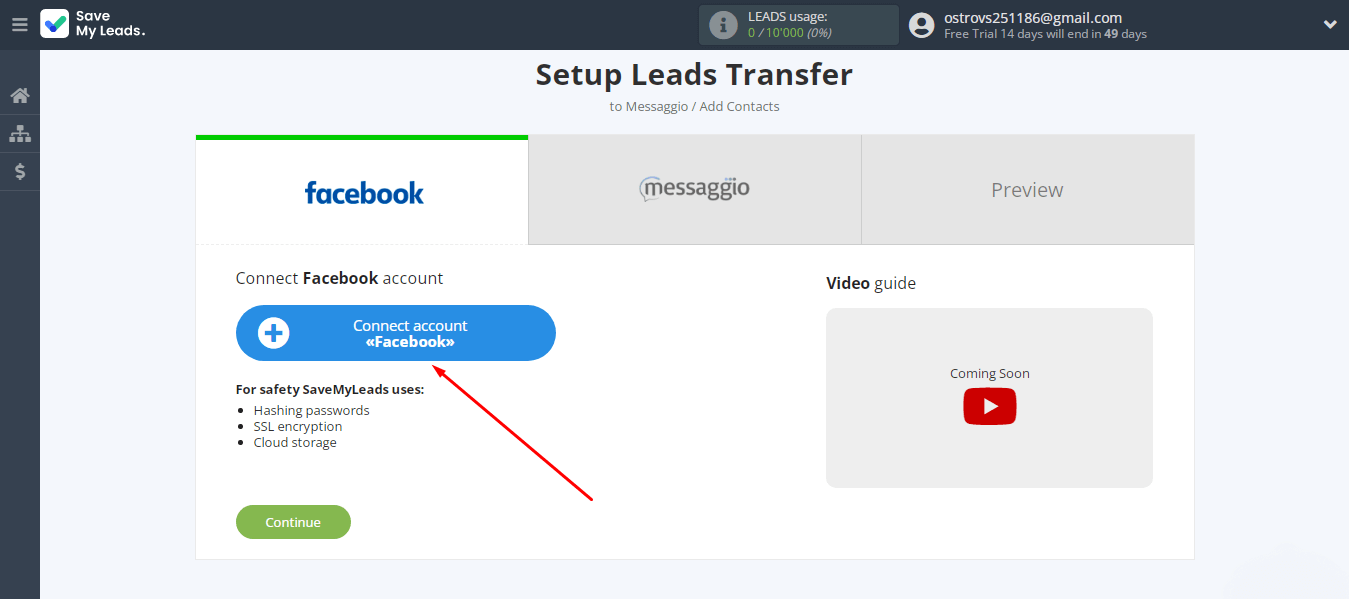
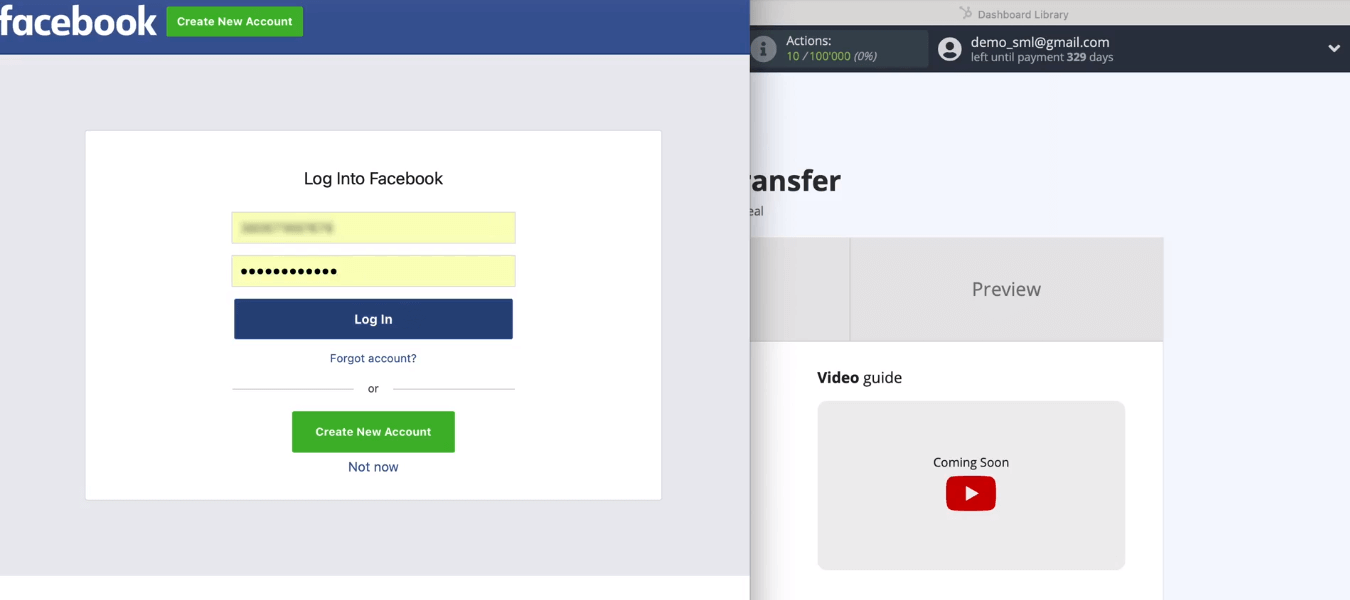
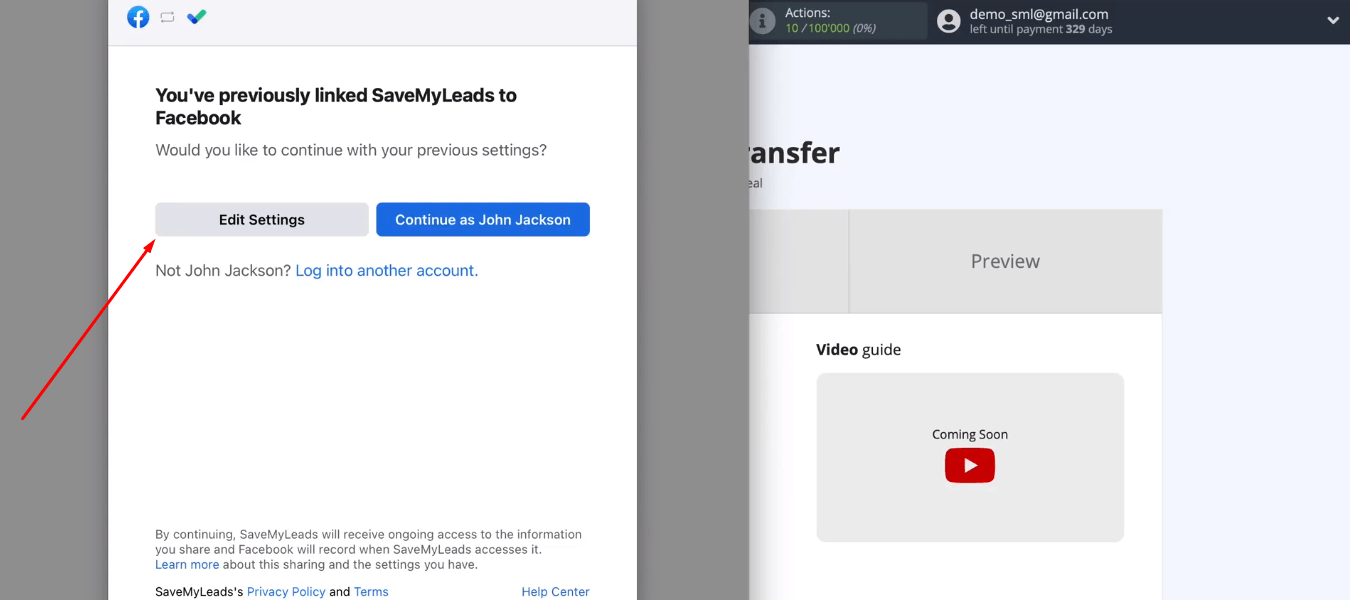
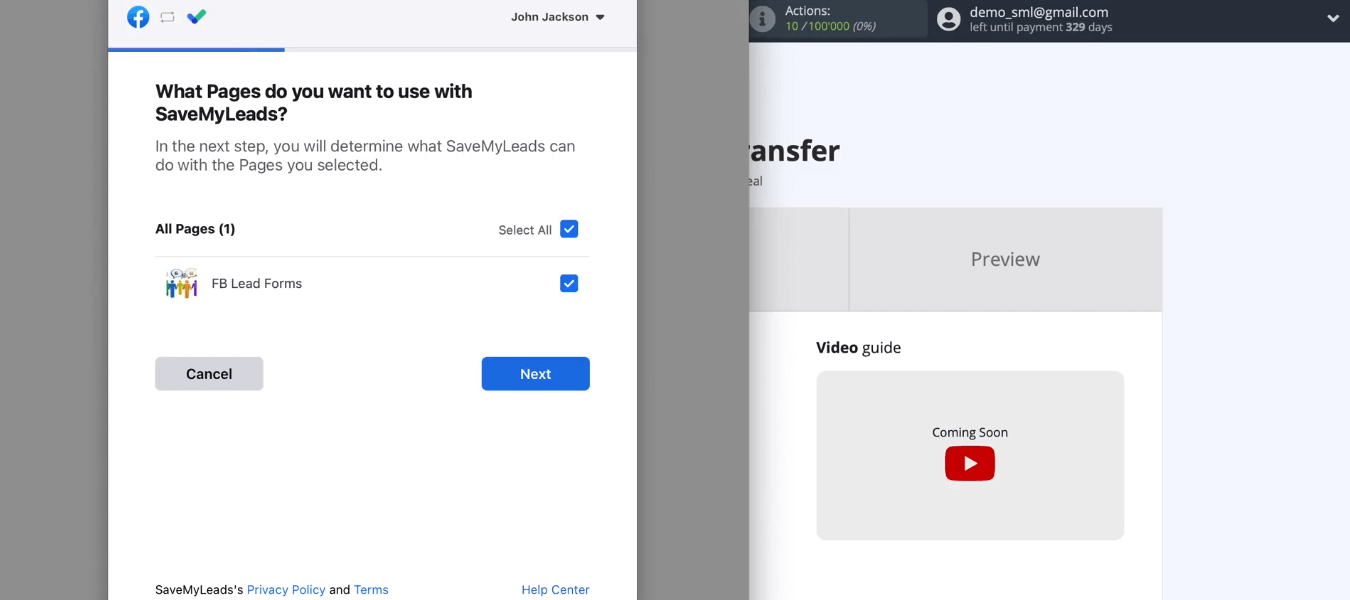
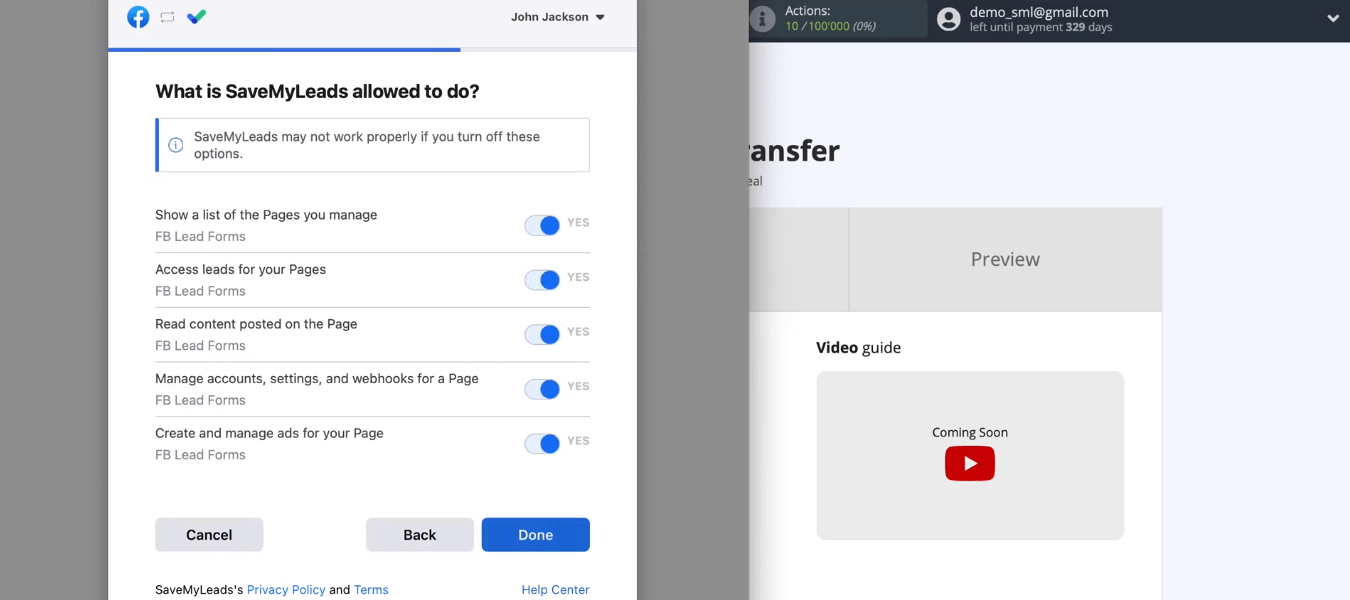
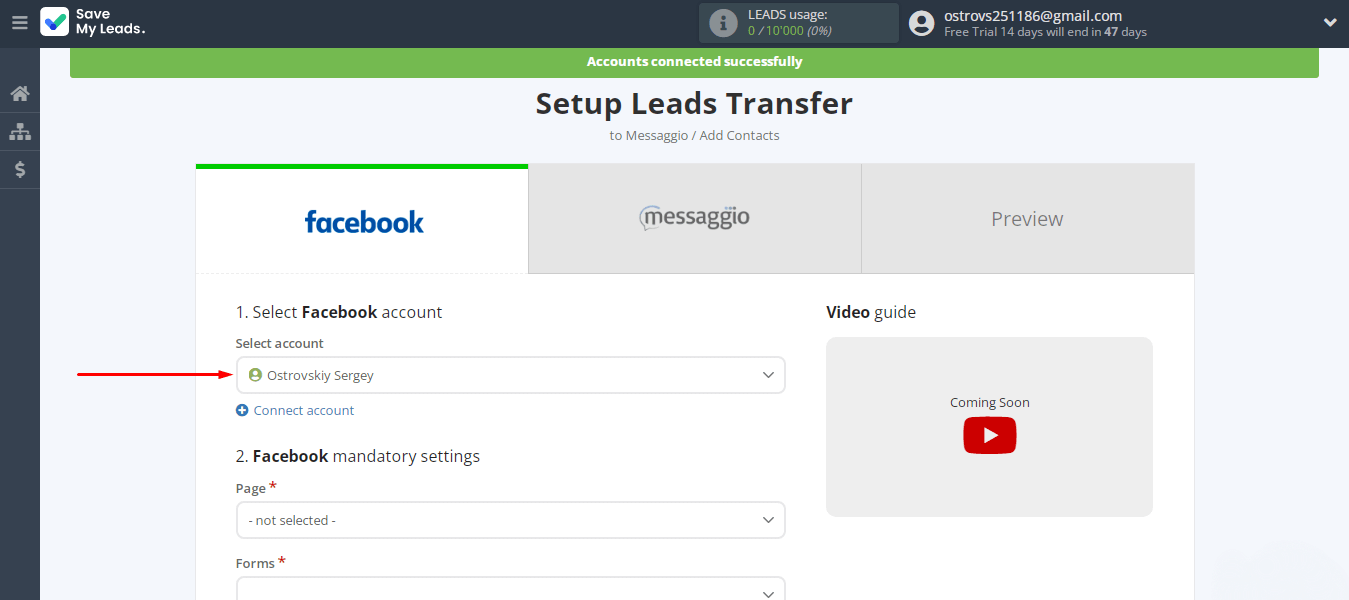
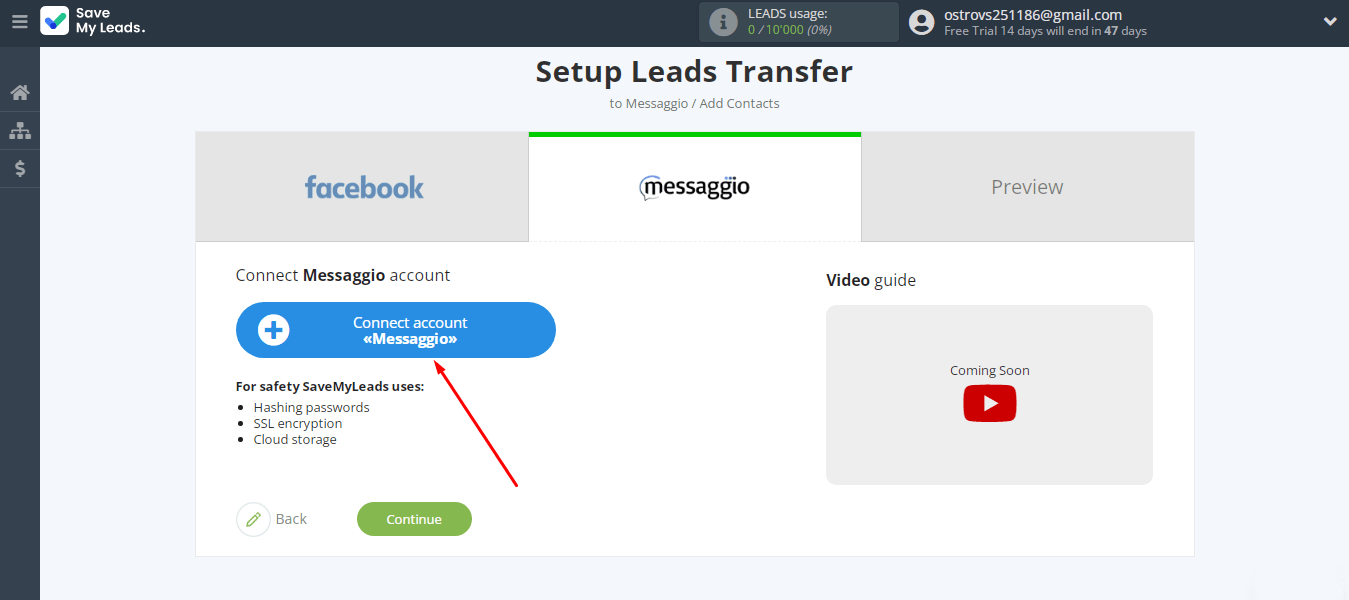
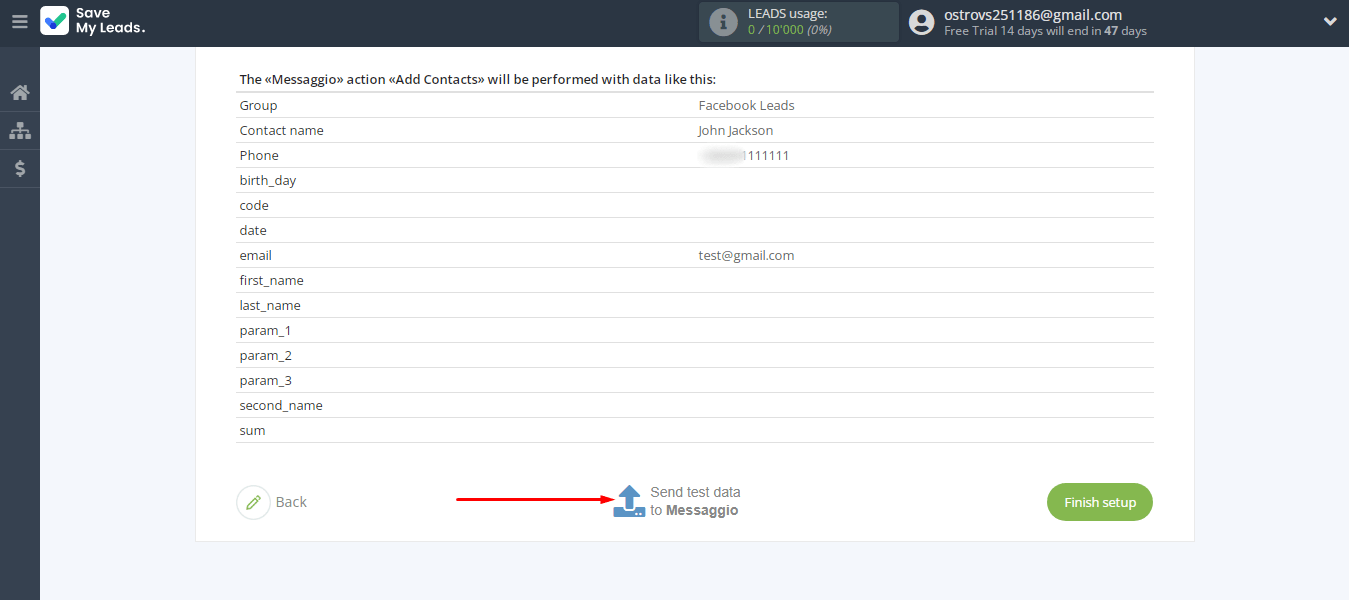
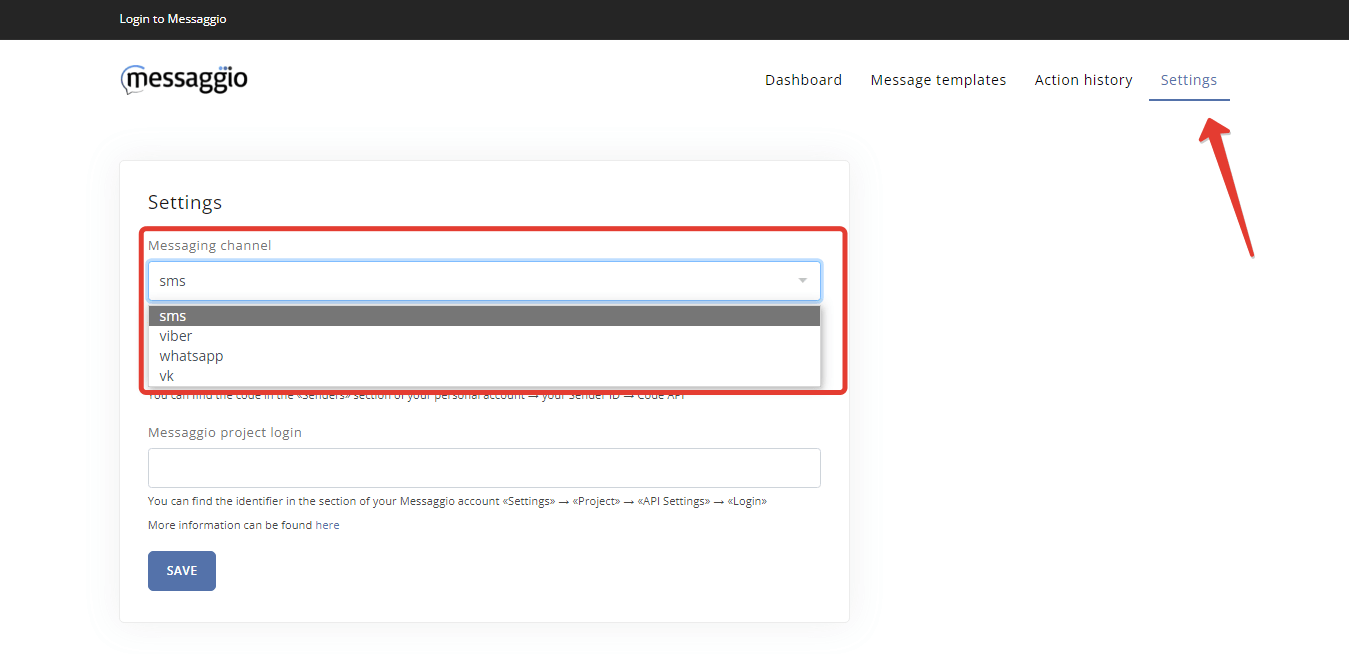
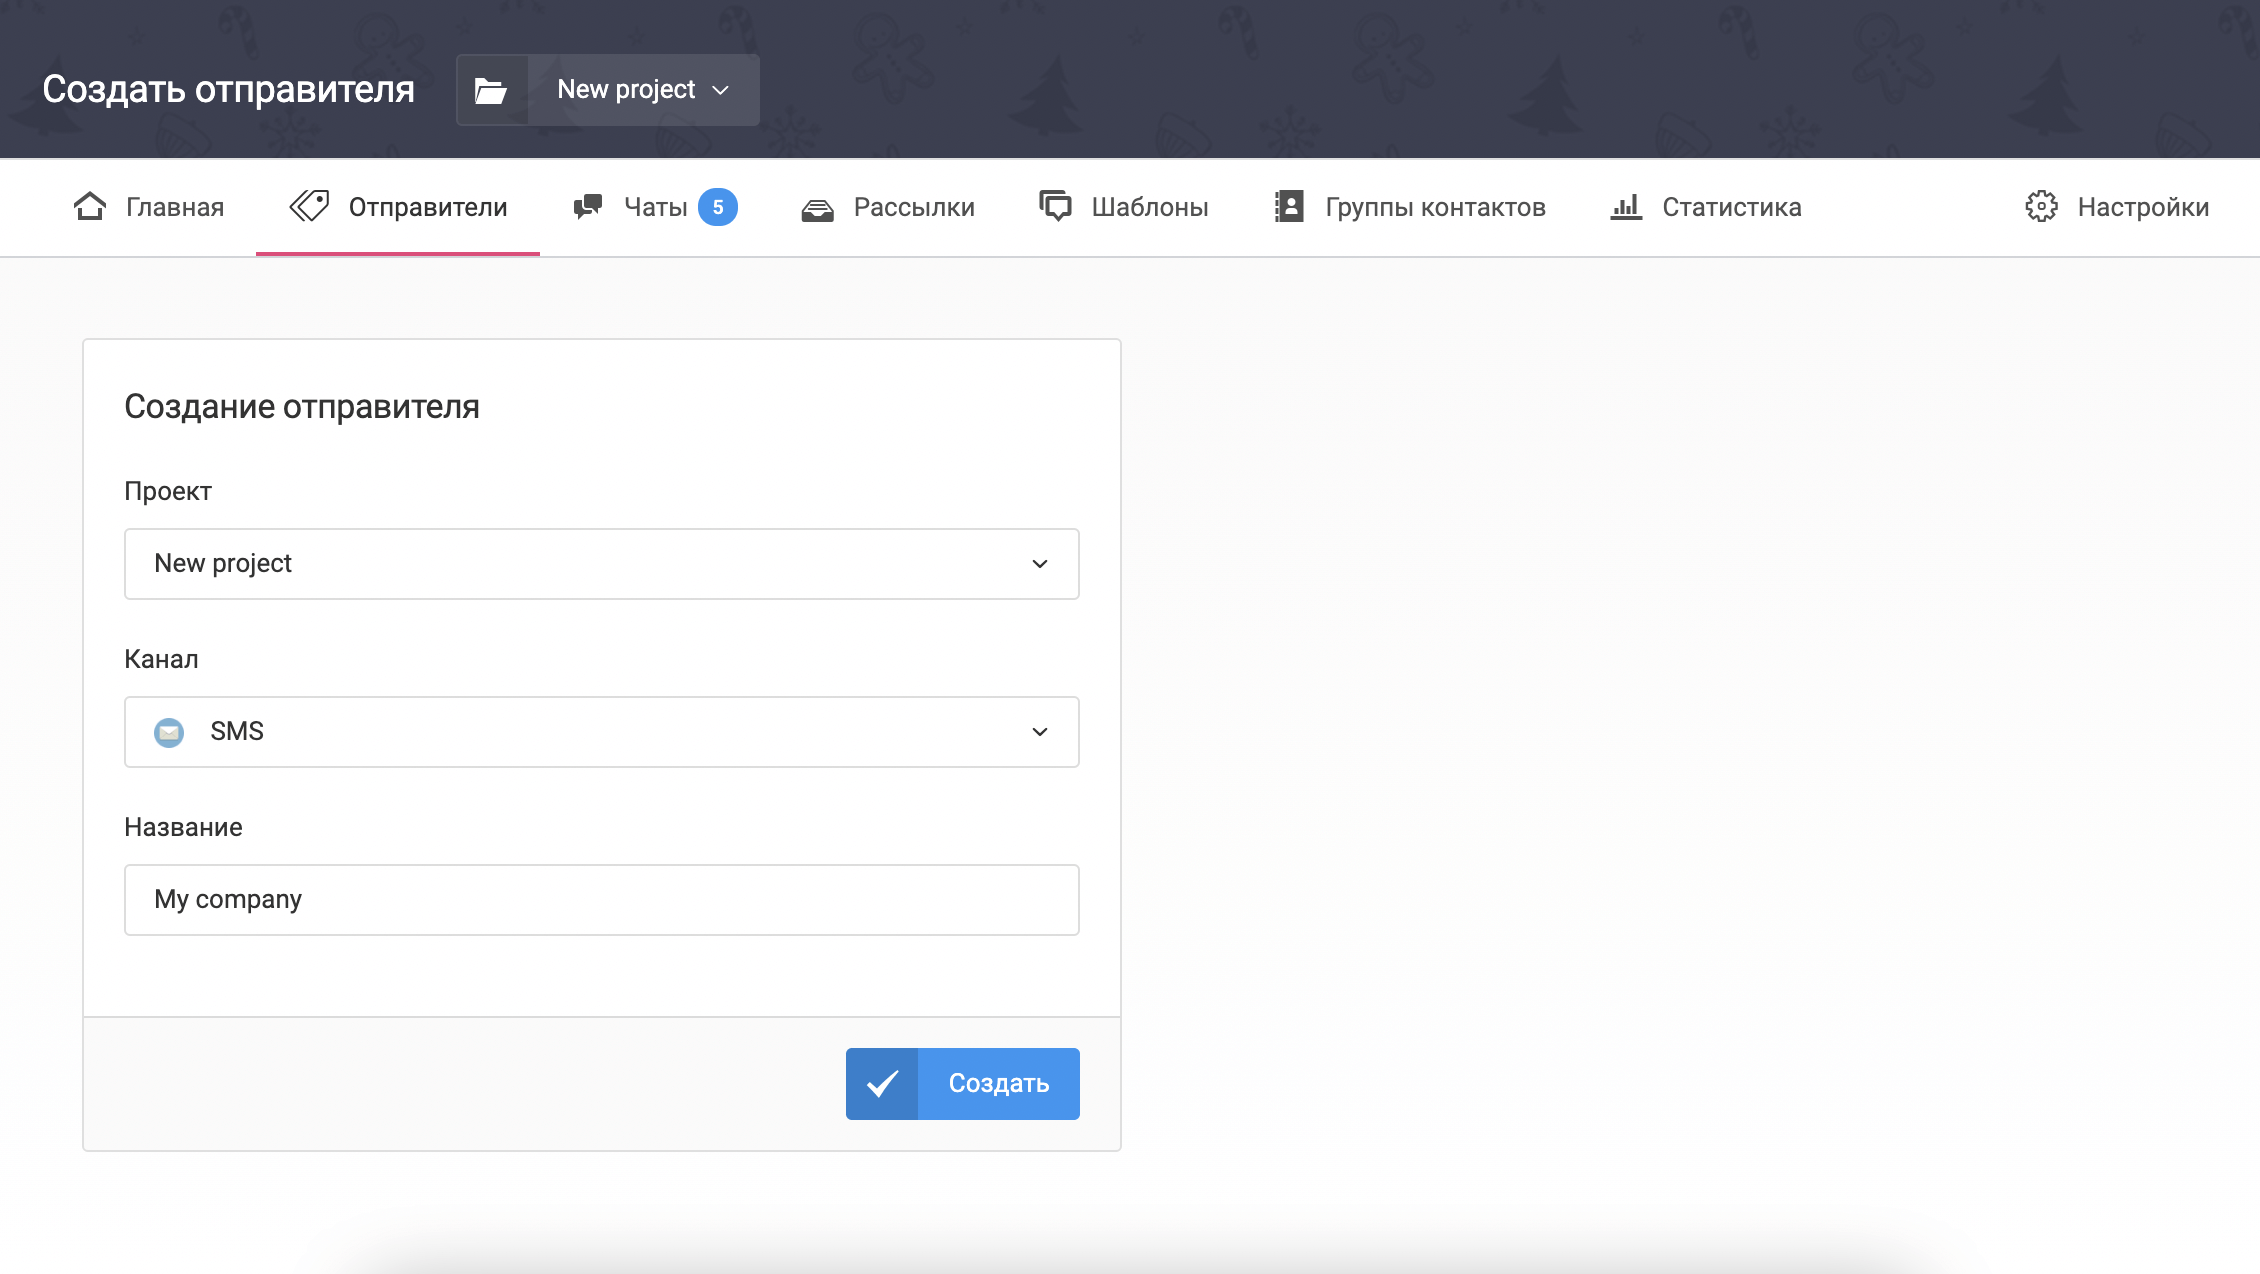
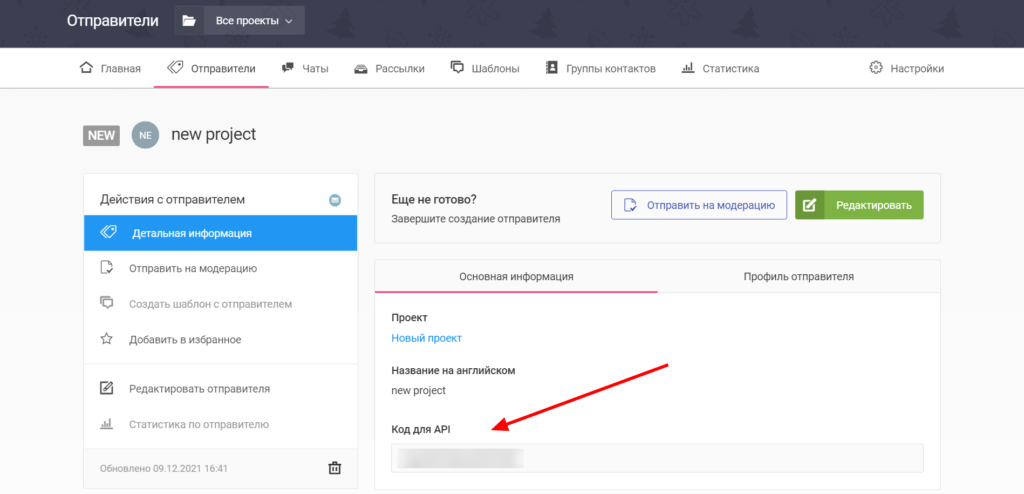
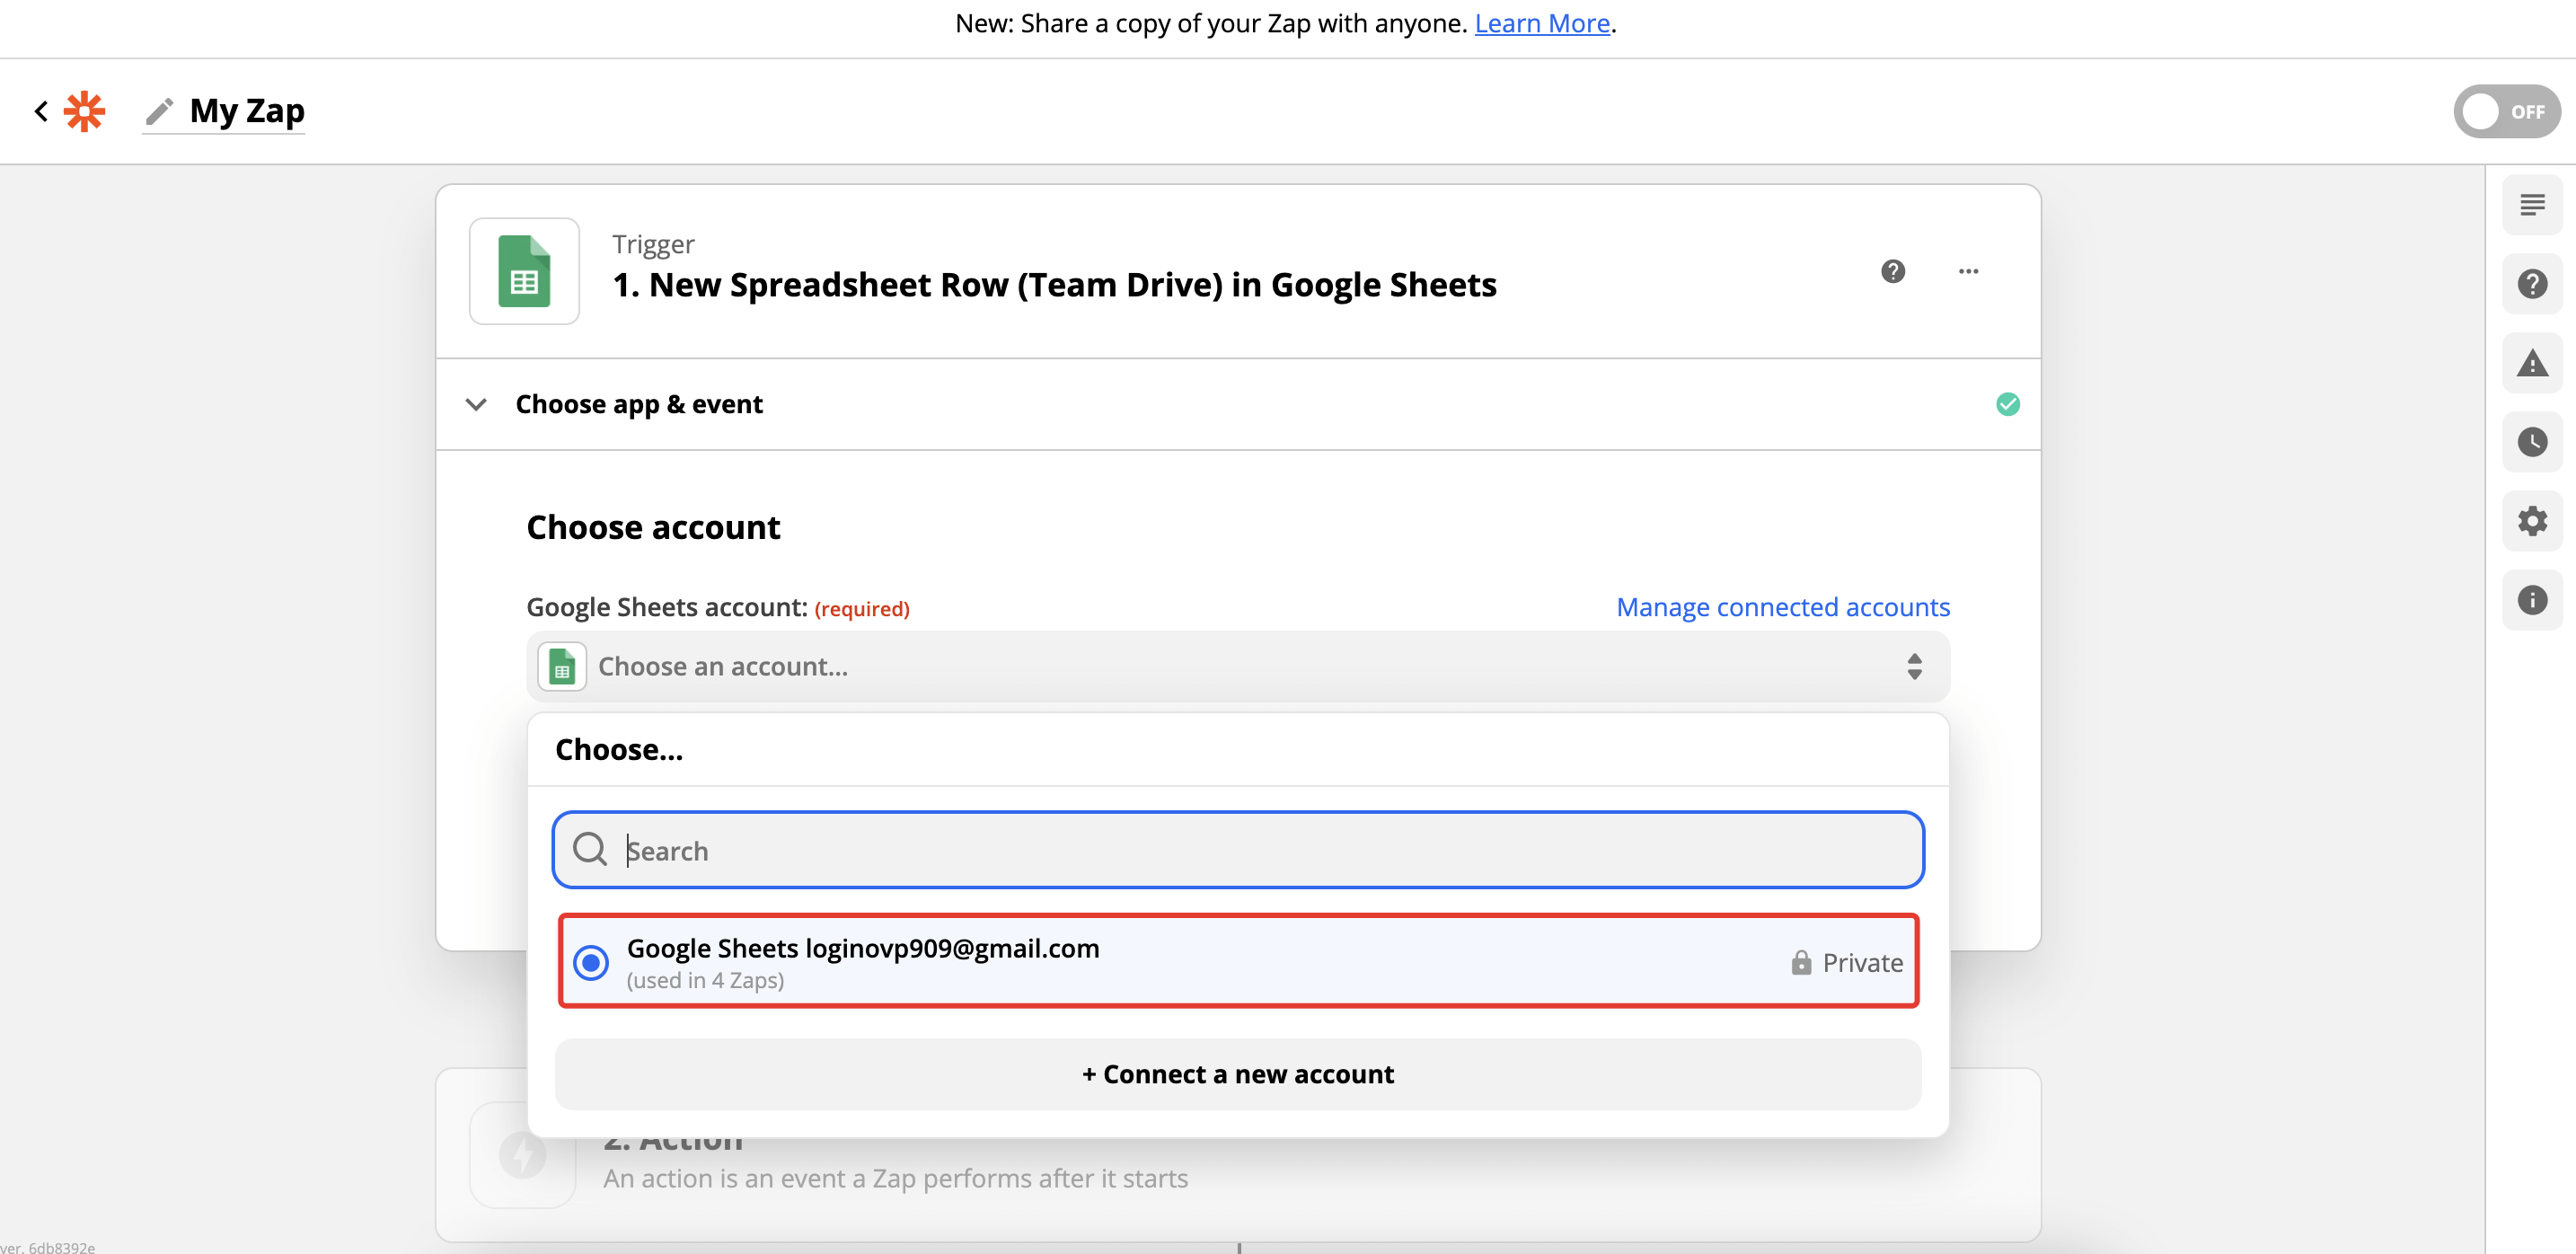
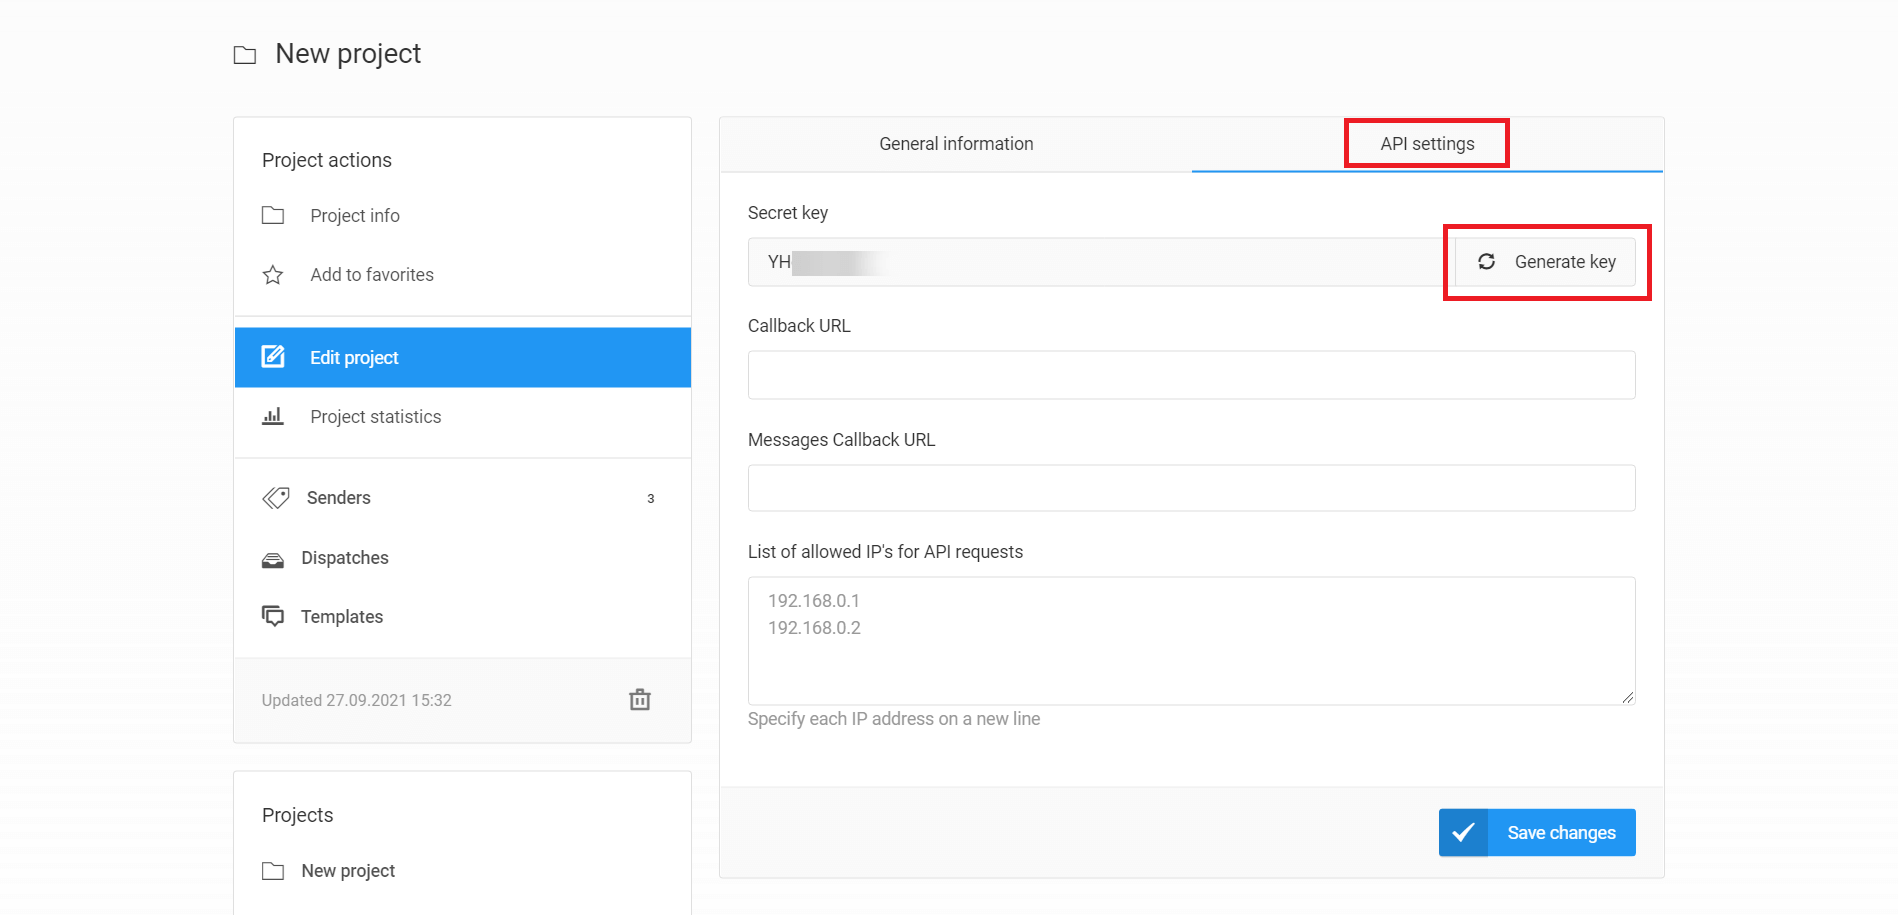
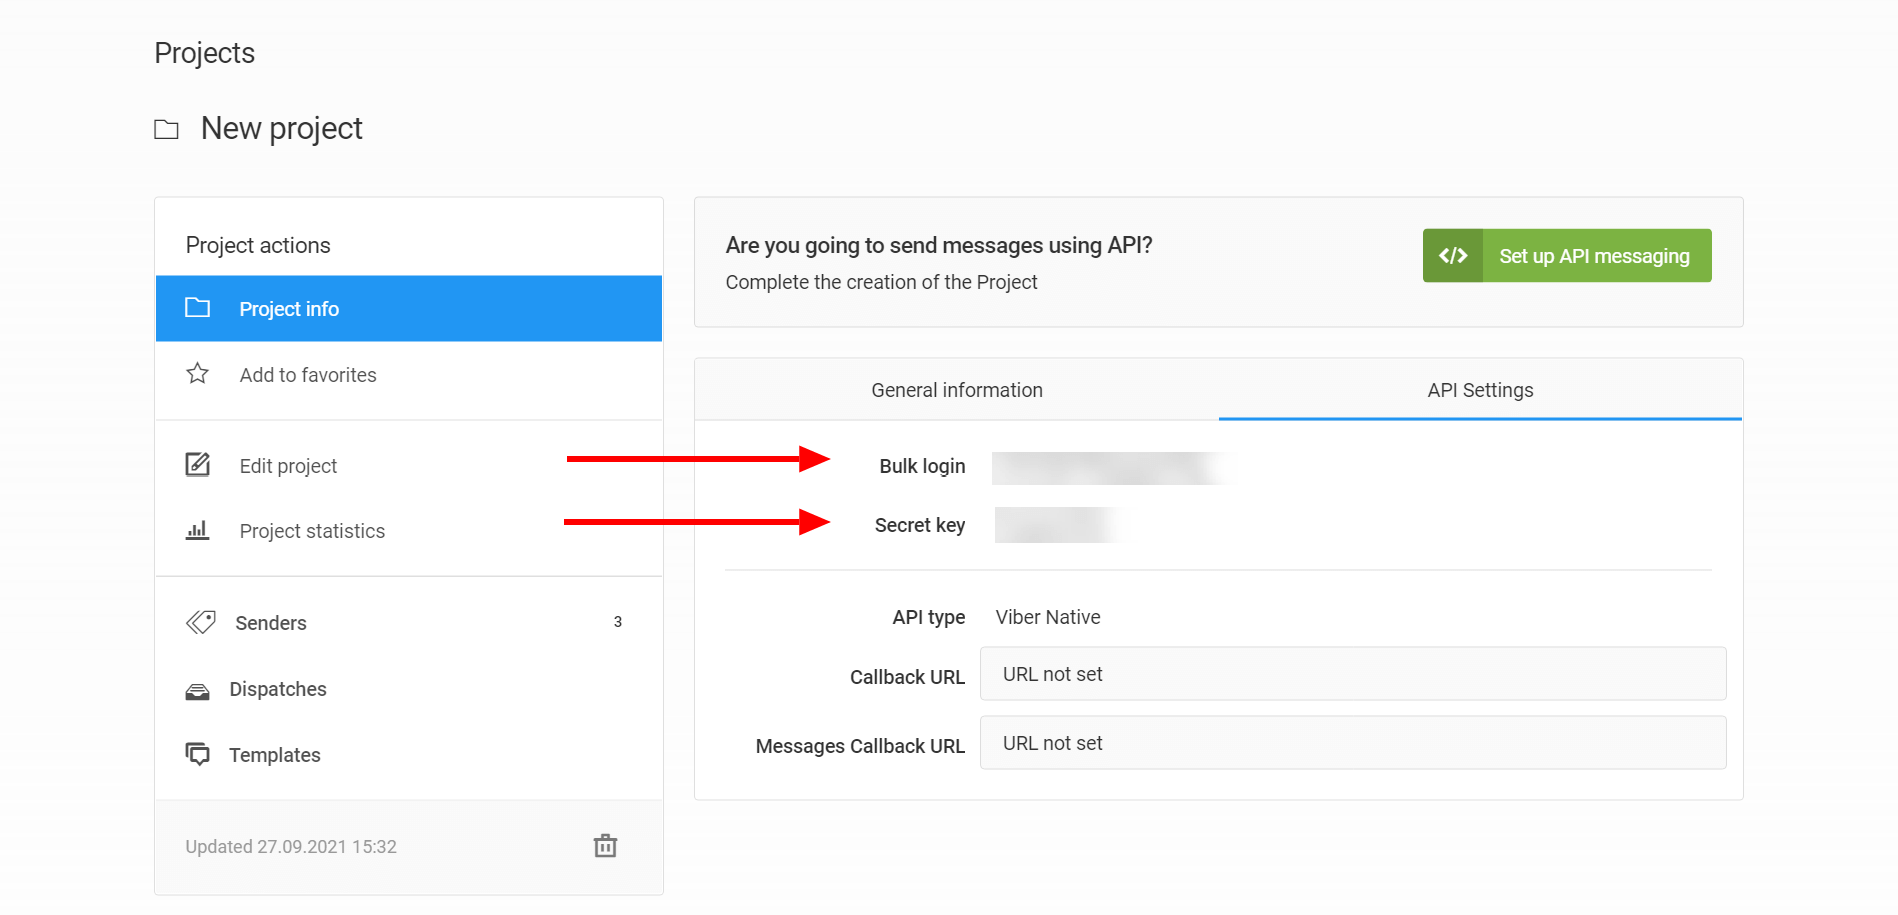
Messaggio: Select the Messaggio account you want to transfer data to. To do this, you have to click + Create a new account in the Choose account field in the drop-down list. To set up subsequent connections with this app, you will not need to link an account again as it will be saved in the drop-down list.

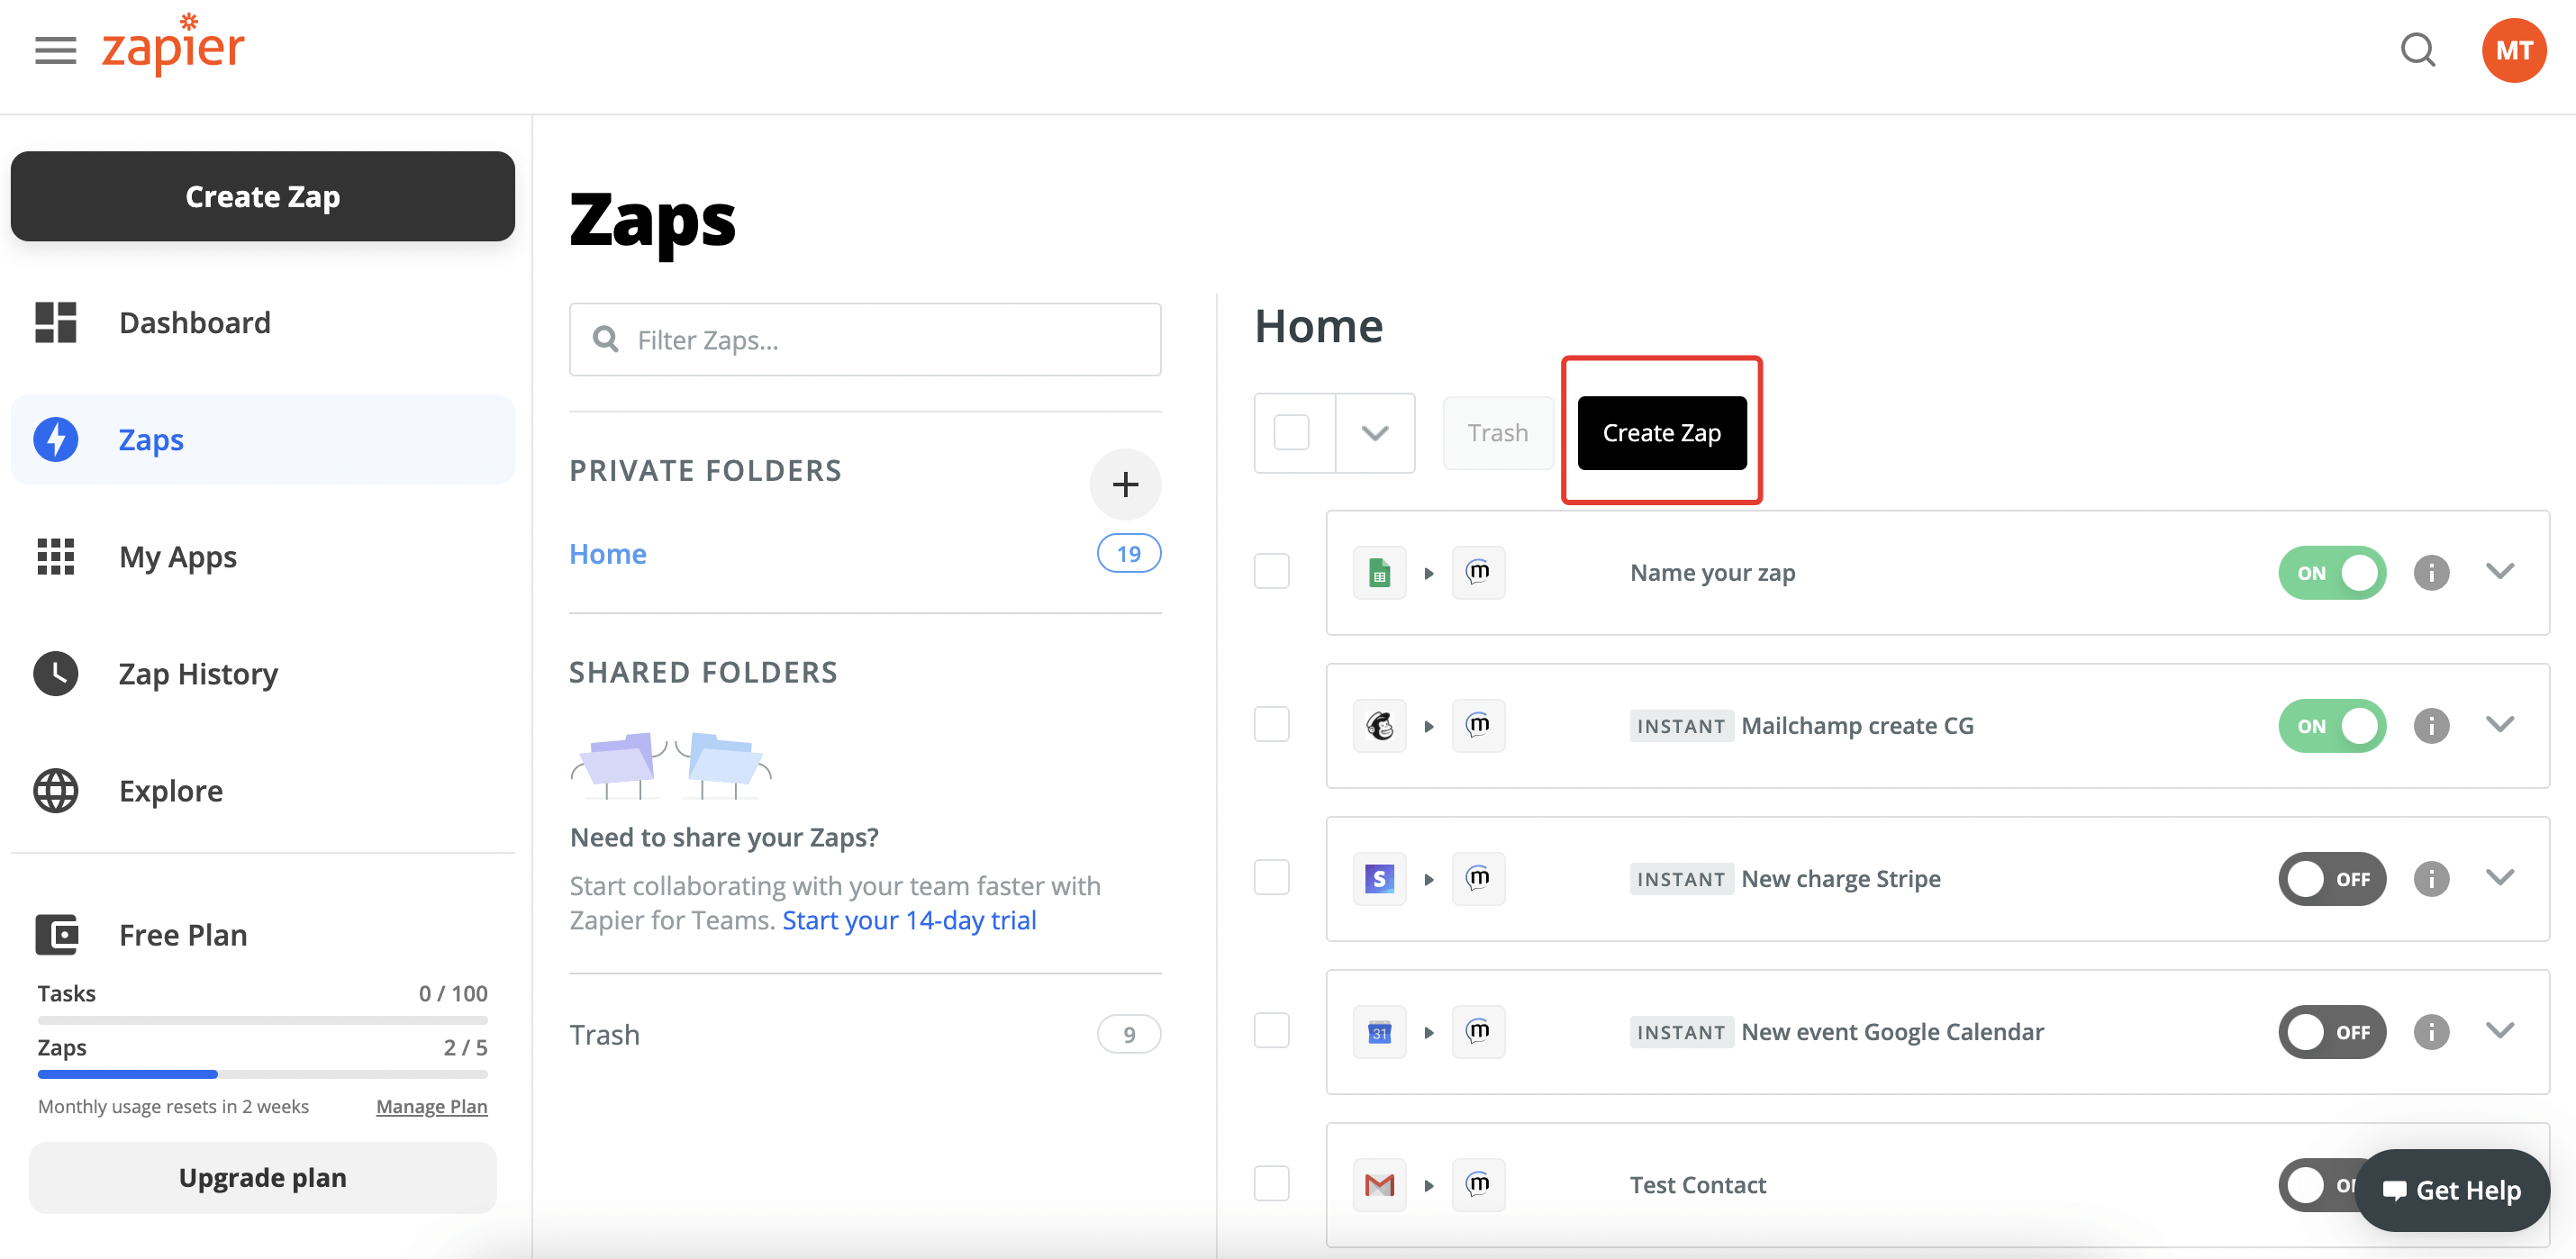
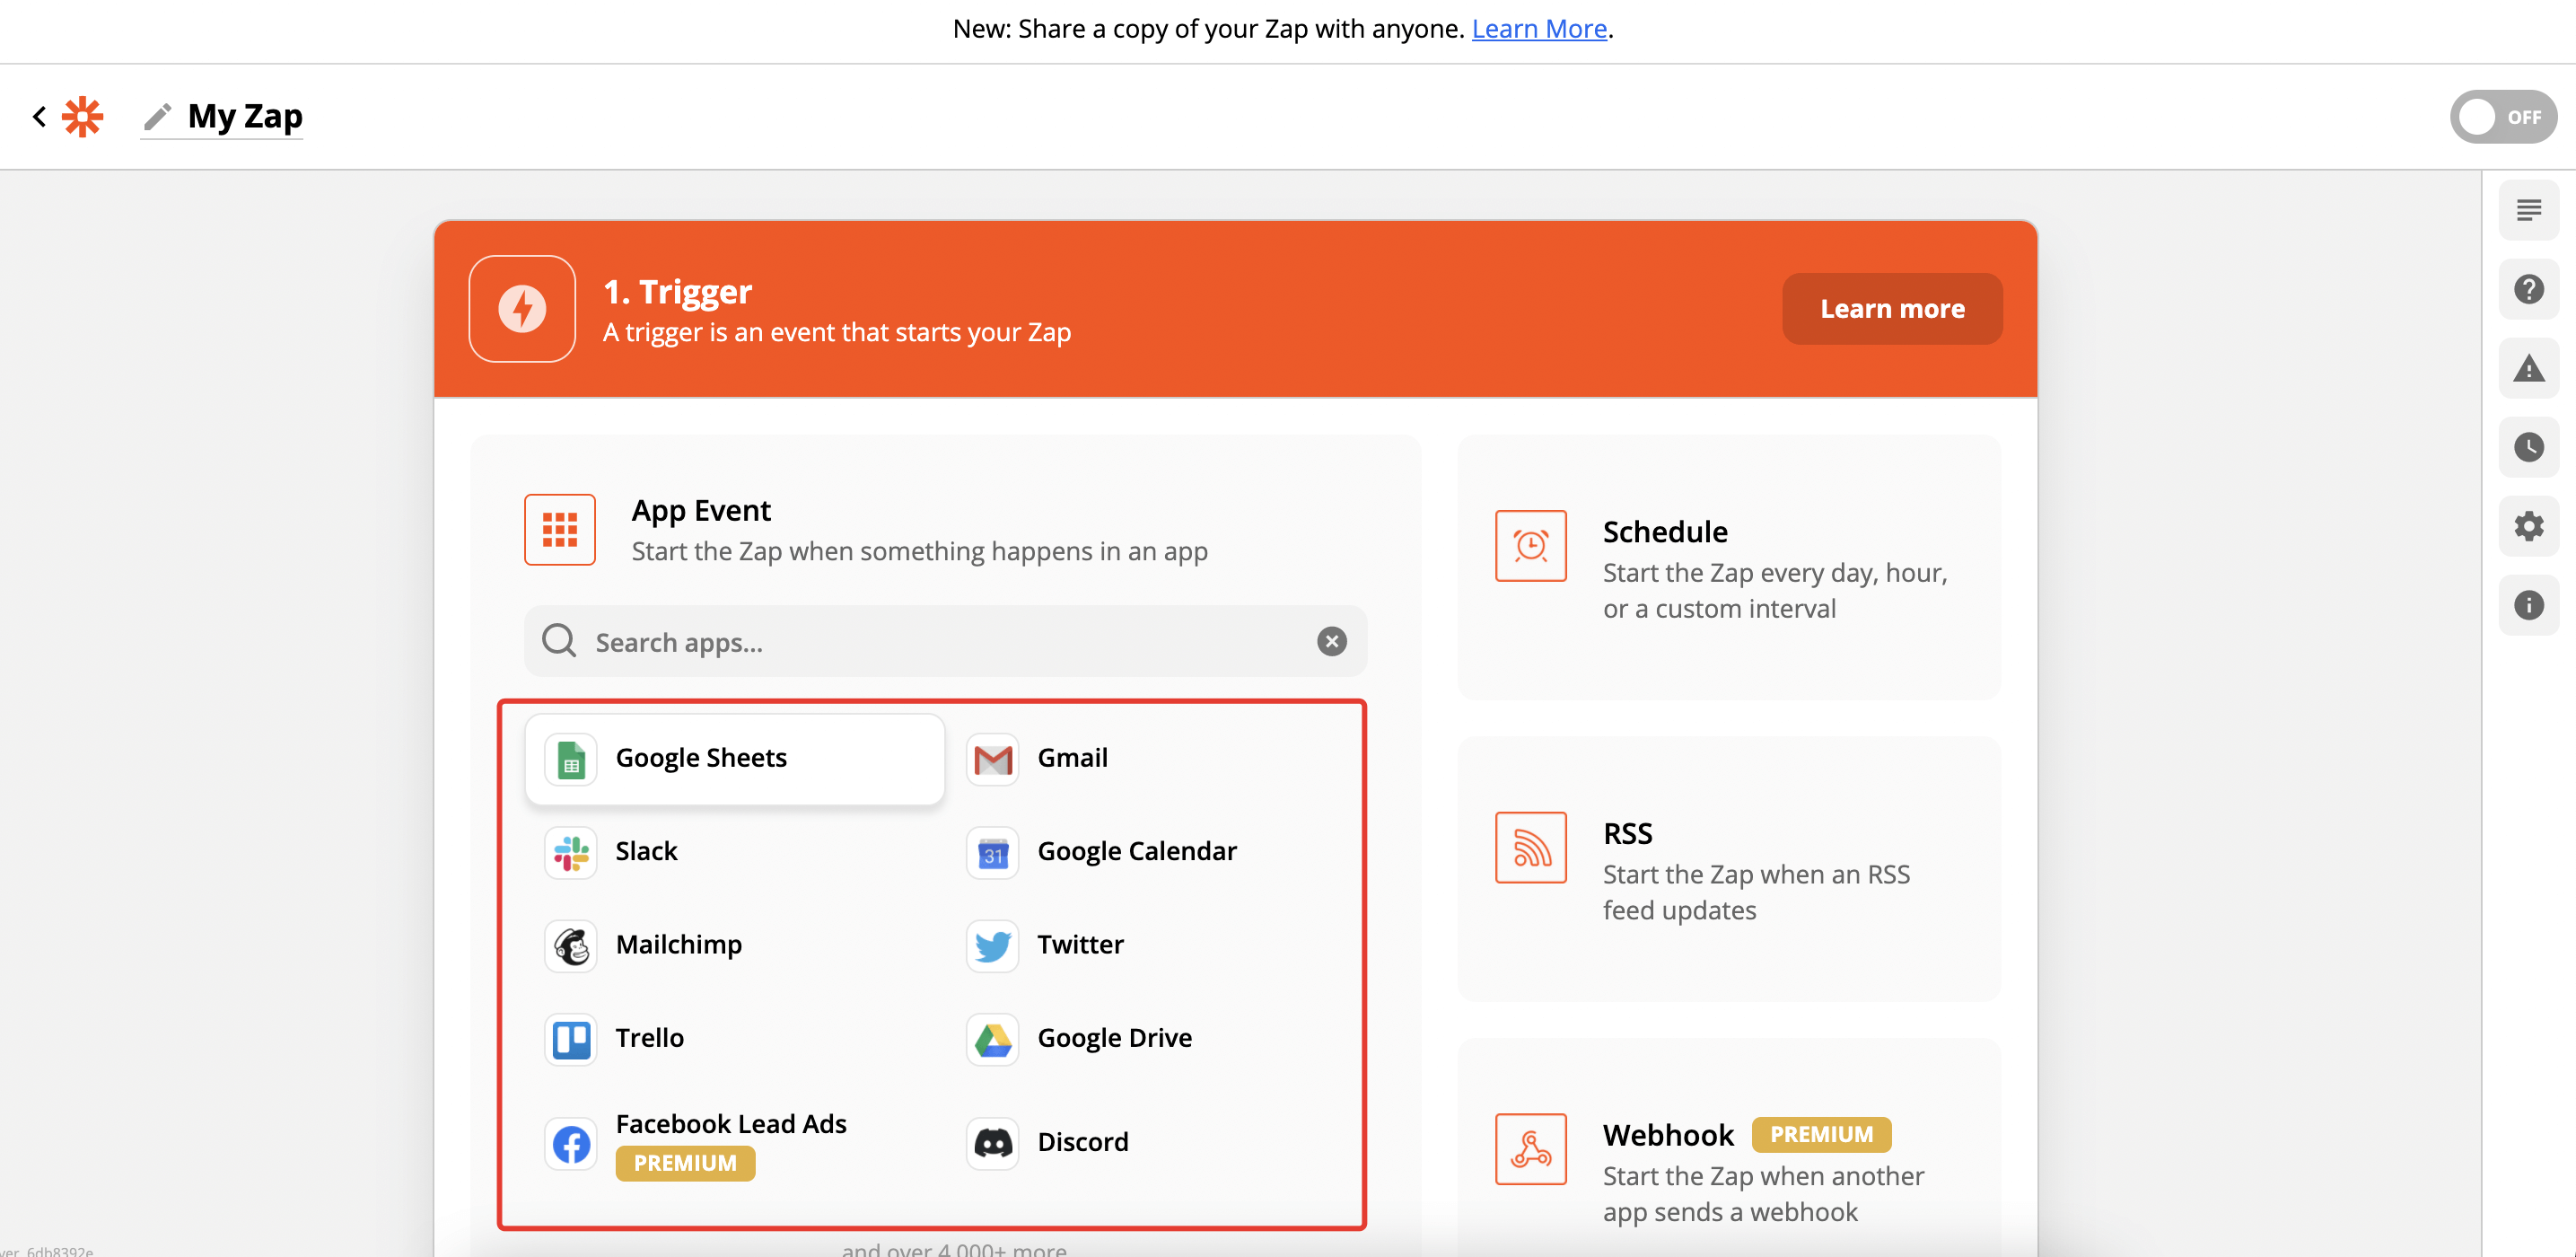
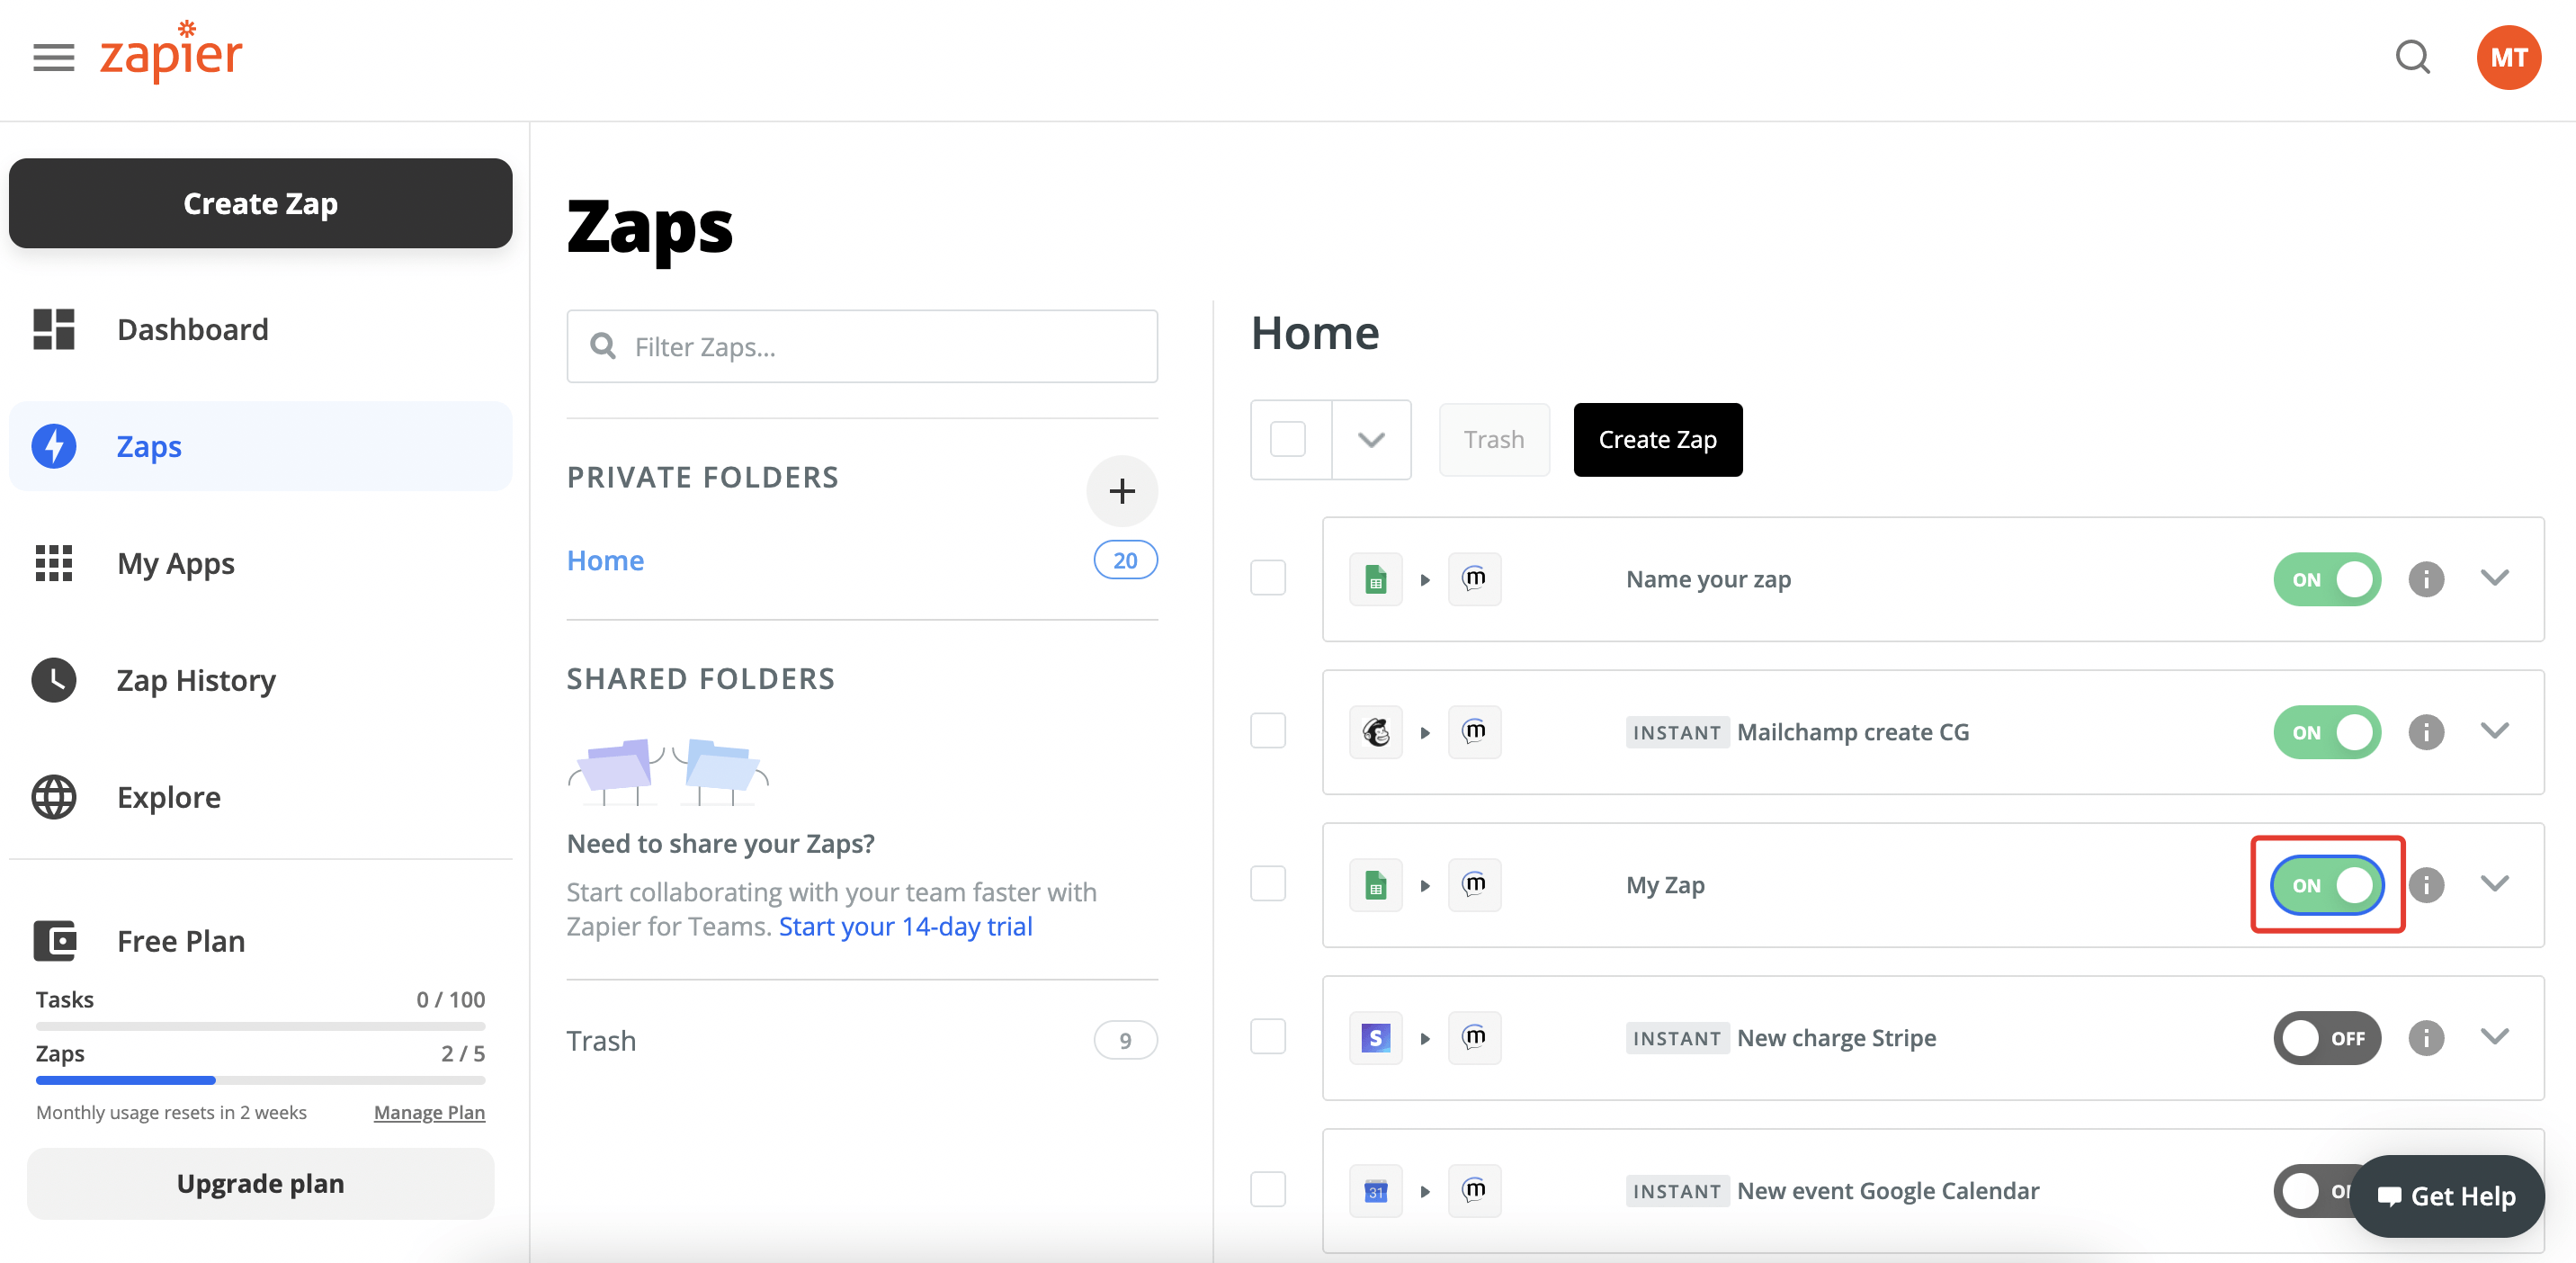
How to create working Zap:

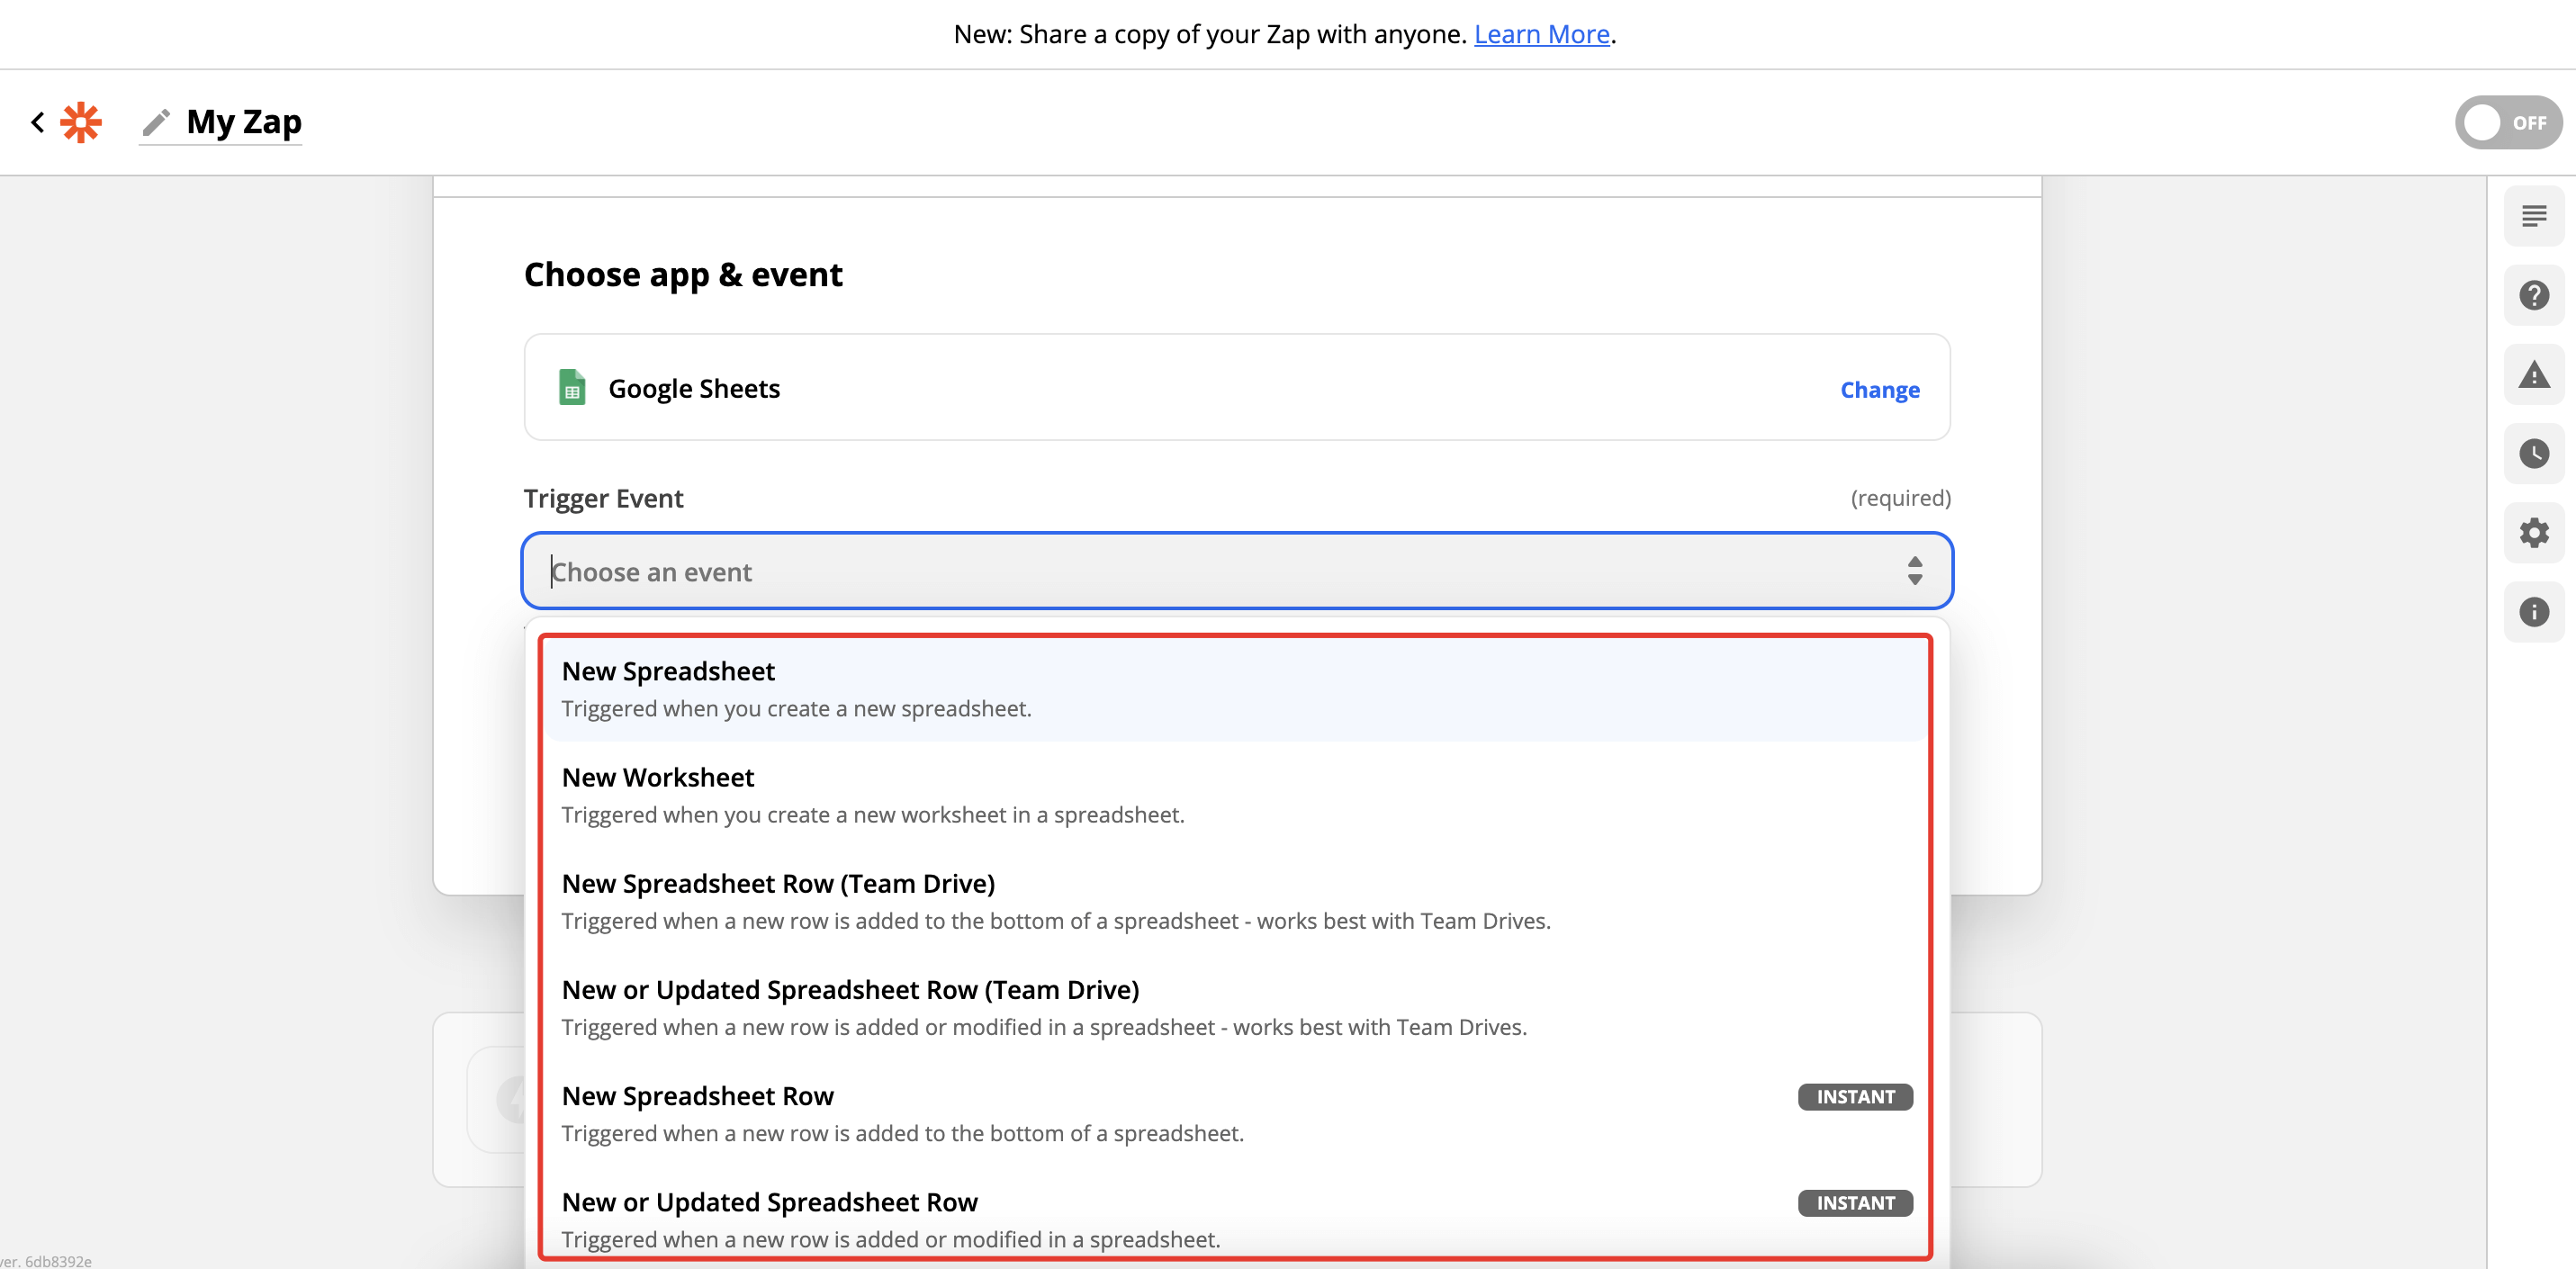
  1. Choose a trigger Firmao — this will be the action that will trigger the automation, for example let’s choose “New Company”.
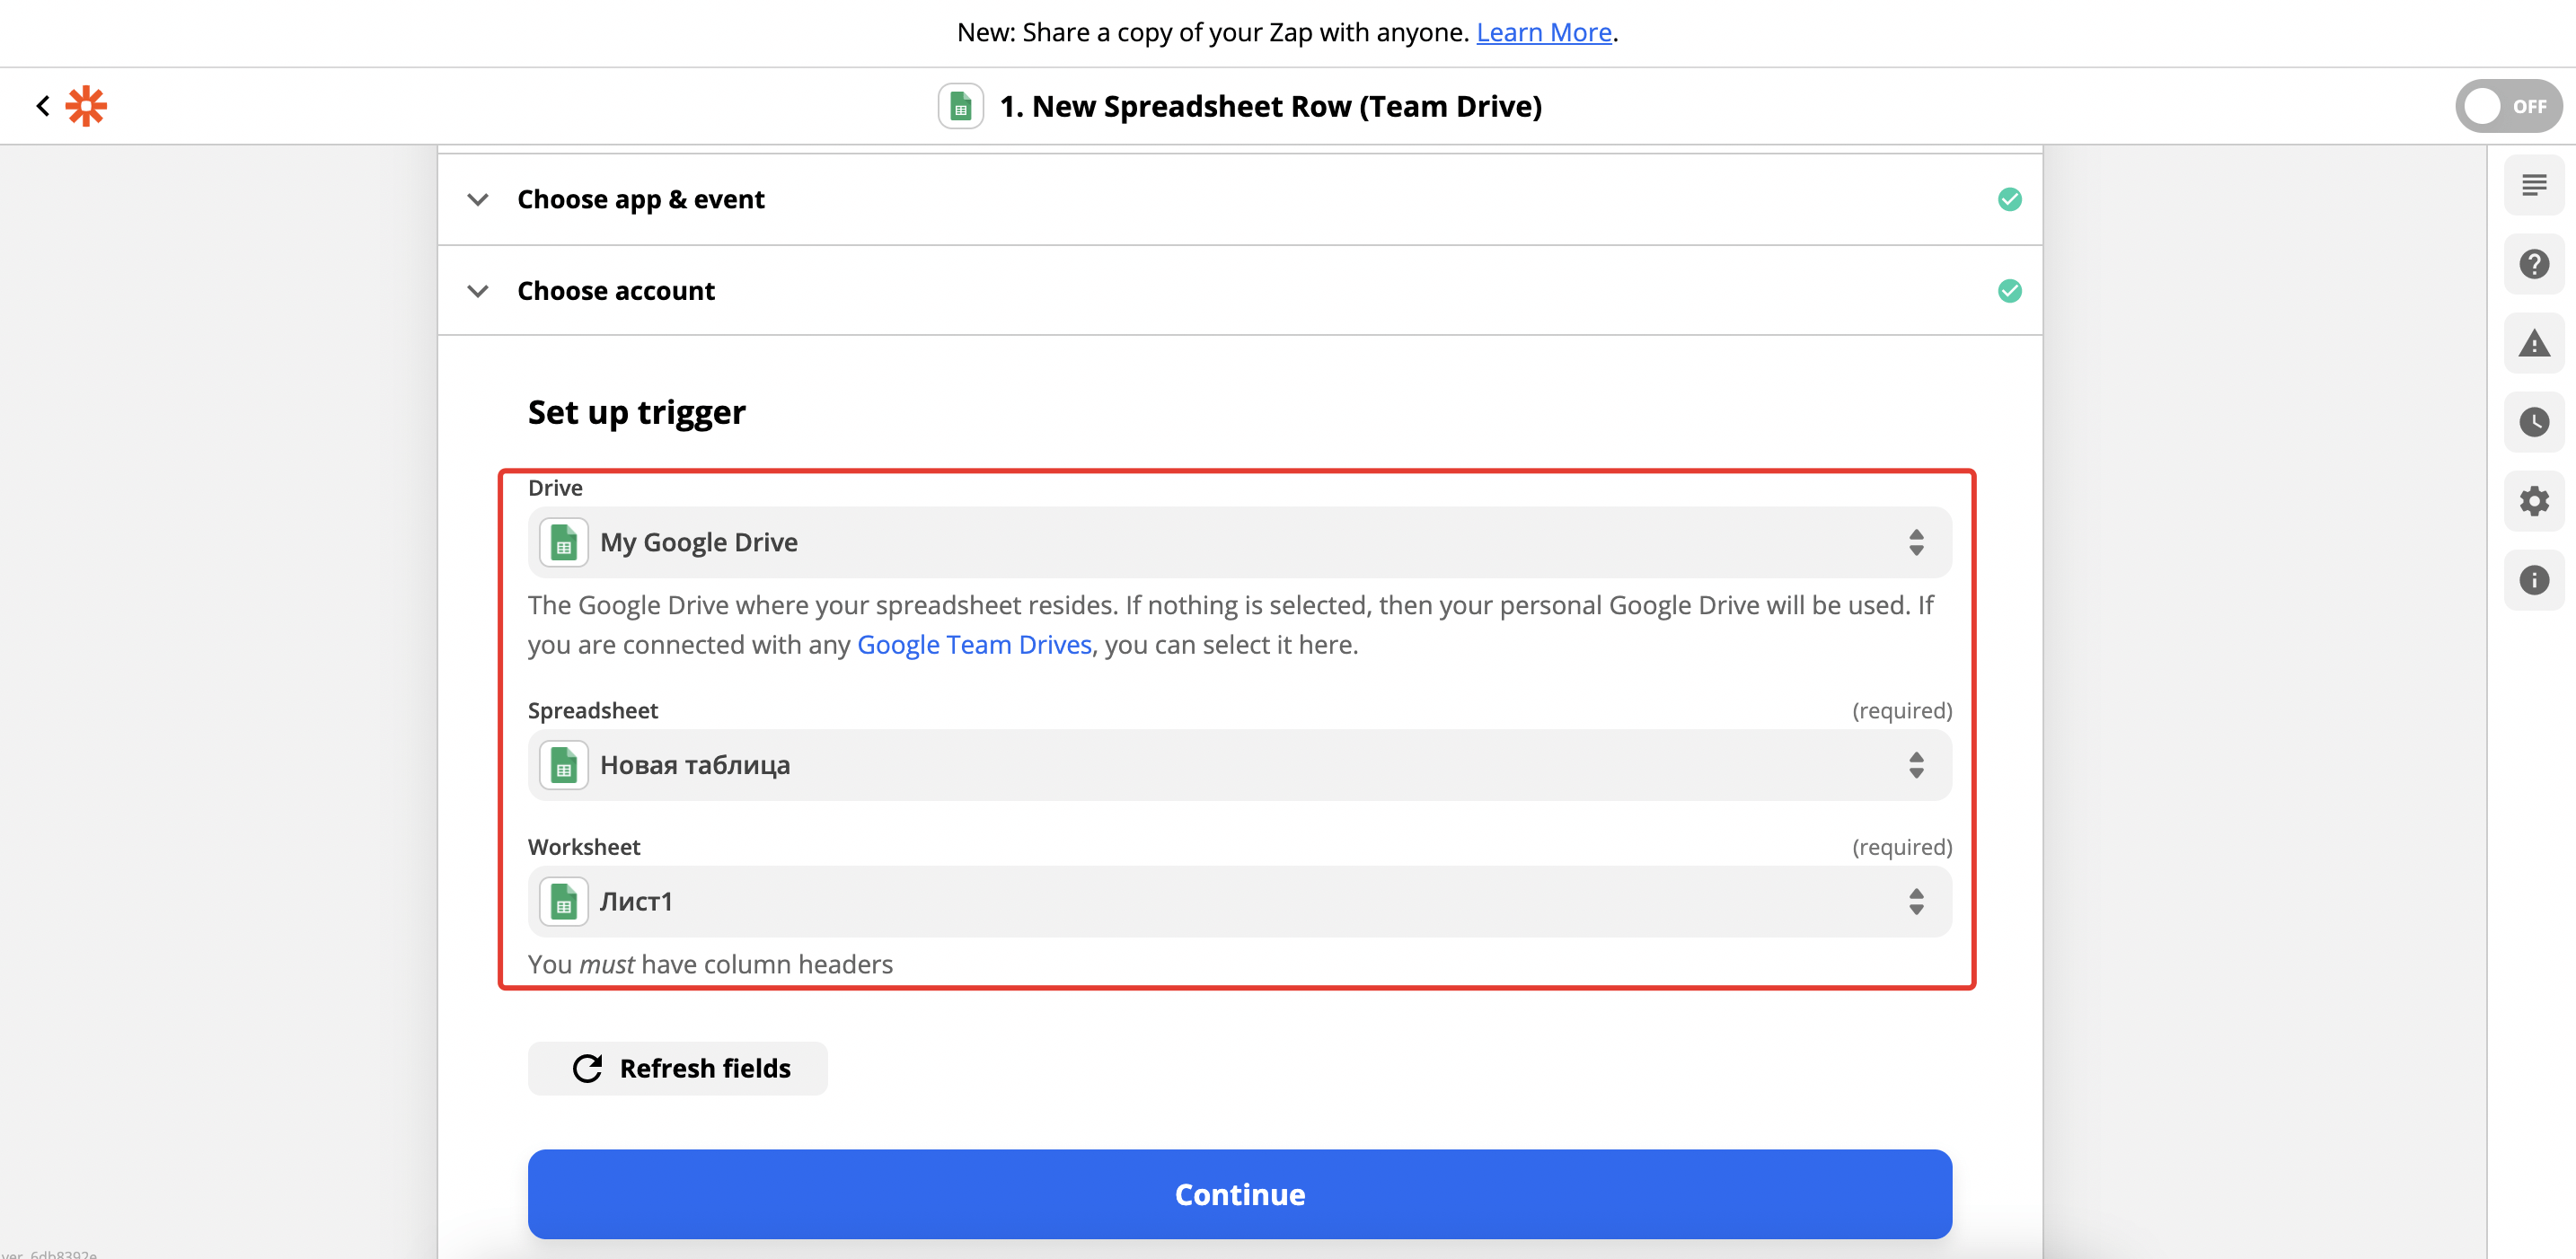
  2. Configure the first steps.
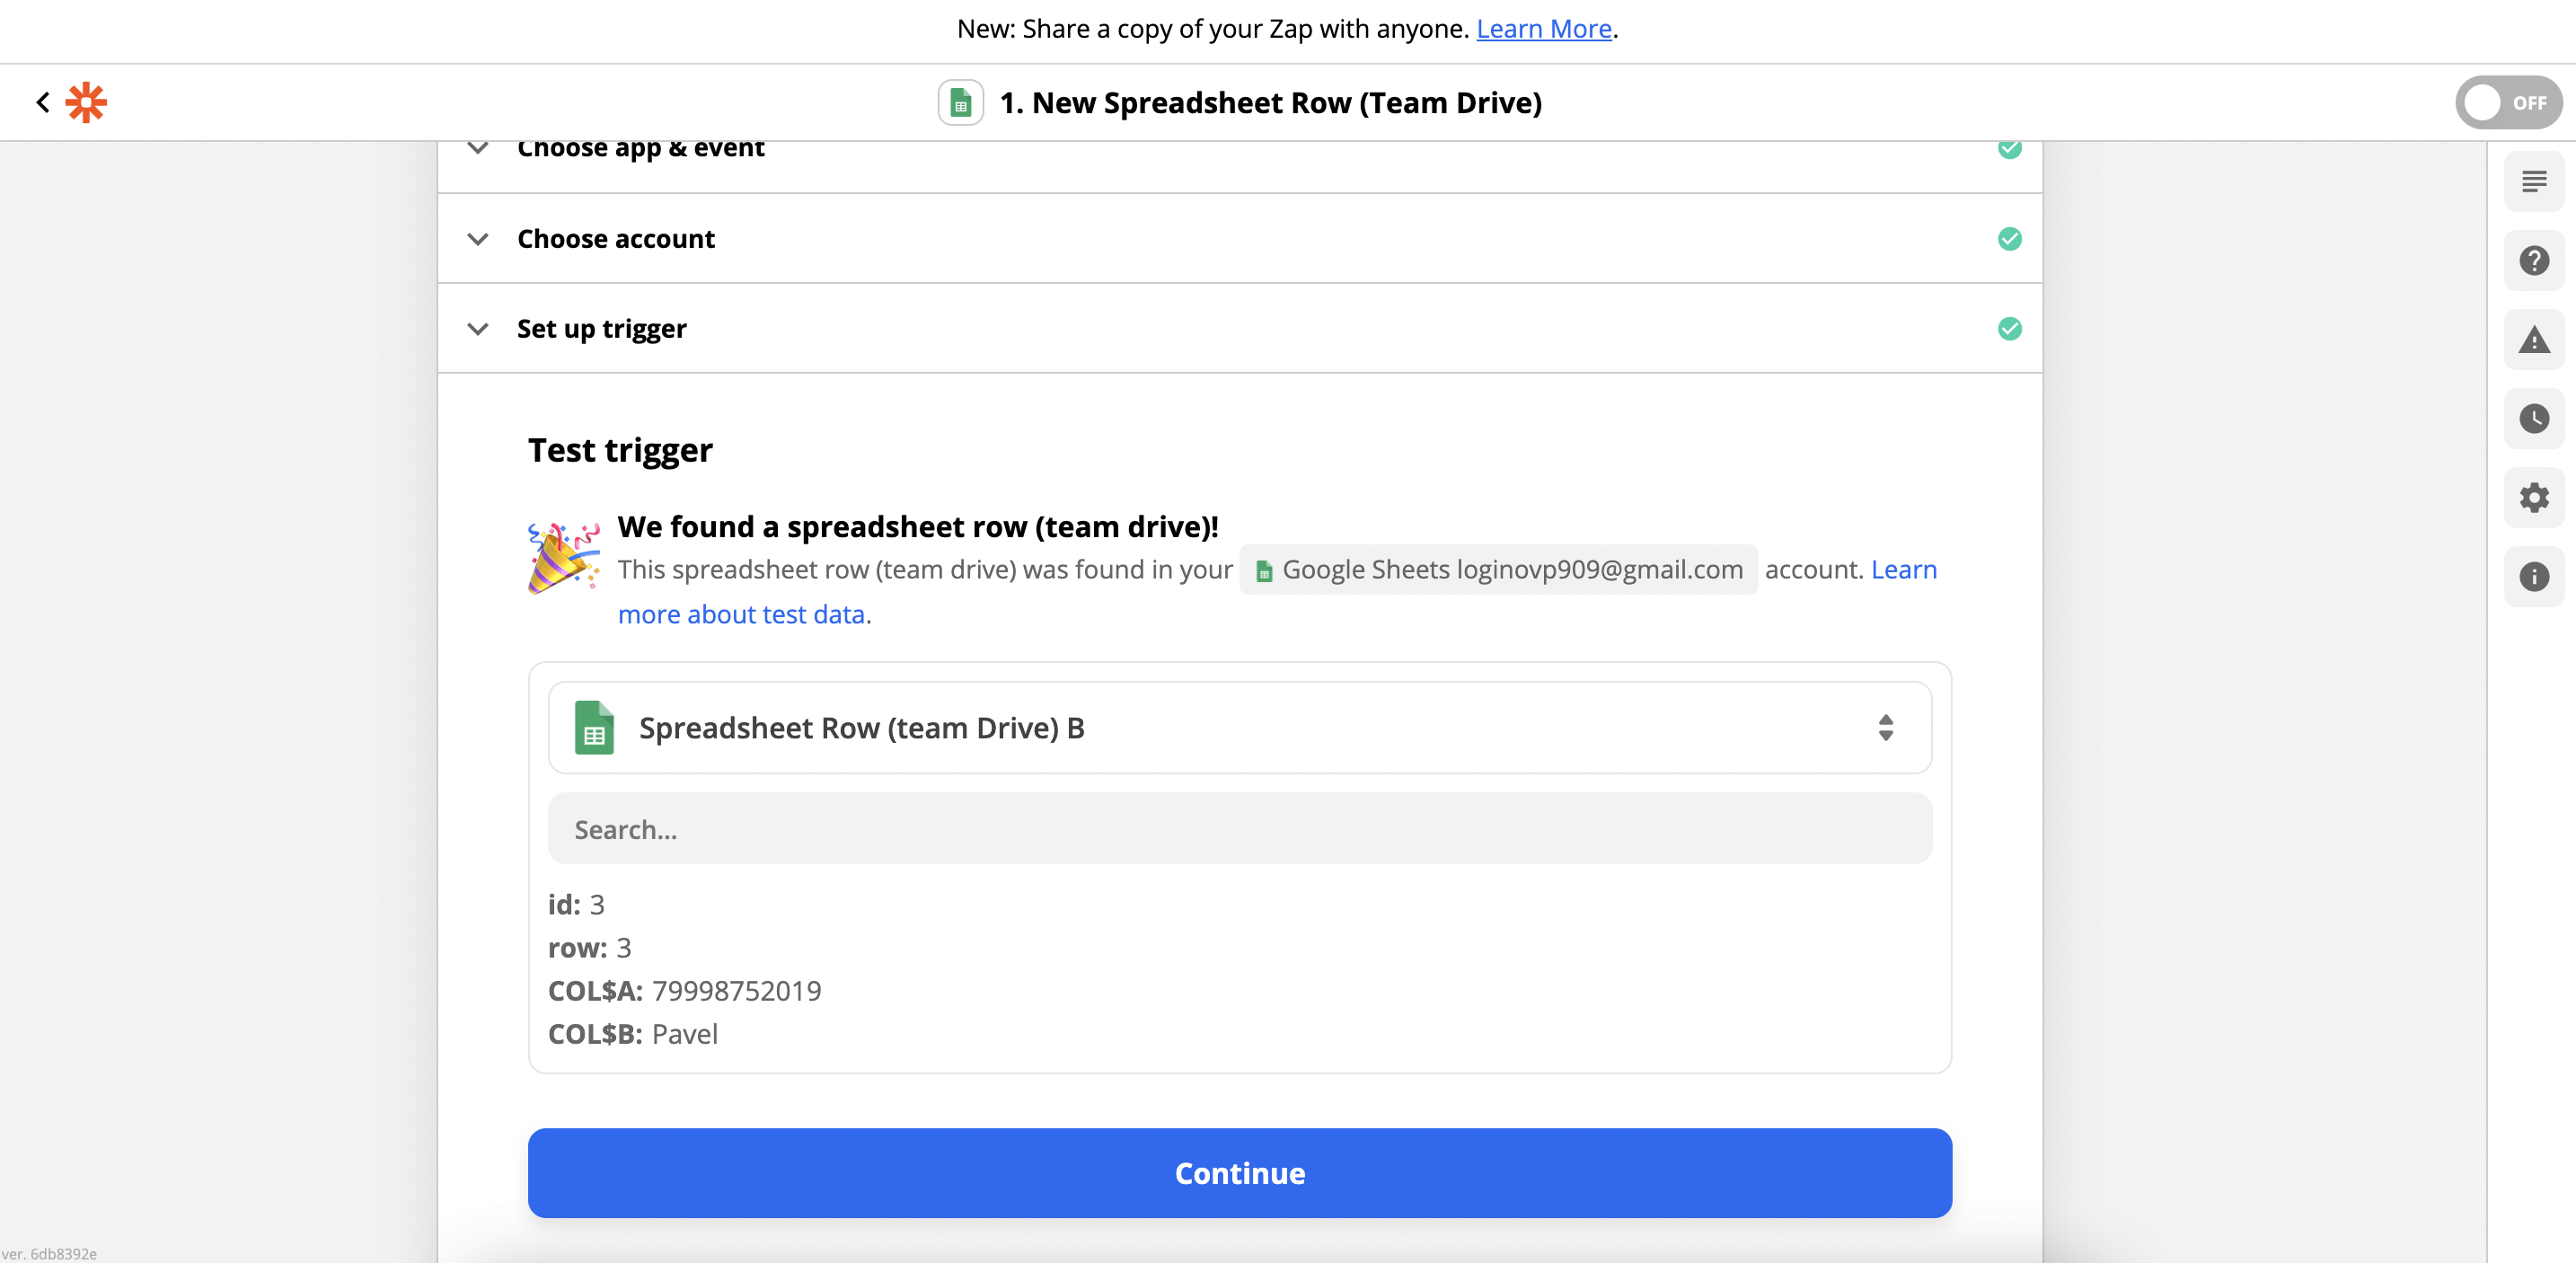
  3. Test the performance.
  4. Configure the second stage of Zap — select Messaggio and decide what action you want to trigger, when a new company is created — for example let’s choose “Send SMS”.
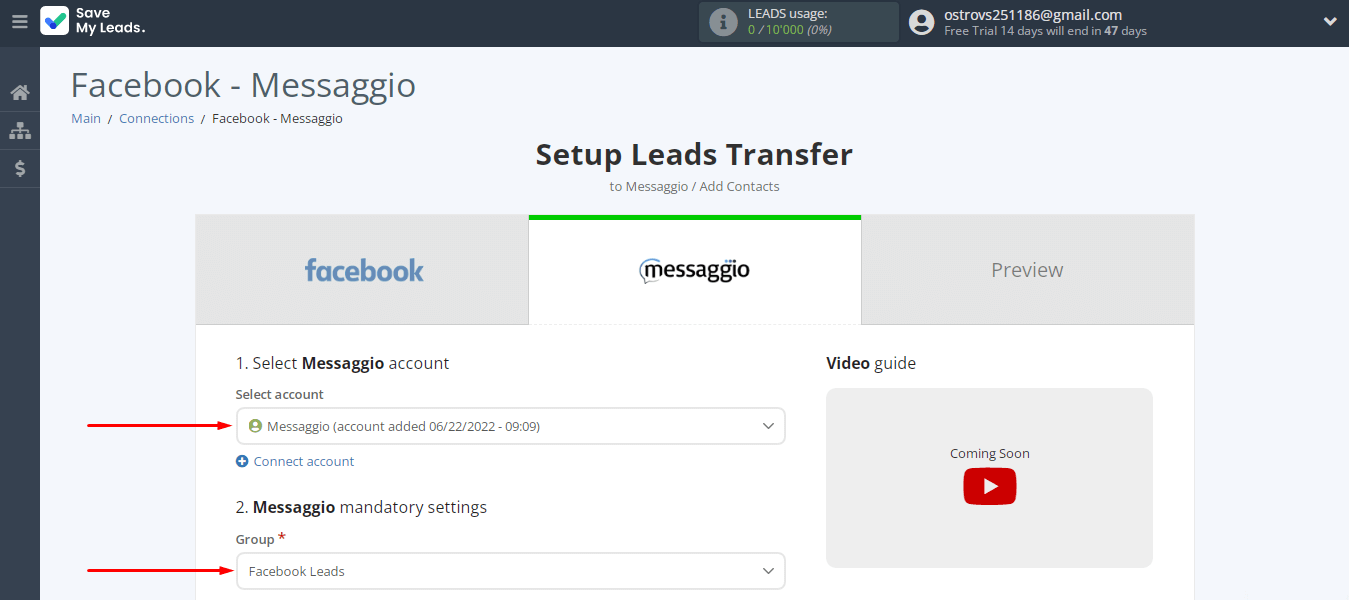
  5. Configure the first elements. Choose a Messaggio account.
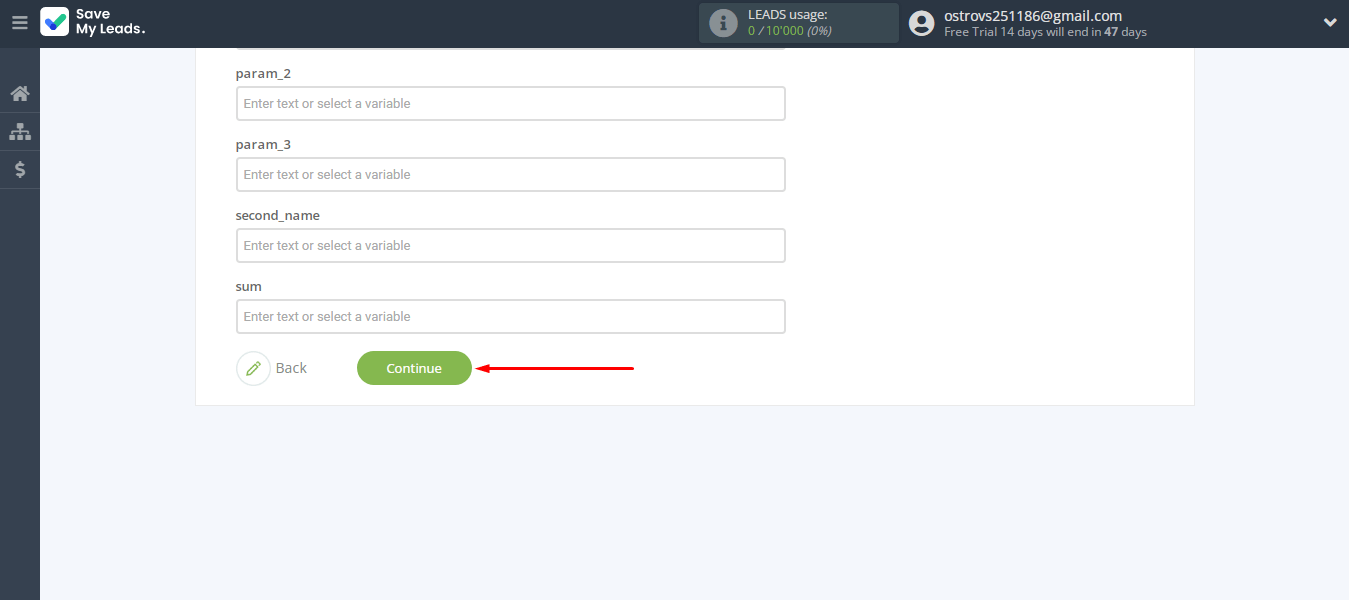
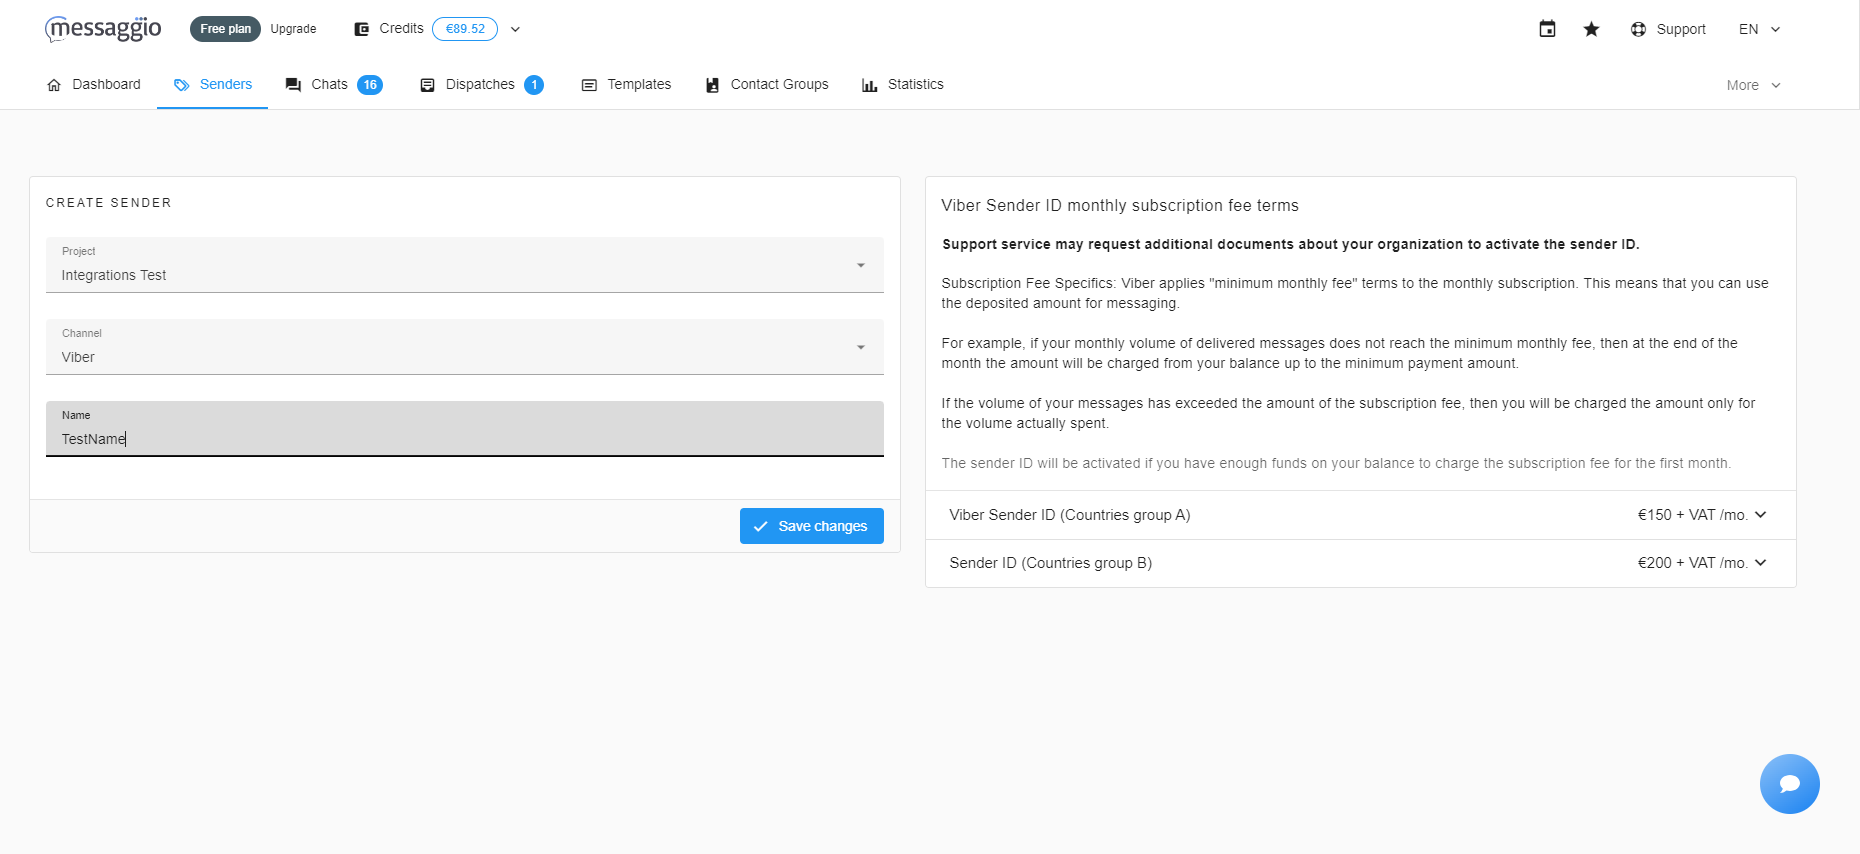
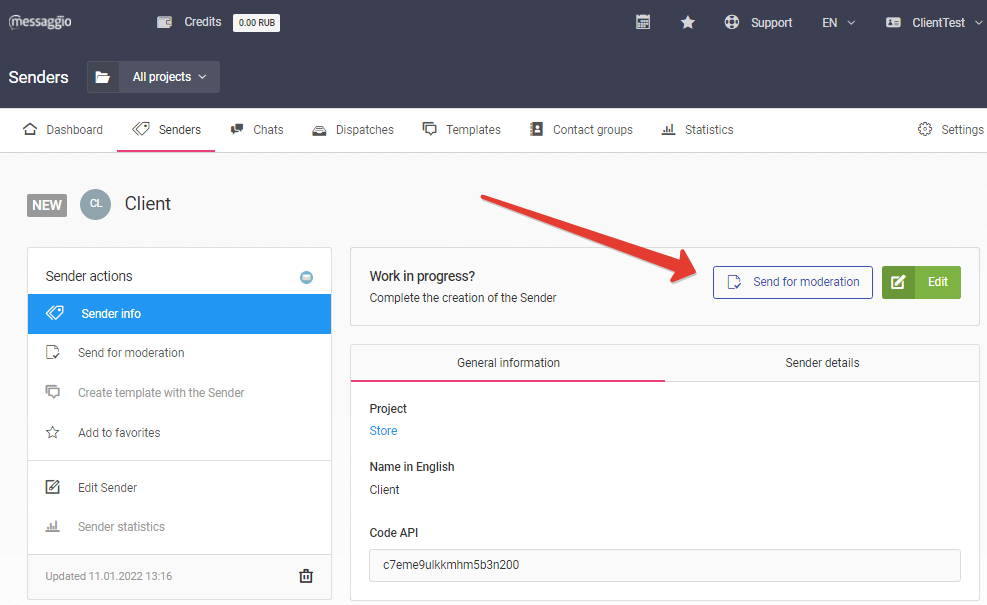
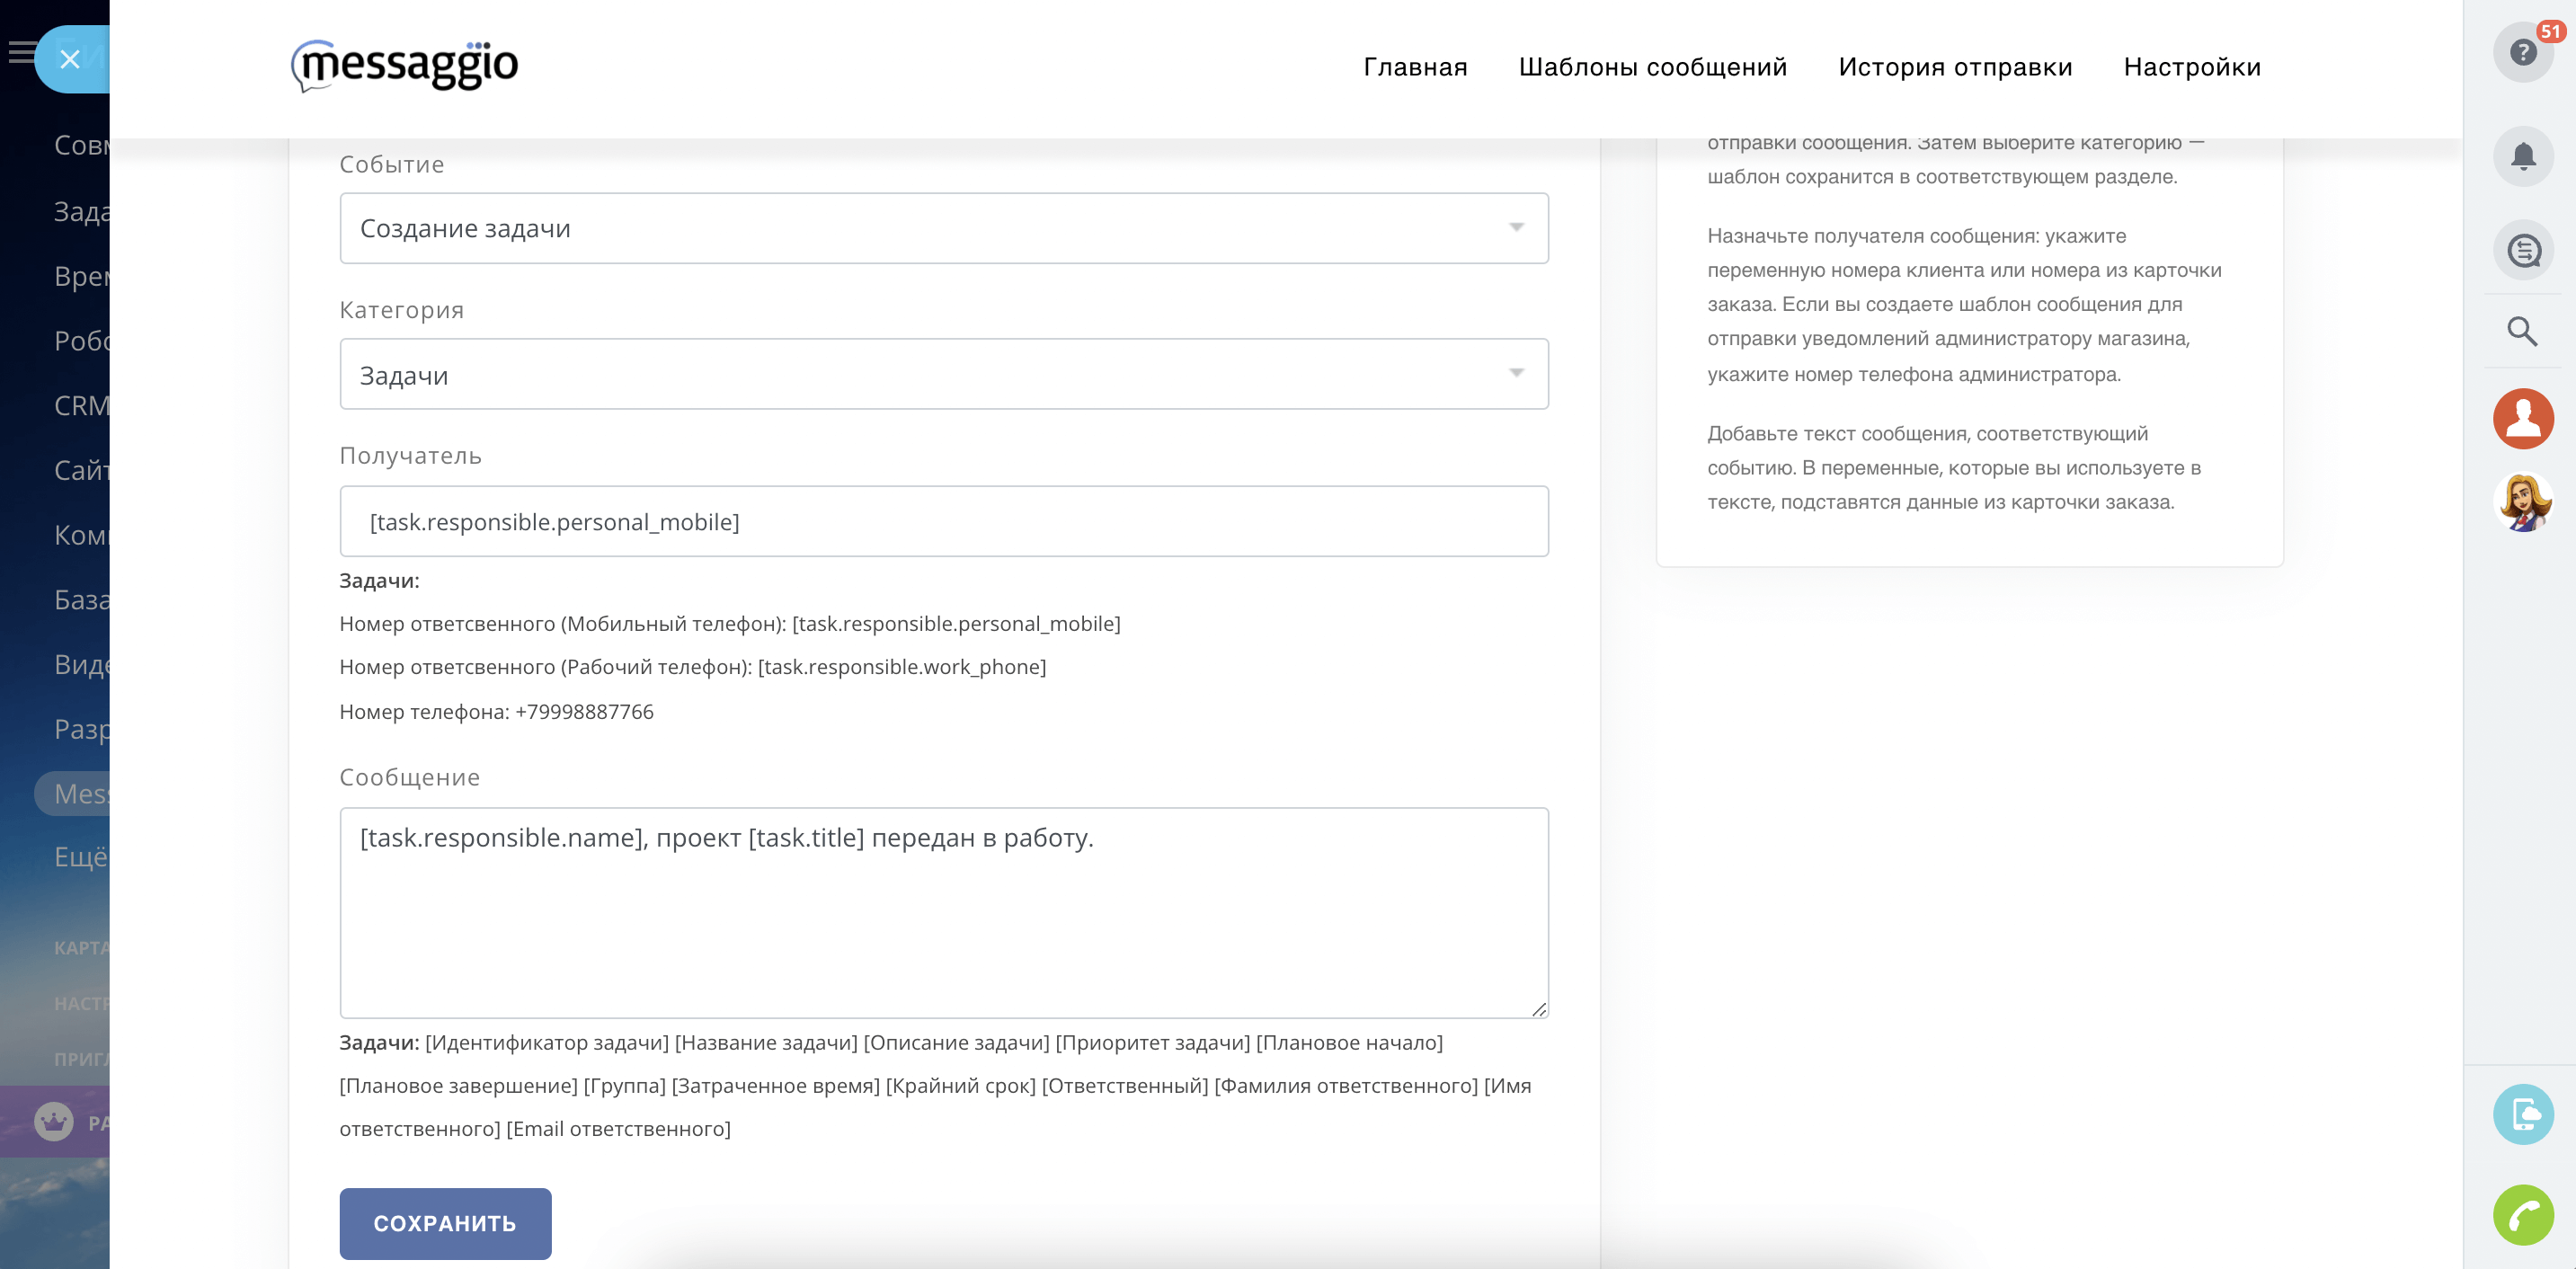
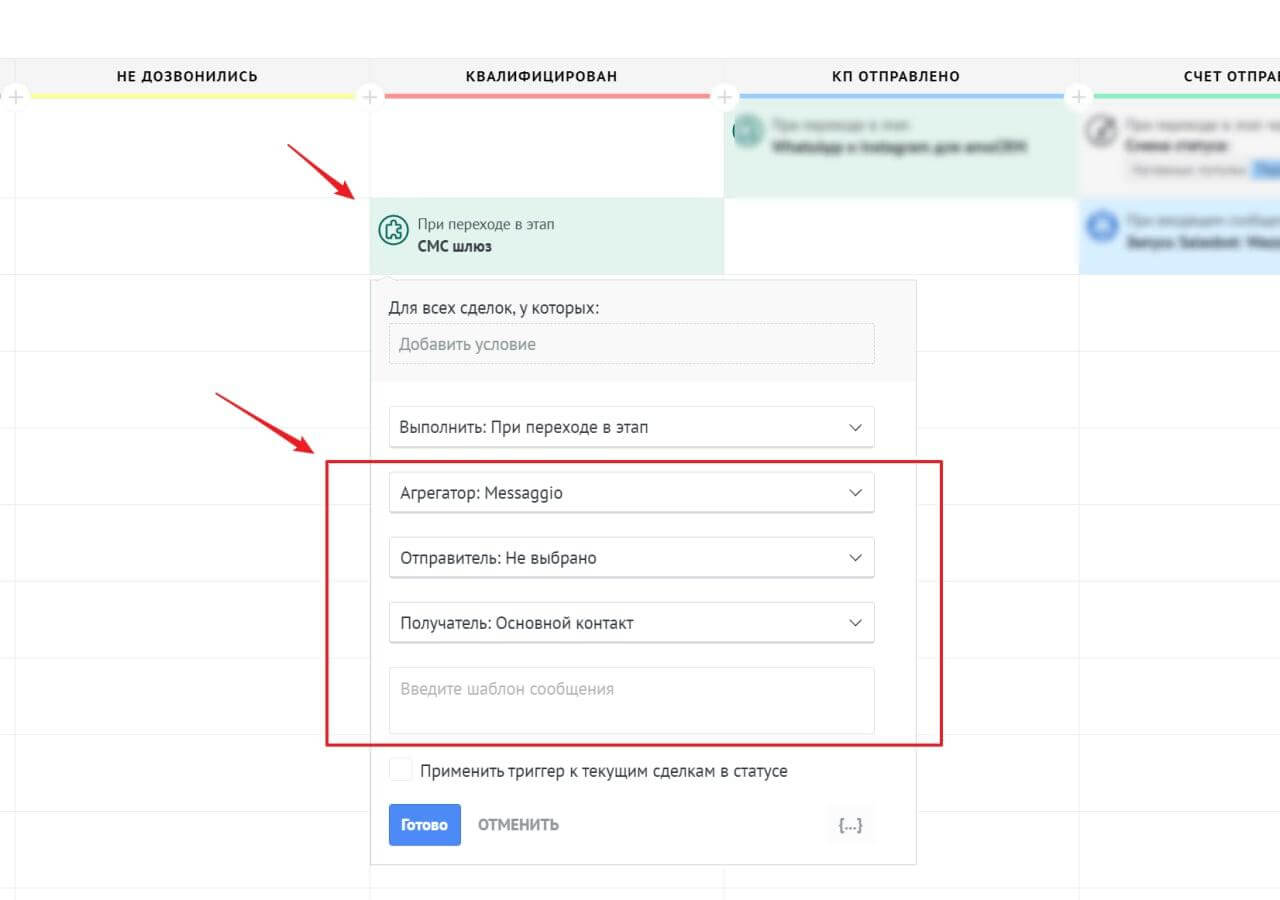
  6. Modify the elements — select the sender, fill in Messaggio login. Then select Phone Number — it can be the number taken from Firmao. Write the template of a message.
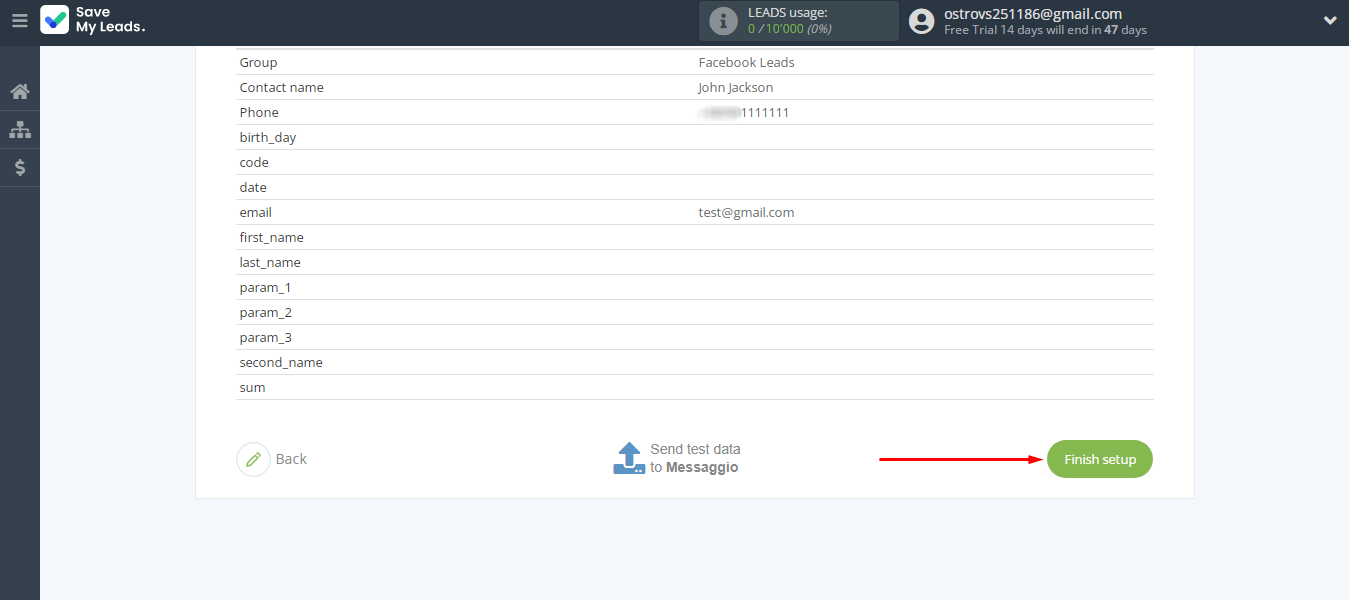
  7. Test the performance of Zap.
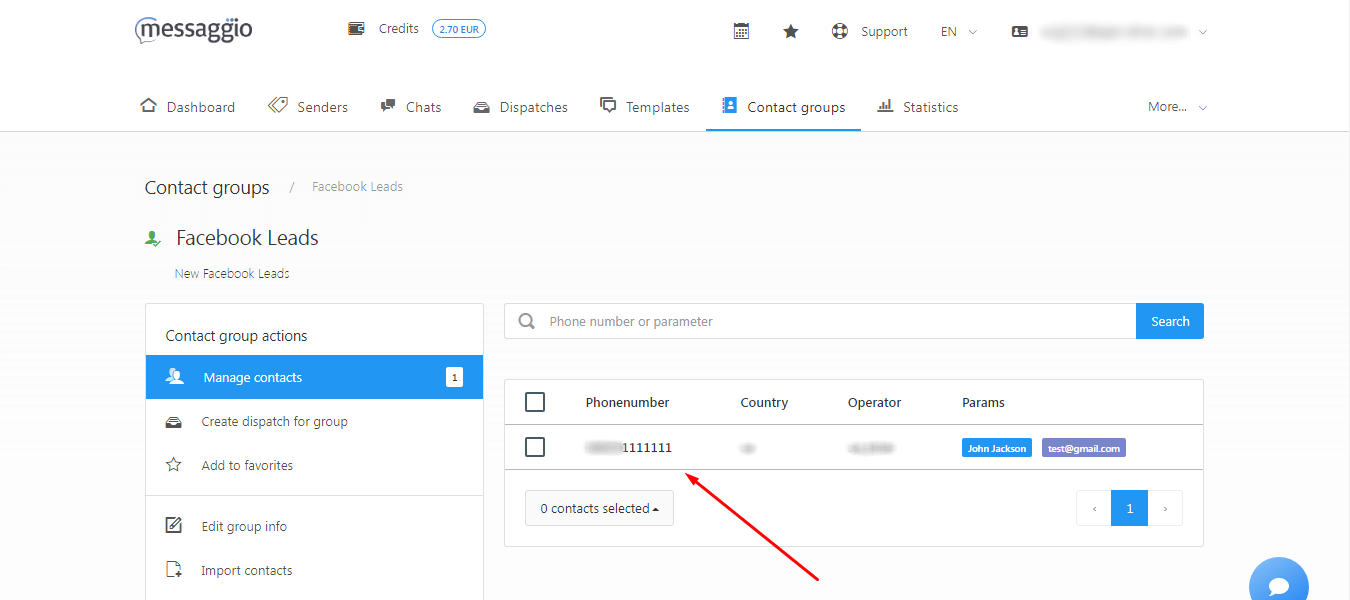
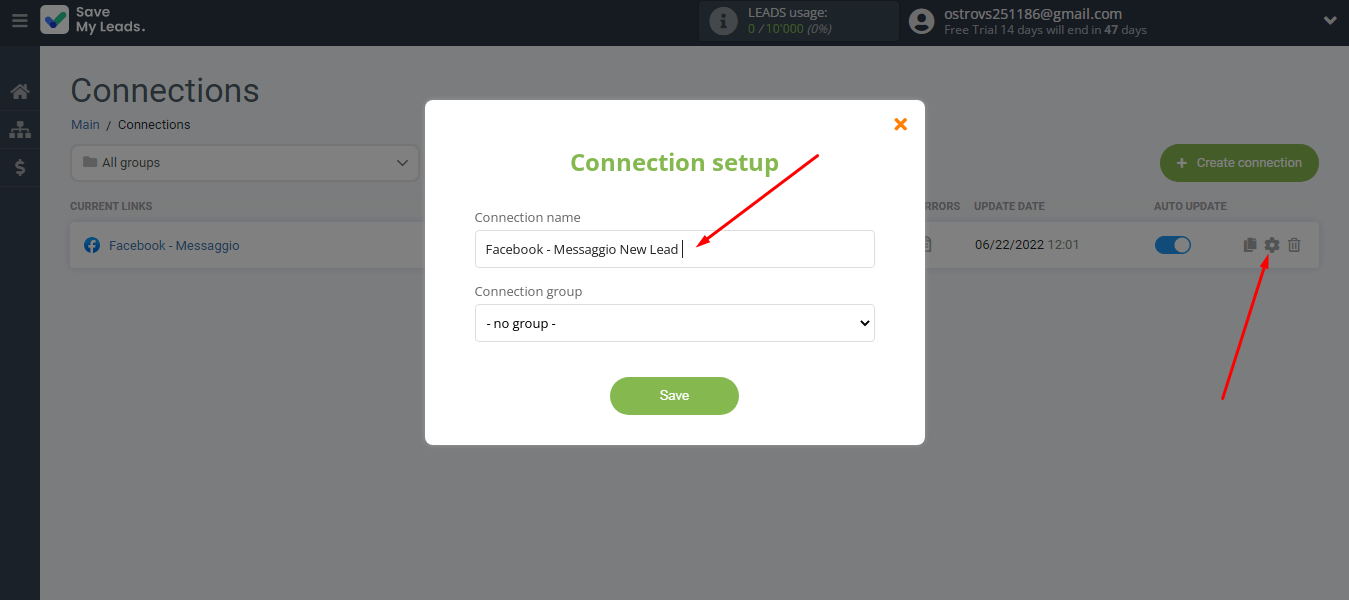
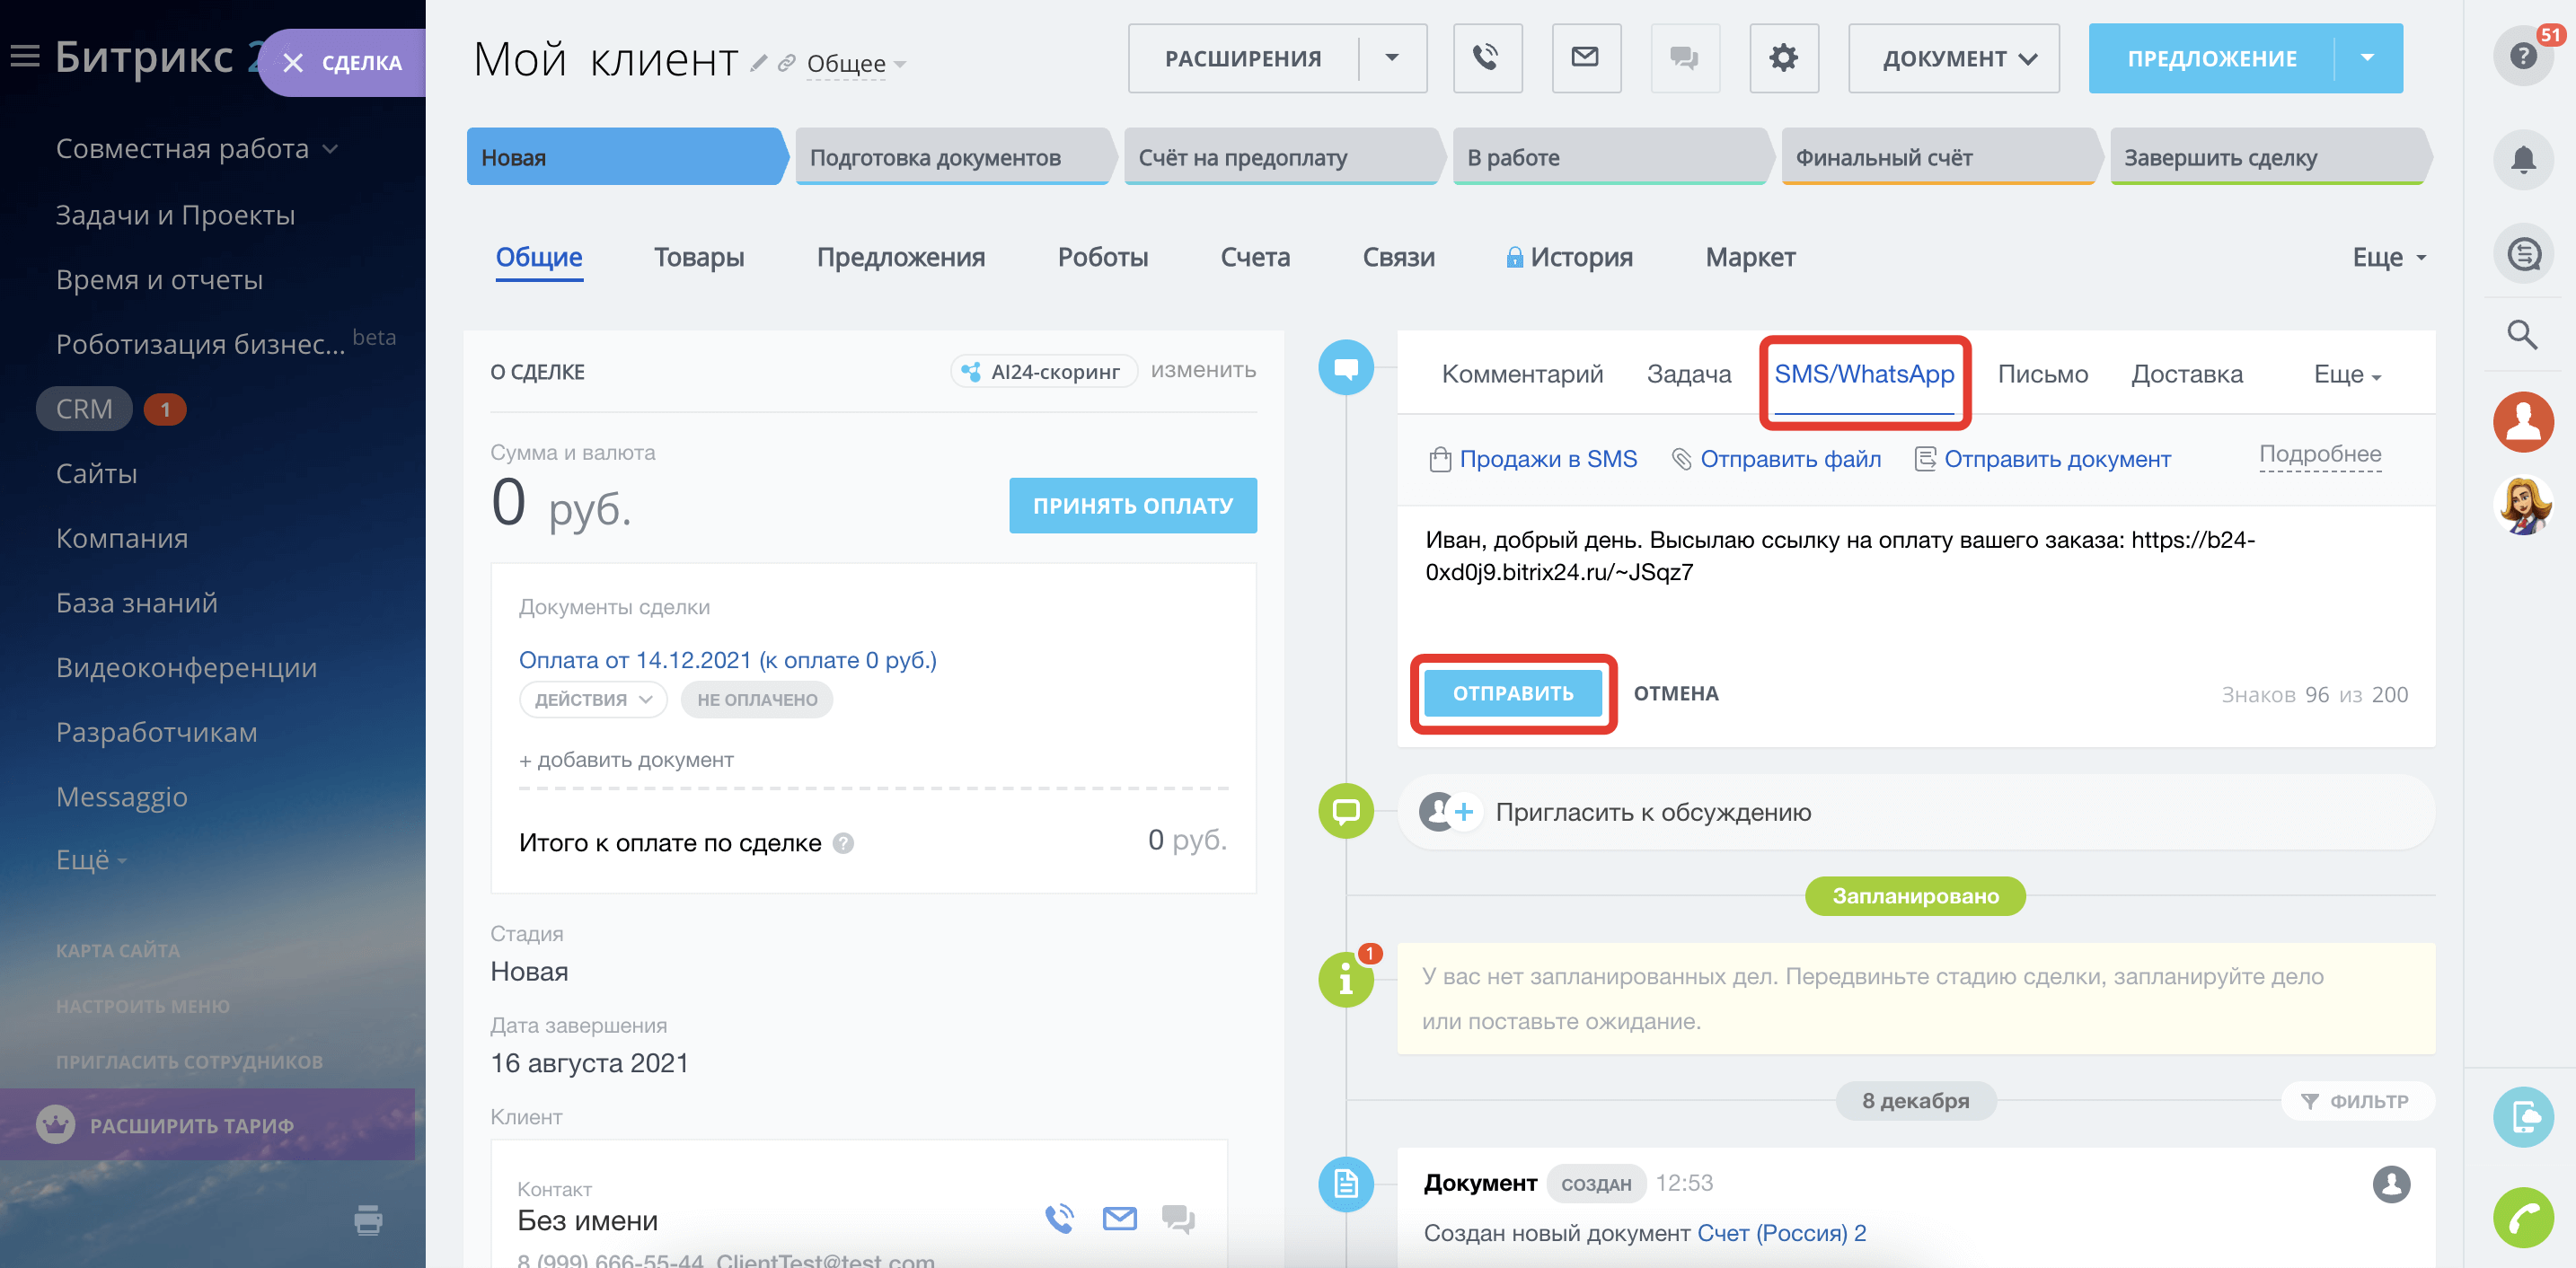
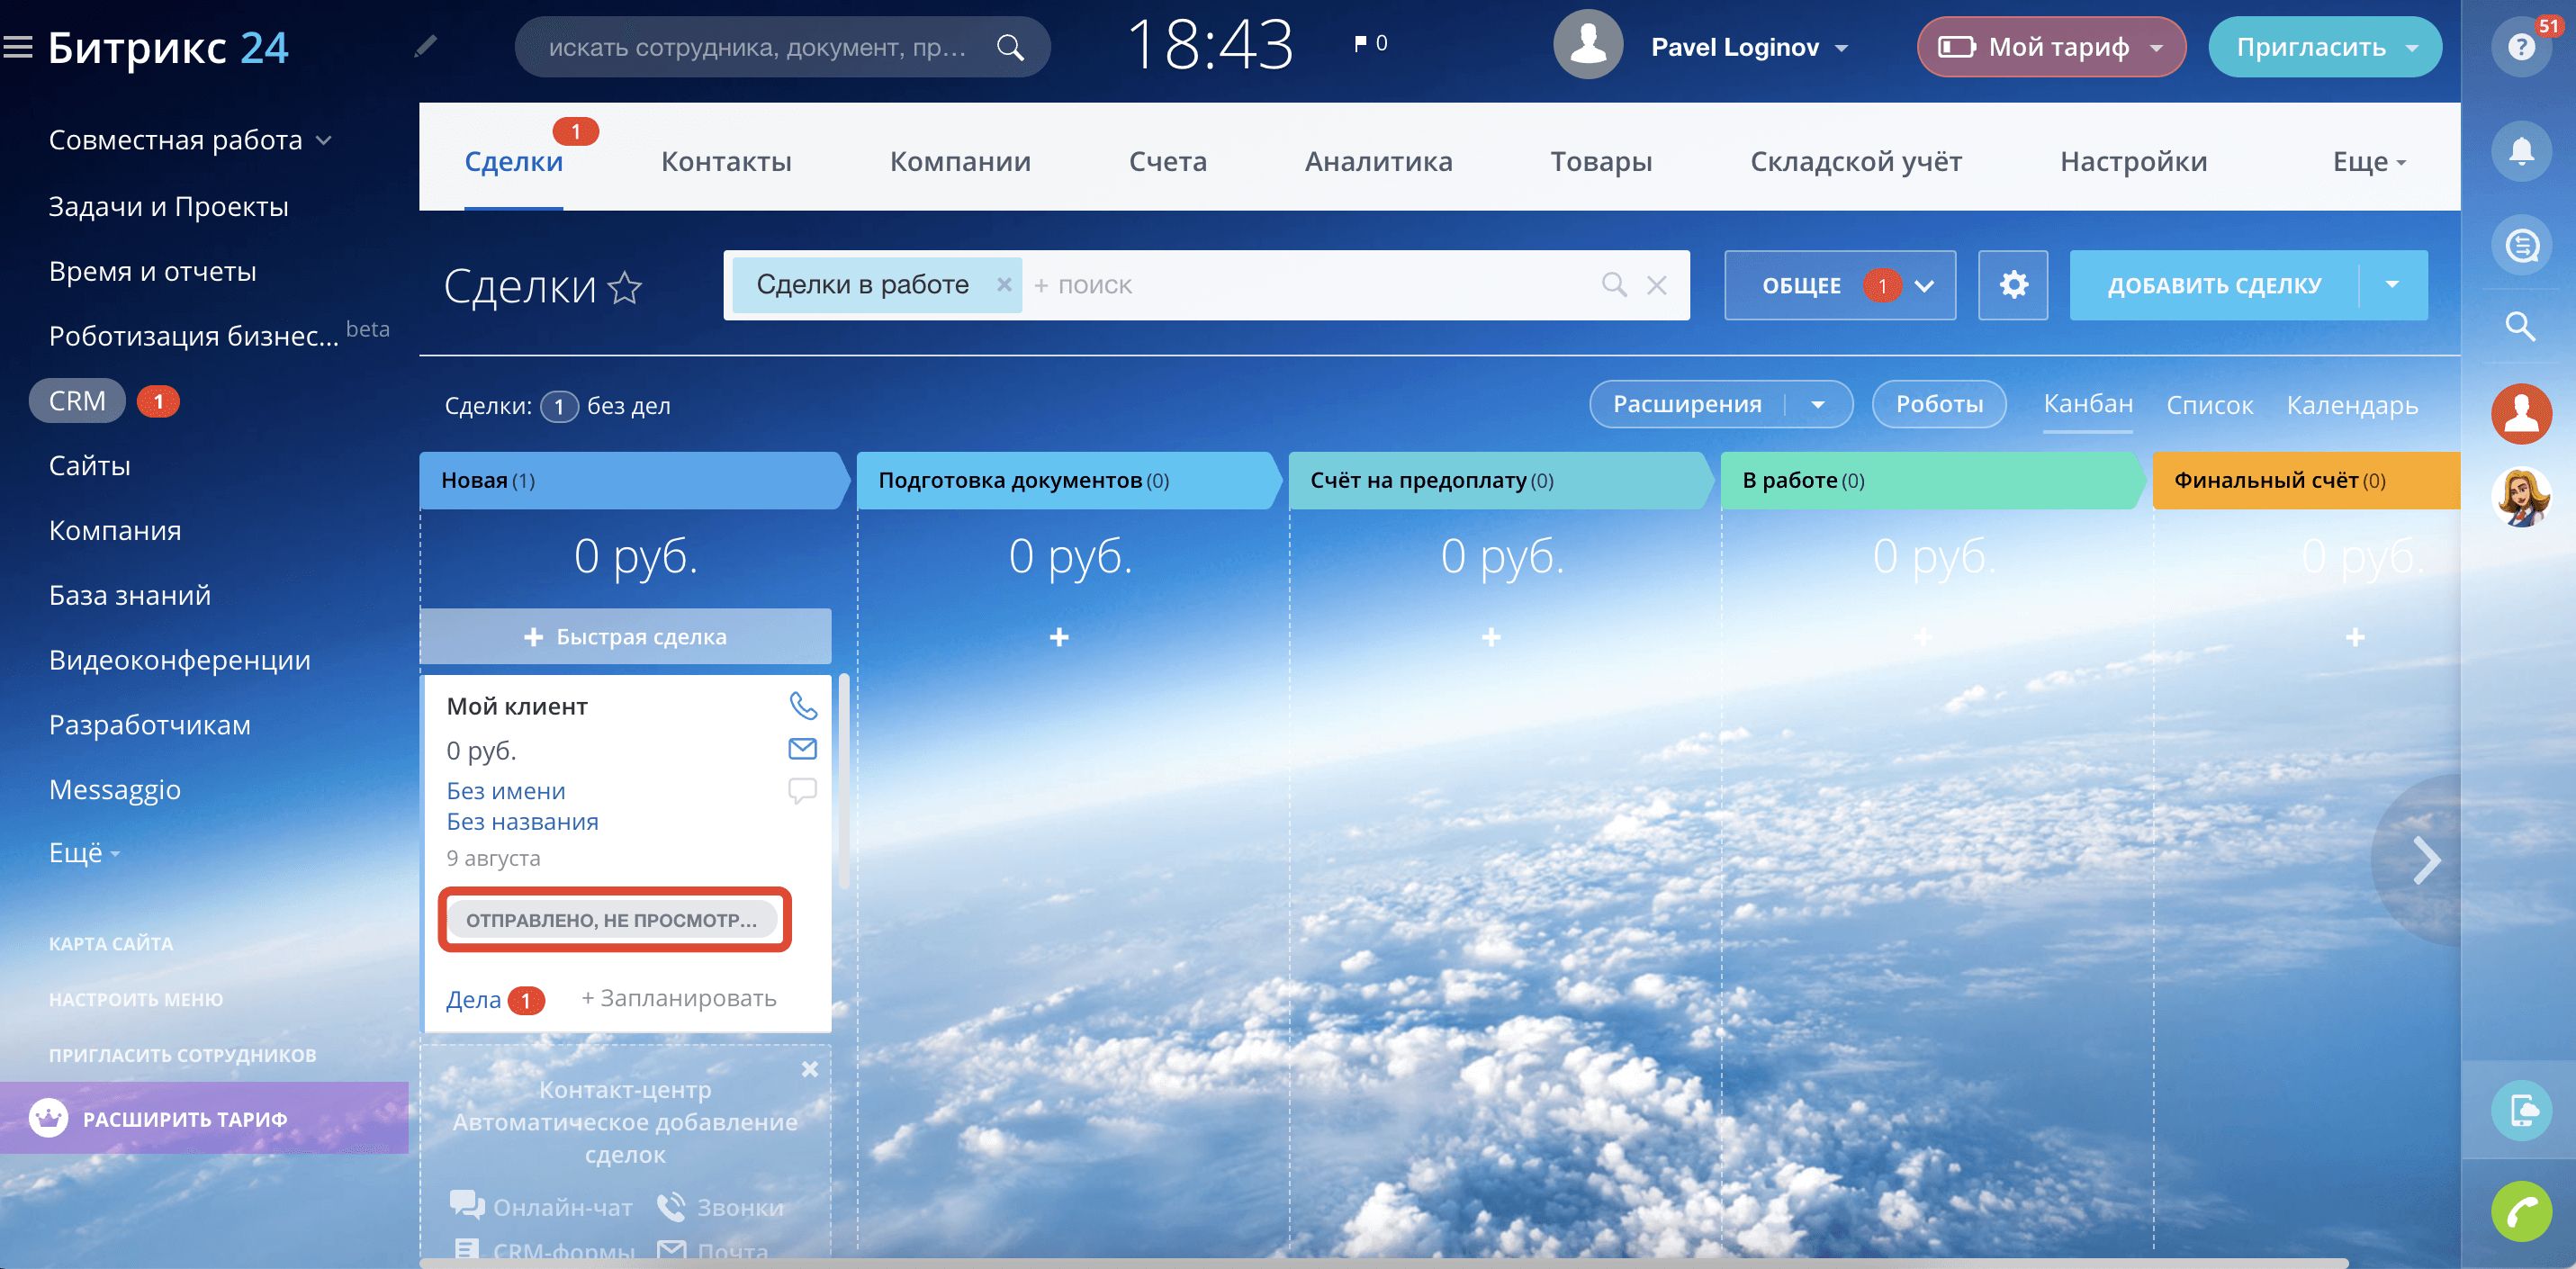
  8. The automation is ready! As a result, an SMS message will be sent, when a new Company is added to Firmao. The user, who set up the account will receive a message with configured text.

Preparing the whole Zap took less than 5 minutes.

How can you benefit from using Firmao CRM with Messaggio?

Integrating Firmao CRM with Messaggio is a solution for companies that want to streamline their business processes, improve communication with customers and manage business relationships more efficiently. Every time you create a new invoice, deal, company or task in Firmao CRM, Messaggio automatically creates a new contact and sends an SMS. This allows you to communicate with customers immediately and efficiently. The integration will be useful mainly for sales departments, where invoice and contract processes are an important part of their work.

Integration with Facebook via SaveMyLeads

Messengers are one of the most effective channels for interacting with customers. The Messaggio service provides functionality for managing via Viber, as well as using SMS messages. Based on this platform, you can implement various marketing campaigns. Multi-channel messages are an effective tool for advertising, notifications, customer engagement, increasing brand/product/company loyalty.

Using the Messaggio platform, you can set up triggered notifications, chats with clients, advertising campaigns, etc. Service users are provided with functionality for creating interactive templates, tracking real-time statistics, and managing contacts. Personalized messages, multi-channel communication, analysis of results, testing of sending, setting up a “smooth” sending — all this can be implemented using the Messaggio platform.

Consider a situation where Facebook lead forms are used to attract new customers. The received data must be transferred to contact groups for dispatch via Messaggio. This can be done manually if you receive a small number of leads through the social network daily. But if there are dozens or hundreds of requests via Facebook, then transferring contacts to the messaging service becomes a routine task that takes a lot of time. This problem is solved by integrating Messaggio and Facebook. If you link these two systems, you can set up automatic transfer of new leads from the Facebook advertising account to the contact groups for dispatch.

How to set up Facebook and Messaggio integration

We need to link the Facebook advertising account and the Messaggio service to automatically transfer leads from one system to another. This task can be entrusted to programmers, but there is a simpler and more cost-effective solution to the problem. With the help of the SaveMyLeads service, the necessary integration is configured in just a few minutes. At the same time, programming knowledge and special skills are not required.

SaveMyLeads is a no-code tool for setting up Facebook integrations and automating workflows. Communication is created through the web interface. The data source is the Facebook advertising account. The SML service constantly checks for new leads and downloads the necessary information. The receiving system can be CRM modules, chat bots, instant messengers, Google services, mailing platforms, etc. In our case, the receiver will be Messaggio. Let’s take a closer look at how to set up automatic uploading of Facebook leads as Messaggio contacts.

Connect Facebook Lead Ads account

Register on the site savemyleads.com, go to your personal account and create a new connection.

Among the ready-made templates for setting up integrations, choose the appropriate option for our task — Messaggio (Add contacts).

Connect a Facebook account to the SML system.

Login.

Go to the settings.

Select advertising pages with which we can work in the SaveMyLeads system. Later, new pages may appear for which you will need to configure the upload of leads. In this case, you should repeat the procedure for adding an FB account to the SML system with new connection parameters (in incognito browser mode).

Provide the necessary access.

The FB account is connected to the SML service — click “OK”.

Select an account from the list and proceed.

Define two required parameters — an advertising page and a lead form. If contacts in Messaggio should be added based on the results of several lead forms, then a separate connection must be configured for each of them. When the required data source criteria are defined, click “Continue”.

Connect Messaggio account

Connect the Messaggio account.

To add a Messaggio account to the SaveMyLeads system, you must specify login/password and click “Save”.

Select the connected account and contact group to which new records will be added.

Define the content of the Messaggio fields that will be used to create new contacts in the messaging service. We have at our disposal variables received from Facebook, as well as system variables. You can enter your own text.

When the contents of the Messaggio fields are defined, click “Continue”.

The SML system offers an example of the data that will be sent to the Messaggio service. We need to check the connection — click “Send test data to Messaggio”.

Go to the Messaggio account and check for a new entry in the desired contact group.

Enable automatic data transfer

We checked the correctness of the integration. Now we need to activate it — enable automatic data updating. Return to the SaveMyLeads workspace and click “Finish setup”.

You may want to change the name of the integration. This is done through the “Connection setup”. Specify a new name and save the changes.

Integration with HubSpot

If you use HubSpot, you can use the Messaggio app to automation of your customer’s lead process and improve their experience with your company. Install the Messaggio app for HubSpot and send SMS, Viber messages to customers and administrators.

This guide will show you how to integrate Messaggio’s messaging application into your HubSpot system.
To setup a triggered sending, you need to link your Messaggio account and HubSpot.

Messaggio settings

    1. Create an account at Messaggio. To do this, click on “Create account” on the Messaggio website. Enter your details and click “Register”. You have an Messaggio personal account now.
    2. Screenshot 1: create a Messaggio account
    3. To get started, you should accept this public offer terms and conditions on behalf of your company. To do this, click “Continue” on the notification under the menu in your personal area and follow the prompts. Once your application has been reviewed, you can proceed with registering the name of the messenger.
    4. Подтвердить оферту
      Screenshot 2: confirm the offer

      Normally it takes no more than one working day to verify an application to join the offer.

    5. Register the sender name, by specifying the required channel for sending messages.
    6. The activation period for the sender name depends on the channel in which it is registered:

      • SMS – 3-15 days, depending on mobile operator
      • Viber – 1-5 days
      • VK – 1-3 days
    7. Go to “Project info”, copy the project login.
    Скопировать логин проекта
    Screenshot 3: go to “Project info”

    Settings on HubSpot side

    Install the Messaggio app in your HubSpot. To do this, go to “AppMarketplace” in HubSpot and search for “Messaggio”. Near the Messaggio application icon, click “Install app”.

    Скопировать логин проекта
    Screenshot 4: Messaggio application installation

    Select the HubSpot account to which you want to add the Messaggio app in the window that opens

    Скопировать логин проекта
    Screenshot 5: Selecting an account to install the Messaggio app

    Confirm the connection between the Messaggio app and your HubSpot account.

    Скопировать логин проекта
    Screenshot 6: application installation confirmation

    After Messaggio plugin and HubSpot connected, go to the “Settings” tab and select a sending channel matching the registered name on the Messaggio platform.

    Скопировать логин проекта
    Screenshot 7: Messaggio plugin installation
  1. Specify the sender name code for the API. For this purpose, go to the Sender Name menu in your Messaggio personal account and click on “Info”. Copy the code and paste it into the relevant field in the application for OpenCart.
  2. Screenshot 7: go to “View details ” sender’s name
    Screenshot 8:copy API code
  3. Specify the Messaggio project login. You can find it in your Messaggio personal account under “Settings” – “Project” – “Detailed information” – “API settings”.
Screenshot 9: Go to project settings
Screenshot 10: Copy the project login

Congratulations, the Messaggio and HubSpot integration is complete!
To send trigger notifications when a task is created/updated, you need to prepare message templates.

Message template creation

A message template is the content you send to the recipient. To start creating message templates, go to “Templates”, press “Create template” and follow the prompts in the application interface.

Screenshot 12: Go to “Templates” and create a template

Integration with OpenCart

If you use OpenCart, you can use the Messaggio app to automation of your customer’s lead process and improve their experience with your company. Install the Messaggio app for OpenCart and send SMS, Viber messages to customers and administrators.

This guide will show you how to integrate Messaggio’s messaging application into your OpenCart system.
To setup a triggered sending, you need to link your Messaggio account and OpenCart.

Messaggio settings

    1. Create an account at Messaggio. To do this, click on “Create account” on the Messaggio website. Enter your details and click “Register”. You have an Messaggio personal account now.
    2. Screenshot 1: create a Messaggio account
    3. To get started, you should accept this public offer terms and conditions on behalf of your company. To do this, click “Continue” on the notification under the menu in your personal area and follow the prompts. Once your application has been reviewed, you can proceed with registering the name of the messenger.
    4. Подтвердить оферту
      Screenshot 2: confirm the offer

      Normally it takes no more than one working day to verify an application to join the offer.

    5. Register the sender name, by specifying the required channel for sending messages.
    6. The activation period for the sender name depends on the channel in which it is registered:

      • SMS – 3-15 days, depending on mobile operator
      • Viber — 1-5 days
    7. Go to “Project info”, copy the project login.
    Скопировать логин проекта
    Screenshot 3: go to “Project info”

    OpenCart side settings

    Messaggio app installation

    Click on “Modules/Extensions”, “Installing Extensions” to install the Messaggio application. To download the zip file containing the installation file, click on “Download” and in the new window select the required file.

    Screenshot 5: Messaggio app installation

    To check that the plugin is installed, go to “Modules/Extensions”. In the “Modules” window you will see the installed Messaggio plugin.

    Screenshot 5: Checking the Messaggio application installed successfully

    To set up a sending a message using our application, click on the “Edit” button near the Messaggio module in the “Modules/Extensions” tab

    Screenshot 6: Go to editing the Messaggio application
    1. In the edit window that opens, inside the Messaggio application interface, go to “Settings”. Make sure that the application has an “Included” status. Select the channel to send notifications according to the sender name created in the Messaggio Personal Area.
    2. Screenshot 7: Messaggio application setup
    3. Specify the sender name code for the API. For this purpose, go to the Sender Name menu in your Messaggio personal account and click on “Info”. Copy the code and paste it into the relevant field in the application for OpenCart.
    4. Screenshot 7: go to “View details ” sender’s name
      Screenshot 8:copy API code
    5. Specify the Messaggio project login. You can find it in your Messaggio personal account under “Settings” – “Project” – “Detailed information” – “API settings”.
    Screenshot 9: Go to project settings
    Screenshot 10: Copy the project login

    Congratulations, the Messaggio and OpenCart integration is complete!
    To send trigger notifications when a task is created/updated, you need to prepare message templates.

    Message template creation

    A message template is the content you send to the recipient. To start creating message templates, go to “Templates”, press “Create template” and follow the prompts in the application interface.

    Screenshot 11: go to “Templates” and create a template
    1. For each template, assign an event to trigger a message. Available events are order information, payment updates, delivery information, and various internal notifications for the administrator.
    2. Select the shop for which template is to be used
    3. Select after which action the message will be sent in the “Event” tab
    4. Specify the category in which template will work
    5. Then select the language in which template text will be written. Both Russian and English languages are available for selection
    6. Enter the recipient’s telephone number in the “Reciepent” field and write the text to be sent in the “Message” field. Text templates are available for the variables listed above the “Message” field
    7. Screenshot 12: Create a message template for sending a message

      To send messages, make sure that the sender’s name is activated. To do this, go to your Messaggio personal account, section “Senders”. An ACTIVE status should appear near the name.

      Dispatch history

      The sent messages log can be viewed under “Send hisory”. The data is displayed for the last 7 days. Statistics for a longer period can be viewed in your personal Messaggio account, in the section “Statistics”.

      Screenshot 13: Message sending history

Integration with Altegio

Simple integration with Altegio will allow you to send SMS, Viber messages to company clients. Cascading is also possible: first to Viber and then to SMS if delivery to Viber fails. Sending messages is done directly from the Altegio interface. The Messaggio technologies enable customers to receive appointment reminders, offer notifications and other messages in time to help automate processes in your company.

The provider works all over the world. In Europe, payment is available both in local currency and euros.  In other countries, subscription and payment in euros is possible.

Connecting is possible only for legal persons.

Messaggio account registration and sender name setup

  1. Visit the Messaggio website and click on “Register” or “Create account”.
  2. Fill the form and click “Create account”.
  3. Confirm your e-mail address: an e-mail with a confirmation link will be sent to the address you specified during registration.

After registration and confirmation of your email address, log in to your personal account. Complete the basic account settings:

    1. Specify the company name, country, website, language and time zone.
    2. Confirm the offer (Adhesion Agreement) by providing your company VAT number and other details. Once the offer is accepted, you will be able to download a top-up account or recharge your balance with a bank card.
    3. Create an individual sender name. To do this, go to in the Senders tab and click on the “Create” button. Select an SMS channel from the drop-down list and specify your company name – this is the name your customers will see when they receive the SMS.

    1. Send the created sender name for moderation and activation. To do this, click on the sender name and click on the “Send to moderation” button..

      Depending on the mobile operator, the name activation process can take 3-15 working days.

    1. Contact the Service Desk to get the settings for integration with Altegio: from your Messaggio account under “Helpdesk” create a ticket with the subject “Integration with Altegio”. In the email, state that you need an authorisation key.

  1. Wait for a response from support, which will apply the settings to your account to work correctly with Altegio. Usually a reply is received within 30 minutes. Copy the received key and sender name code from the email.

Settings in the Yclients private area

Log into your Altegio personal area to section “Settings – Notifications”, select Messaggio SMS provider, enter key in field “Authorization key”, specify sender name code in field “SMS sender name”.

Rates and charges

Detailed Messaggio tariff descriptions is available by clicking.
To top up your balance, go to “Credits”, enter the payment amount and press the “Checkout” button.

Then follow the instructions in the payment interface.

To ensure that you do not stop receiving messages when you have a zero balance, activate the AutoPay service. The specified amount will be automatically charged from your bank card when you use up your balance. For more information on how to activate AutoPay, see «Finance».

You can now send individual messages to customers or send to groups from your customer base. Altegio flexible filters will allow you to create a user segment to send messages to suit your needs. Messaggio will ensure high speed and deliverability of messages from your brand, verified by your service provider.

Integration with Bitrix24

You can use the Messaggio application if you use Bitrix24 as a CRM or task tracker to automate your customer’s lead process and improve their interaction experience with your company. Connect Messaggio in the Bitrix24 marketplace and send SMS, Viber, WhatsApp and VK messages from a transaction or when creating/updating a task.

This guide will show you how to integrate Messaggio application for SMS sending in your Bitrix24 system.

Messaggio and Bitrix24 integration

You need to link your Messaggio account and Bitrix24 to set up sending notifications.

Messaggio application installation

Install the Messaggio application in your Bitrix24. To do this, go to “Applications” – “Market” – “SMS” in Bitrix24 and type “Messaggio” in the search box. Click “View” – “Install” near the Messaggio application icon. Messaggio will appear in the list of services displayed in the Bitrix24 sidebar.

Messaggio. Боковая панель Битрикс24
Screenshot 1: Messaggio in the Bitrix24 services list
According to your Bitrix24 tariff plan, you can use from 2 to 10 free integration applications from the Bitrix24.Market catalogue. If your application limit is exceeded, you can delete some of the free applications you are no longer using and install new ones instead or subscribe to Bitrix24.Market Plus.

Messaggio settings

  1. Create an account in Messaggio. You can do this by launching the Messaggio application for Bitrix24 and clicking on “Create Messaggio account” in the “General” tab. Complete your details and click “Register”. You have an account in your Messaggio personal account now.
  2. Создать аккаунт в Messaggio
    Скриншот 2: Create an Messaggio account
    • Accept the public offer on behalf of your company. Click “Continue” on the notification under the menu and follow the prompts in your personal Messaggio account. Once your application has been reviewed, you can proceed to register the sender name.

    It usually takes 1 working day or less to verify an offer to join.

    Подтвердить оферту
    Screenshot 3: Confirm the offer
  3. Register the sender name by specifying the preferred channel for sending messages.
  4. Создать Имя Отправителя
    Screenshot 4: Create Sender Name
    Выбрать канал отправки
    Screenshot 5: Select channel for sending messages (in Messaggio)
    • SMS – 3-15 days, depending on mobile operator
    • Viber – 1-5 days
    • WhatsApp – up to 10 days
    • VK – 1-3 days

Bitrix24 settings

  1. In Bitrix24, in the Messaggio application interface, go to “Settings”. Select the channel for sending notifications according to the sender name created in the Messaggio personal account.
  2. Выбрать канал отправки сообщений
    Screenshot 6: Select channel for sending messages (in Bitrix24)
  3. Enter the Sender Name code for the API. Click on the Sender Name menu in your Messaggio Personal account and then click on “Info”. Copy the code and paste it into the relevant field of the application for Bitrix24.
  4. Screenshot 7: Go to the “Info” tab of the sender’s name
    Screenshot 8: Copy code for the API
  5. Enter the Messaggio project login. You can find it in your Messaggio personal account under “Settings” – “Project” – “Detailed information” – “API settings”.
  6. Screenshot 9: Go to project settings
    Screenshot 10: Copy project login

    Congratulations, the Messaggio and Bitrix24 integration is complete!

Sending messages from a deal

You can remind the client about yourself, invite them to a meeting, send documents or a link to payment directly from the deal interface.

  1. Open a deal with the customer you want to send a message. Press “SMS/WhatsApp”.
  2. Enter the message text, select the files you want to attach to the message (public links will be generated), add a link to pay for the item if necessary. Click on “Send”.
  3. Отправить сообщение из сделки
    Screenshot 11: Send a message from the deal

    Your customer will see a message push notification on their mobile device. The message status will be displayed in the transaction preview.

    Статус отправленного сообщения
    Screenshot 12: Message sent status

    Sending messages when creating/updating tasks

    The function can be used to send messages to the account manager’s, sales managers’ and other employees’ devices to get their attention to a task and trigger a customer-facing process.

    To send trigger notifications when a task is created/updated, you need to prepare message templates.

Message template creation

A message template is the content you send to the recipient. To start creating message templates, go to “Message templates”, press “Create template” and follow the prompts in the application interface.

Перейти в раздел «Шаблоны сообщений» и создать шаблон
Screenshot 13: Go to “Message templates” and create a template
  1. For each template, assign an event to which a message should be sent. The available events are Task Creation and Task Update.
  2. Specify the recipient’s phone number and message text. To personalise your message, add parameters to the template. To do this, simply click on the necessary parameter. It is located under the text field of the template.
  3. Создать шаблон сообщения для отправки при создании:обновлении задачи
    Screenshot 14: Create a message template for sending messages when creating/updating tasks

    List of available parameters:

    Task ID — [task.id]
    Task name — [task.title]
    Task description — [task.description]
    Task priority — [task.priority]
    Start date plan — [task.start_date_plan]
    End date plan — [task.end_date_plan]
    Group name — [task.group_name]
    Time estimate — [task.time_estimate]
    Deadline — [task.deadline]
    Responsible — [task.responsible.name]
    Responsible person’s last name — [task.responsible.last_name]
    Responsible person’s first name — [task.responsible.first_name]
    Responsible person’s email — [task.responsible.email]

  4. Press “Save”. The status ✓ means that the template is active and will be sent as soon as the event occurs.
  5. We have already prepared several message templates for your convenience. To use them, click on “Edit” near the selected template and customise it to your needs.

    To send messages, make sure that the sender’s name is activated. Click on the “Senders” tab in your Messaggio account. An ACTIVE status should appear near the name.

Dispatch history

You can see the messages log you have sent in the “Sending history” section. The information is displayed for the last 7 days. Statistics for a longer period can be viewed in your personal Messaggio account, in tab “Statistics”

История отправки сообщений
Screenshot 15: Message sending history

How to integrate Messaggio with apps via Zapier

Performing integrations with Messaggio in Zapier make it easy to connect to applications. You can automatically set up the creation of contact groups from your database for messaging via Messaggio. You can also send trigger messages without enlisting the help of a developer team.

This is done by forwarding an event from the source — your CRM, CMS, or table to the receiver — Messaggio.

Integrations with Messaggio in Zapier

Integration scenarios with Messaggio in Zapier

To configure the integration of the source and receiver applications, a Zap template needs to be created. Below, we present 5 integration scenarios (Zap templates) that we offer to automate processes in Messaggio:

  1. Messaggio and Stripe

  2. Sending out SMS after you make a payment through Stripe. Notify customers about different order statuses like placed order or subscription, successful payment, accepted refund, etc.

  3. Messaggio and Google Calendar

  4. Sending SMS about events to Google Calendar. Remind colleagues, clients, and partners about an upcoming meeting or schedule changes. Not only that, but you can send SMS to employees at the end of an event reminding them to prepare a review of the meeting or other tasks, according to business processes.

  5. Messaggio and Google Sheets

  6. Automatic creation of contact groups from Google Sheets for messaging via Messaggio. Send messages to the base of contacts, which are compiled and stored in Google Sheets.

  7. Messaggio and Call Rail

  8. Automatic creation of contact groups from Call Rail for messaging via Messaggio. Send messages to clients who called the company and were recorded by the call tracking system. You can send all contacts to Messaggio, or just tagged contacts.

  9. Messaggio and Mailchimp

  10. Automatic creation of contact groups from Mailchimp. Send messages to new subscribers who have just been added to your Mailchimp audience.

All these are examples of Messaggio’s connections to applications. Other scenarios are also possible. It is advisable to try out different integrations with Messaggio via Zapier to achieve maximum automation in the company’s interactions with customers.

How integrations in Zapier work

To transfer data from one app to another, you need to create a connection. In Zapier, the connection between two applications is called Zap.

A simple Zap has two steps:

  1. Trigger — an event by which the data transfer process is started.
  2. Action — an event to be performed if the Trigger is activated.

At the Trigger step, you need to specify the app from which you want to take data, and at the Action step, specify the application you want to transfer data to.

How to Build a Zap Template

Log in to your Zapier account or create a new account.

Create a Zapier Account
Screenshot 1: create a Zapier Account

The main Zapier dashboard will open in front of you. Click Create zap.

Create Zap
Screenshot 2: create Zap

Here are the steps for creating a connection (Zap). Create a Zap using the following algorithm:

  1. Select the app in which the trigger should fire.
  2. Select Messaggio data transfer app
    Screenshot 3: select Messaggio data transfer app
  3. Specify the trigger event that will activate Zap. The list of possible events is unique for each app.
  4. Specify trigger event
    Screenshot 4: specify trigger event
  5. Select the account of the application from which you want to receive data. To do this, click +Create a new account in the Choose account field in the drop-down list. To set up subsequent integrations with this app, you will not need to link an account again — it will be saved in the drop-down list.
  6. Specify data source account
    Screenshot 5: specify data source account
  7. If the trigger fires when creating new data in the source, you’ll need to specify the file, table, fields from which you want to take data — follow the prompts in the interface.
  8. Set up a trigger
    Screenshot 6: set up a trigger
  9. Test the trigger and check the data that will be sent to Messaggio. To do this, click Test trigger.
  10. Test a trigger
    Screenshot 7: test a trigger
  11. Select Messaggio as the app in which the action should occur.
  12. Select Messaggio as data receiver
    Screenshot 8: select Messaggio as data receiver
  13. Indicate the action that suits your needs. There are two actions available in Messaggio:
    • Send SMS — sending SMS by triggers.
    • Create Contact — create a contact in a group for dispatch.
    Assign an action in Messaggio
    Screenshot 9: assign an action in Messaggio
  14. Select the Messaggio account you want to transfer data to. To do this, you have to click + Create a new account in the Choose account field in the drop-down list. To set up subsequent connections with this app, you will not need to link an account again as it will be saved in the drop-down list.
  15. Select the Messaggio account to transfer data to
    Screenshot 10: select the Messaggio account to transfer data to
  16. If the action you need to perform is Send SMS, you have to specify the Sender’s ID, Messaggio login, the field from which the phone number will be taken to send the message, and the text the message should contain. If your action is Create Contact, you have to specify the Contact group to which the new phone number should be added, as well as the fields in the source from which you want to get data for substitution in Messaggio variables.
  17. Set up an action
    Screenshot 11: set up an action
  18. Check the correctness of the data and test the action. To do this, click Test and continue.
  19. Turn on your Zap. To do this, you have to change the position of the button next to Zap in the list of all connections created in the account.
Turn on your Zap
Screenshot 12: turn on your Zap

Congratulations, you’ve set up a connection! Now the required action will take place in Messaggio, and will be activated by a trigger in the application of your choice. When on a free plan, Zapier allows you to create just a maximum of 5 Zaps.

Review

We’ve covered how to set up connections between Messaggio and other apps in Zapier. If you want to learn how to customize a specific integration scenario in Zapier, then read the instructions about Messaggio’s integrations with popular apps.

Integration with amoCRM

If you use AmoCRM in your working process and plan to send notifications to your clients or colleagues via SMS, Viber or other channels, you could use a ready-made module, which have been developed by the F5 company for amoCRM. A special widget “SMS gateway” allows you to connect Messaggio as the SMS messaging provider. First of all, you should find a widget in the AmoCRM marketplace and also set up an account in Messaggio platform. For more on this, please find our step-by-step instructions below.

The account in Messaggio platform and the process of getting all the necessary settings

  1. First of all, you should create the user account in Messaggio dashboard. While using it, you will be able to get notifications about a low balance and top up your balance. All messaging activity, the delivery statistics and the active Sender IDs will be available for you in your account.
  2. To get started, you should accept all the terms of the offer agreement on behalf of your company. In order to do this, please click “Continue” in your dashboard on the pinned notification under the menu and follow the prompts. When your application is being reviewed, you will be able to start the registration process of your SMS Sender ID.

    As a rule, the verification process of the request for accession to the offer agreement takes not more than 1 working day.

  3. Register the Sender ID, having pointed out the messaging channel – “SMS”.

    The SMS Sender ID moderation process takes from 3 till 15 days, depending on the mobile operator.

    The moderation process also includes checking of the SMS messages for compliance with the conditions and requirements. For more information about registering of the SMS Sender ID, see the “Senders” section.

  4. To get the necessary settings for sending messages, there is very little left: Generate an API secret key in your Messaggio dashboard. To do this, go to the “Settings” section, then click the sign of the gear in the corner of the project.Go to settings
  5. In the “edit project” section, go to the “API Settings” tab, click “Generate key” and save the changes.
  6. API settings

  7. Go to the «Detailed information» section, copy the key and login.

Copy key and login

The widget connection and the settings in amoCRM

  1. Log in to AmoCRM and go to the “Settings” section. Enter “SMS Gateway” in the widget marketplace search and then click “Install”.
  2. In the “Connection” tab, click “Connect” in the Messaggio line.
    Нажмите «Подключить» в строке Messaggio
  3. Set your Messaggio account login, the approved Sender ID and the API secret key of the activated Sender ID (you can find this key, having clicked on the Sender ID in your Messaggio dashboard). Задайте логин, секретный ключ и имя отправителя
  4. Go to the section «Deals» —> «Funnel» —> «Funnel settings». Click on the empty field, where it is required to create an action. Find the widget “SMS Gateway” in the search, which has been added earlier. Click «Add».
    Выберите SMS шлюз
  5. Set the necessary settings and input the text of the message to be sent.
    Задайте необходимые настройки

Now this message will be sent to the contact from the deal, which fell into the funnel stage with the assigned action. If, while creating the action, you click the tick “Apply the trigger to the current deals in status”, the message will be sent to all the contacts at the stage you have chosen.